

Use Track My Tickets to find your tickets, check their status, and open their details. This section explains how to view ticket details and review the information related to the concerns you have raised.
Step 1: Open Sidebar > Ticket > Service Ticket > My Tickets. The ticket cards appear in the main work area.
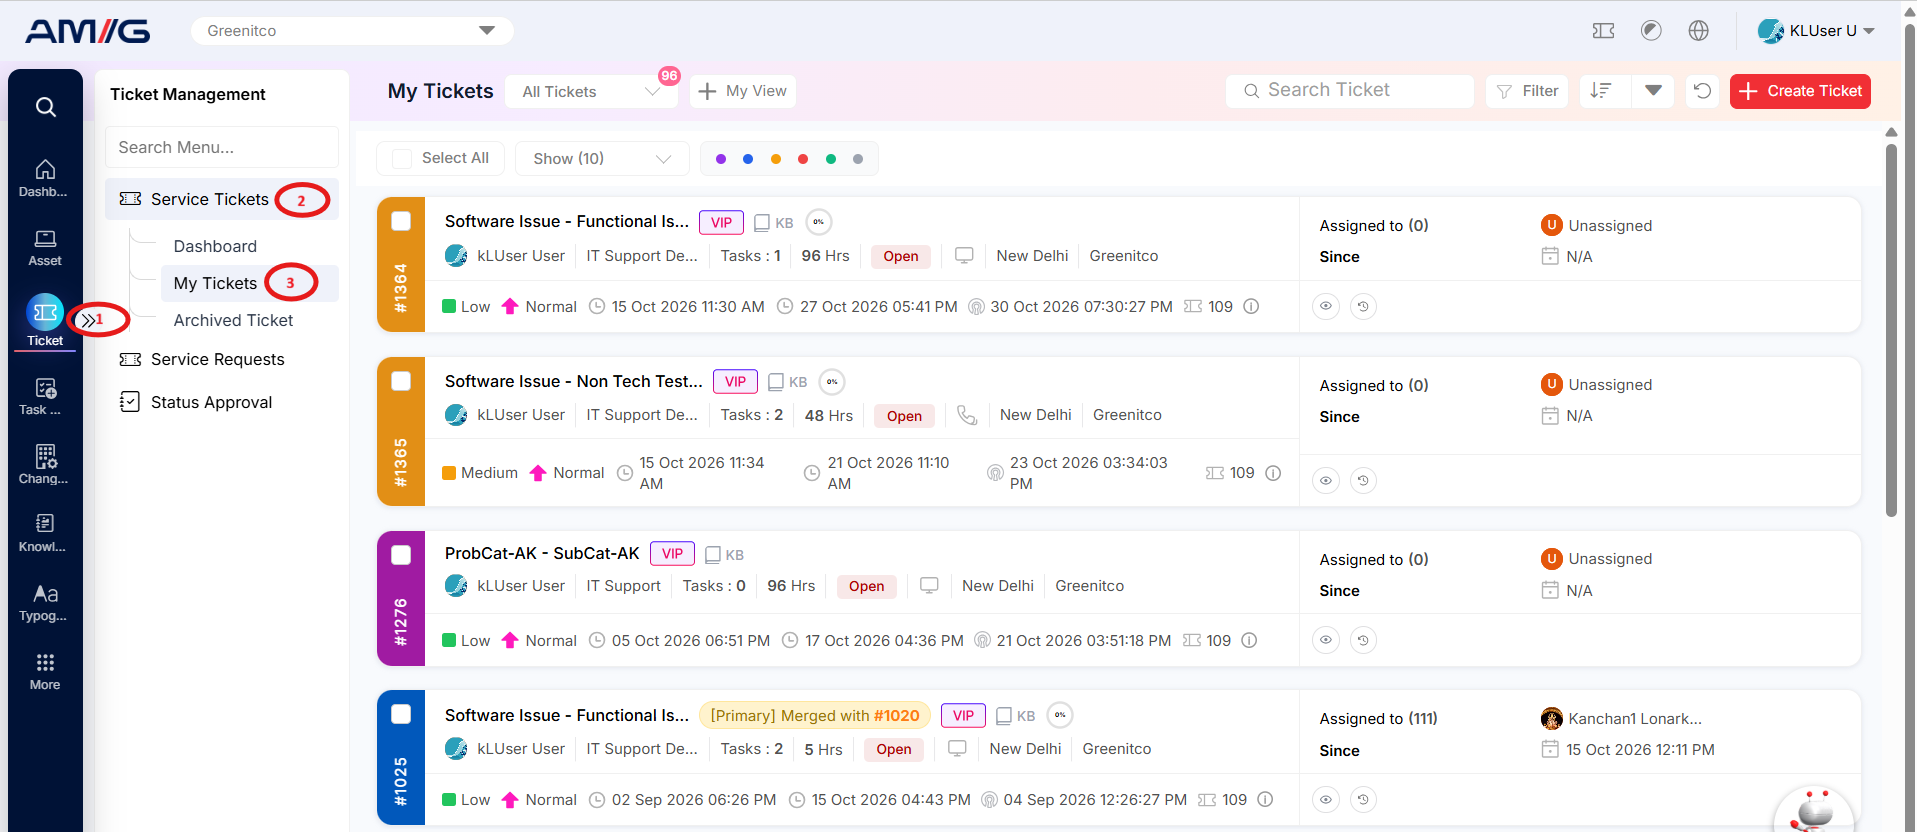 Step 2: Review each card for the ticket subject and ID, requester, department, task count, TAT, status, location, company and assignment details.
Step 3: Use Search Ticket to find a ticket by a relevant term. Use Filter to narrow the list, and the sorting controls to order tickets by a supported field.
Step 4: Use the page-size selector, pagination and Refresh control to navigate or reload the list.
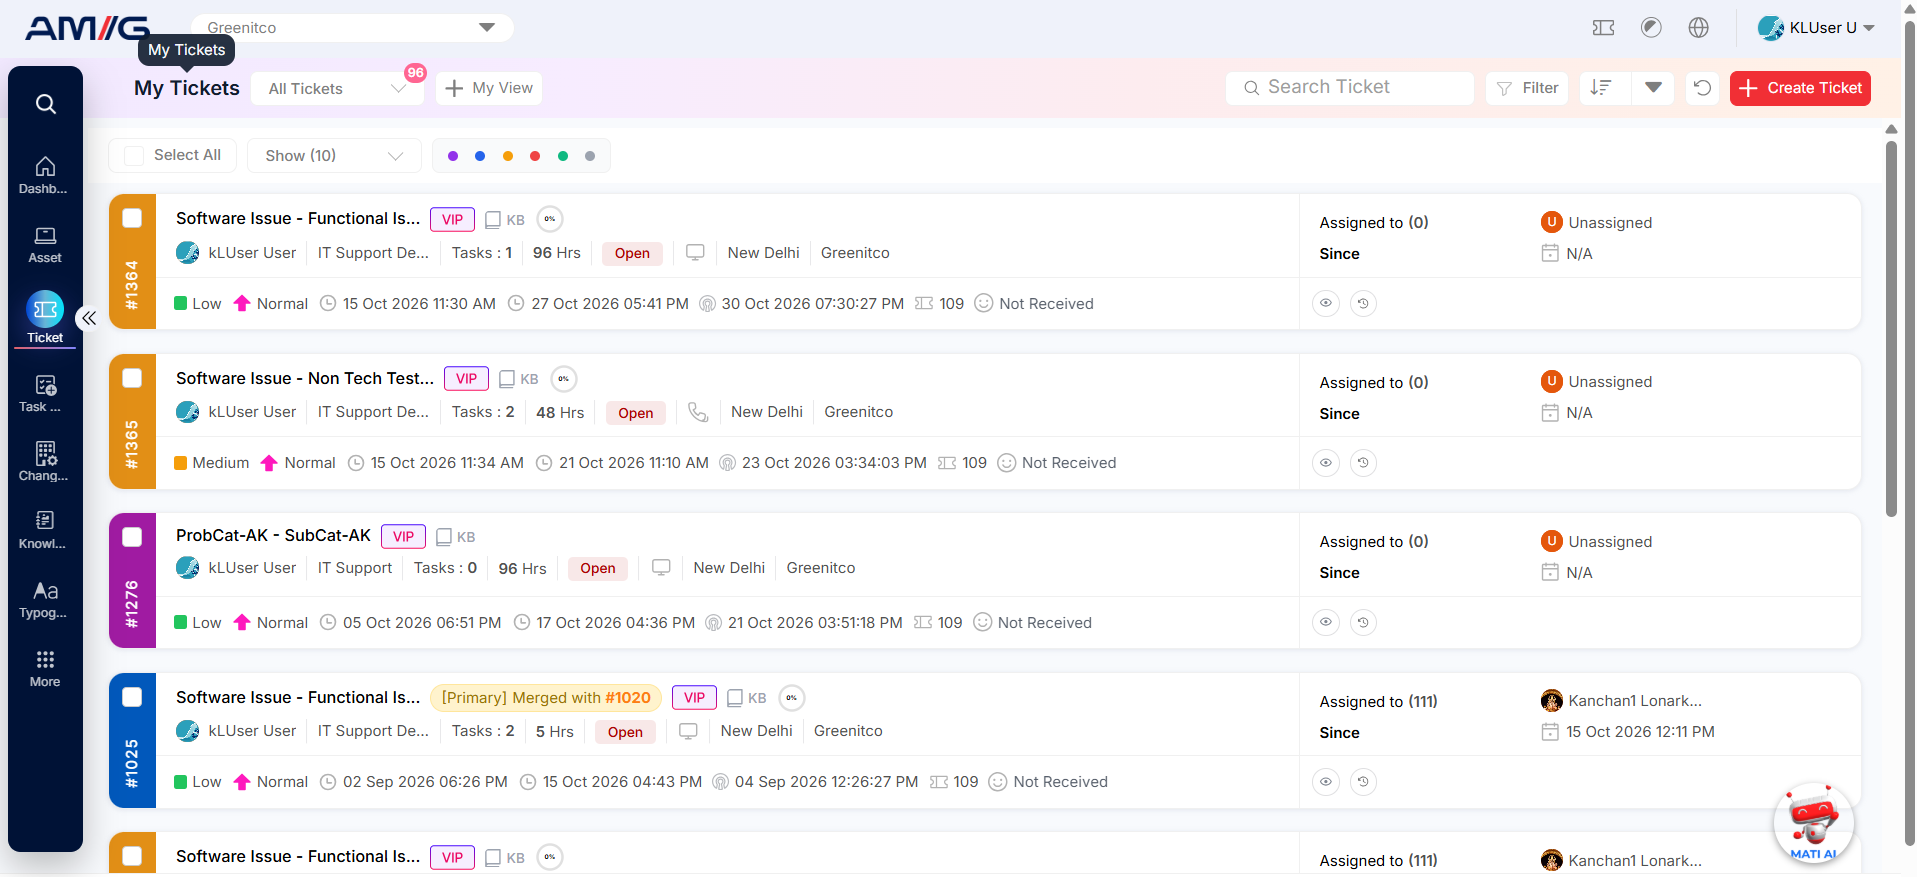
Figure: My Tickets list and ticket card actions
Table: My Tickets list elements
| Element | Purpose |
|---|---|
| Ticket card | Shows the subject, ticket ID, requester, department, task count, TAT, status, device/channel indicators, location, company and activity timestamps. |
| Assignment area | Shows the assignee or Unassigned status, assignment count and the date from which the current assignment applies. |
| Search Ticket | Finds tickets that match the entered search term. |
| Filter and sorting controls | Narrow the list or order tickets using supported ticket attributes. |
| Card action icons | Open ticket details or perform available actions such as history, transfer, edit or other ticket operations, subject to permissions. |
Filtering Tickets
Step 1: Click Filter on the ticket list.
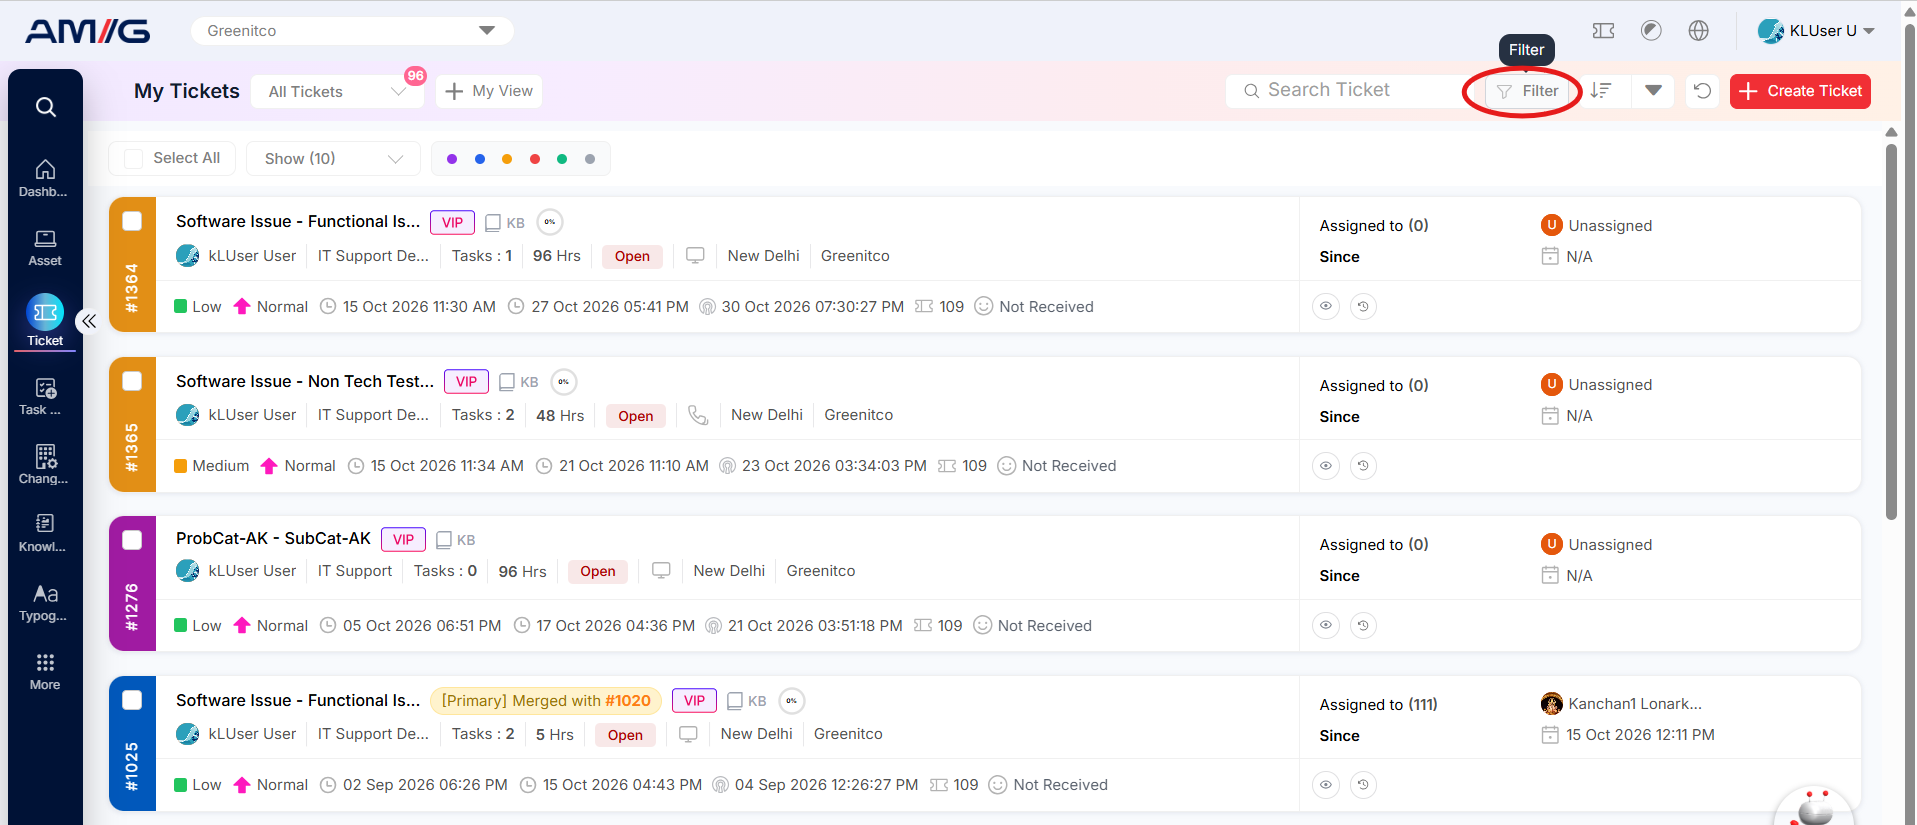 Step 2: Select one or more available filters. Depending on permissions and configuration, the filter can include status, priority, department, problem category, subcategory, ticket handler, tag, creation source, location, creator/logger, ticket or service request, feedback, task, task-added status and date or date range.
Step 3: Click Filter to apply the selected criteria. Click Clear to reset the criteria and restore the broader list.
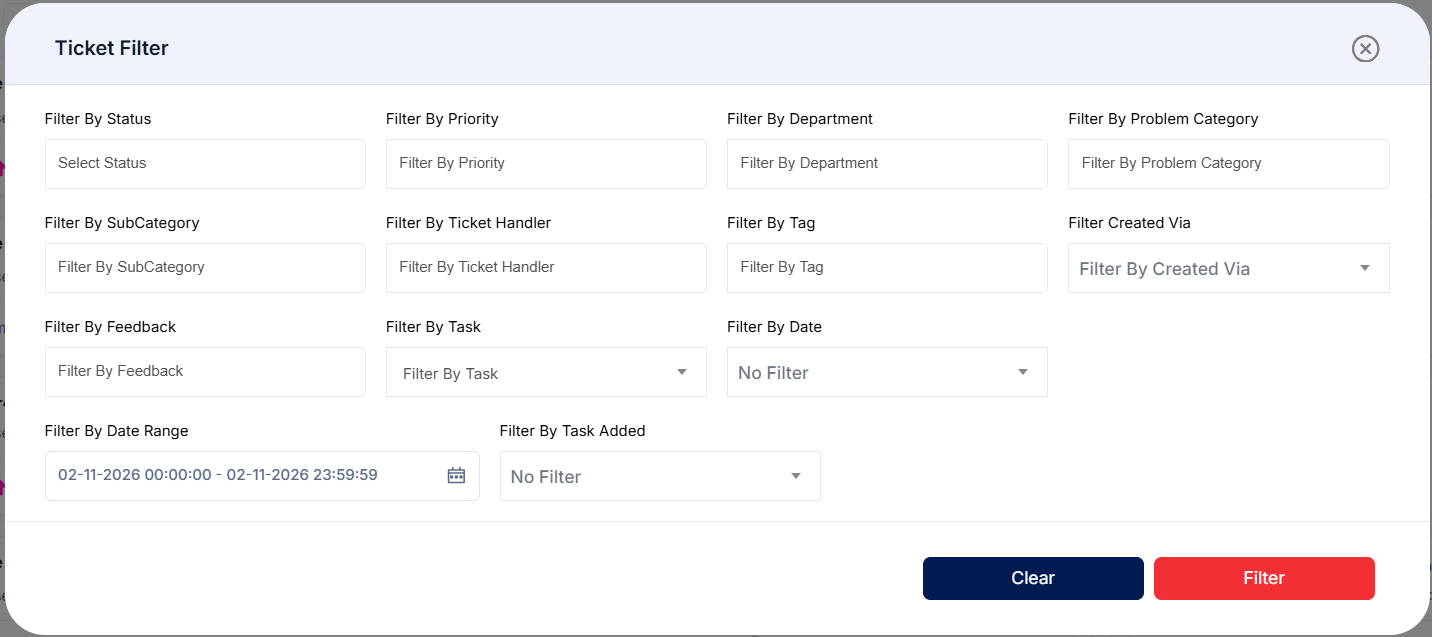
Figure: Ticket Filter options
Table: Common ticket filter groups
| Filter group | Examples shown in the filter |
|---|---|
| Ticket classification | Status: Filter tickets by status. Priority: Filter tickets by priority (Low, Medium, High or Critical). Department: Filter tickets by department. Problem Category: Filter tickets by problem category. Subcategory: Filter tickets by problem subcategory. |
| Ownership and source | Ticket Handler: Filter tickets by the handler to whom they are assigned. Creator: Filter tickets by the user who created them. Logger: Filter tickets by the user who logged them. |
| Service and feedback | Task-Added Status: Filter tickets by the status of their added tasks, such as Completed or All. |
| Date criteria | Filter By Date: Filter tickets by their Created At, Updated At or Resolved At date. Filter By Date Range: Select a start and end date to show tickets within that range. |
Sorting Tickets
Step 1: Open the sorting field menu on the ticket list.
Step 2: Select the field to sort by. The menu shown includes Ticket ID, Created By, Status, Priority, Assigned To, Created On, Updated On, Reopened On, Star, TAT Expire and Feedback.
Step 3: Use the sort direction control, where available, to change the ordering.
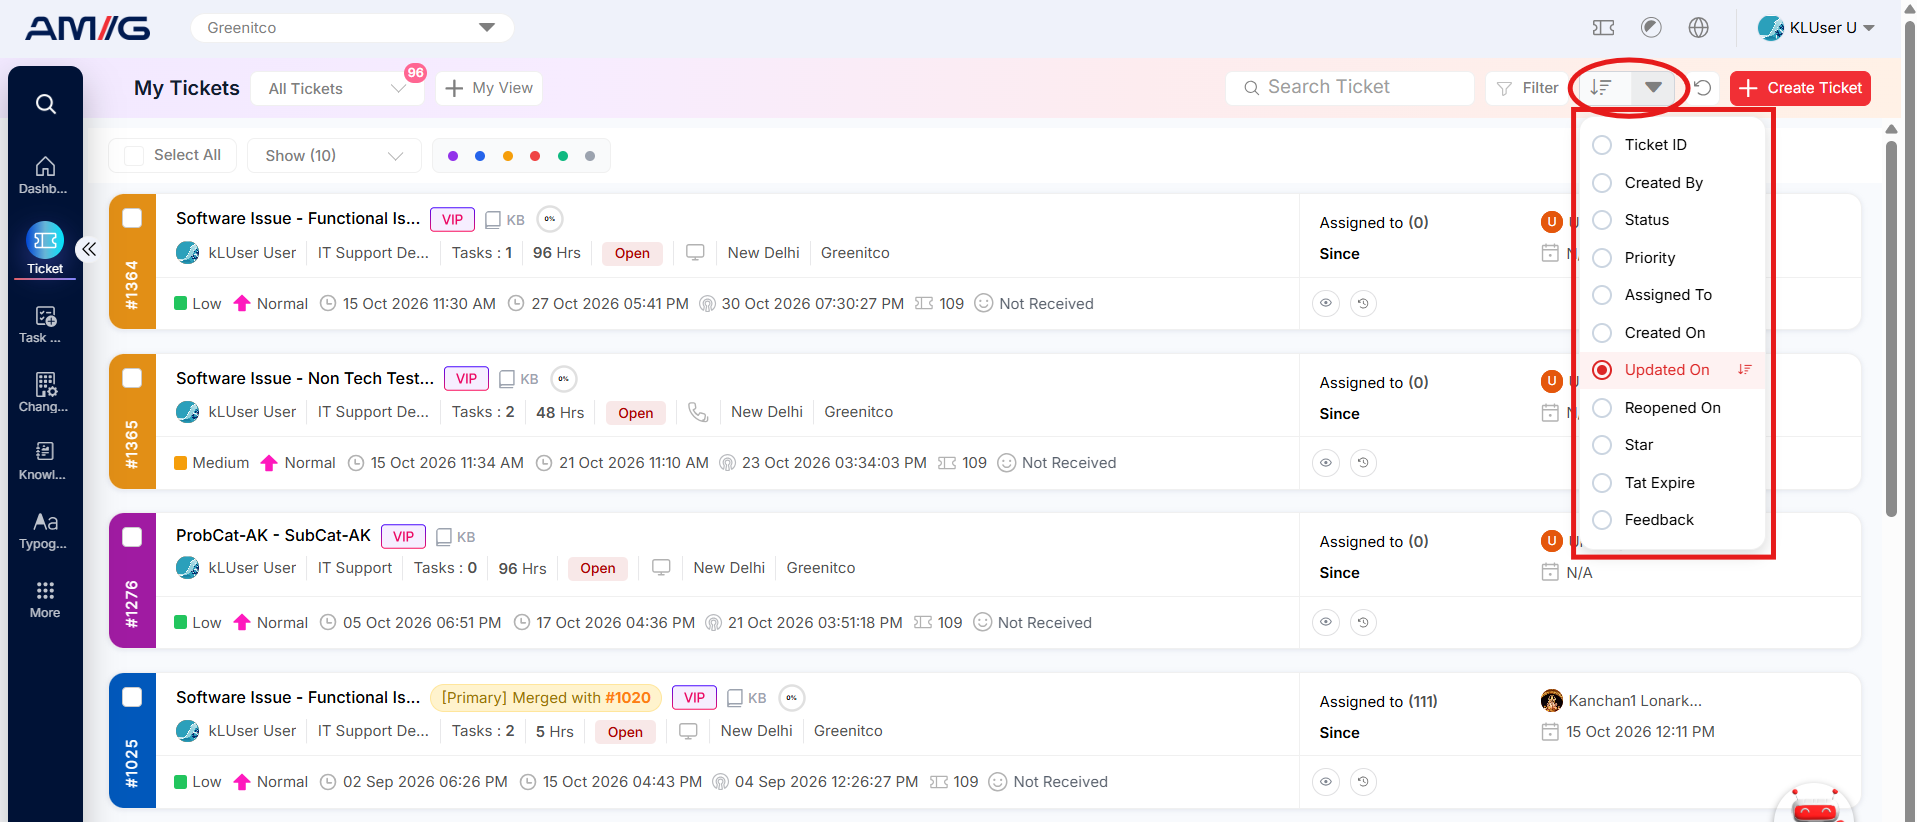
Figure: Ticket sorting fields
Opening Ticket Details
Click a ticket’s subject or card to open the Ticket Details screen.
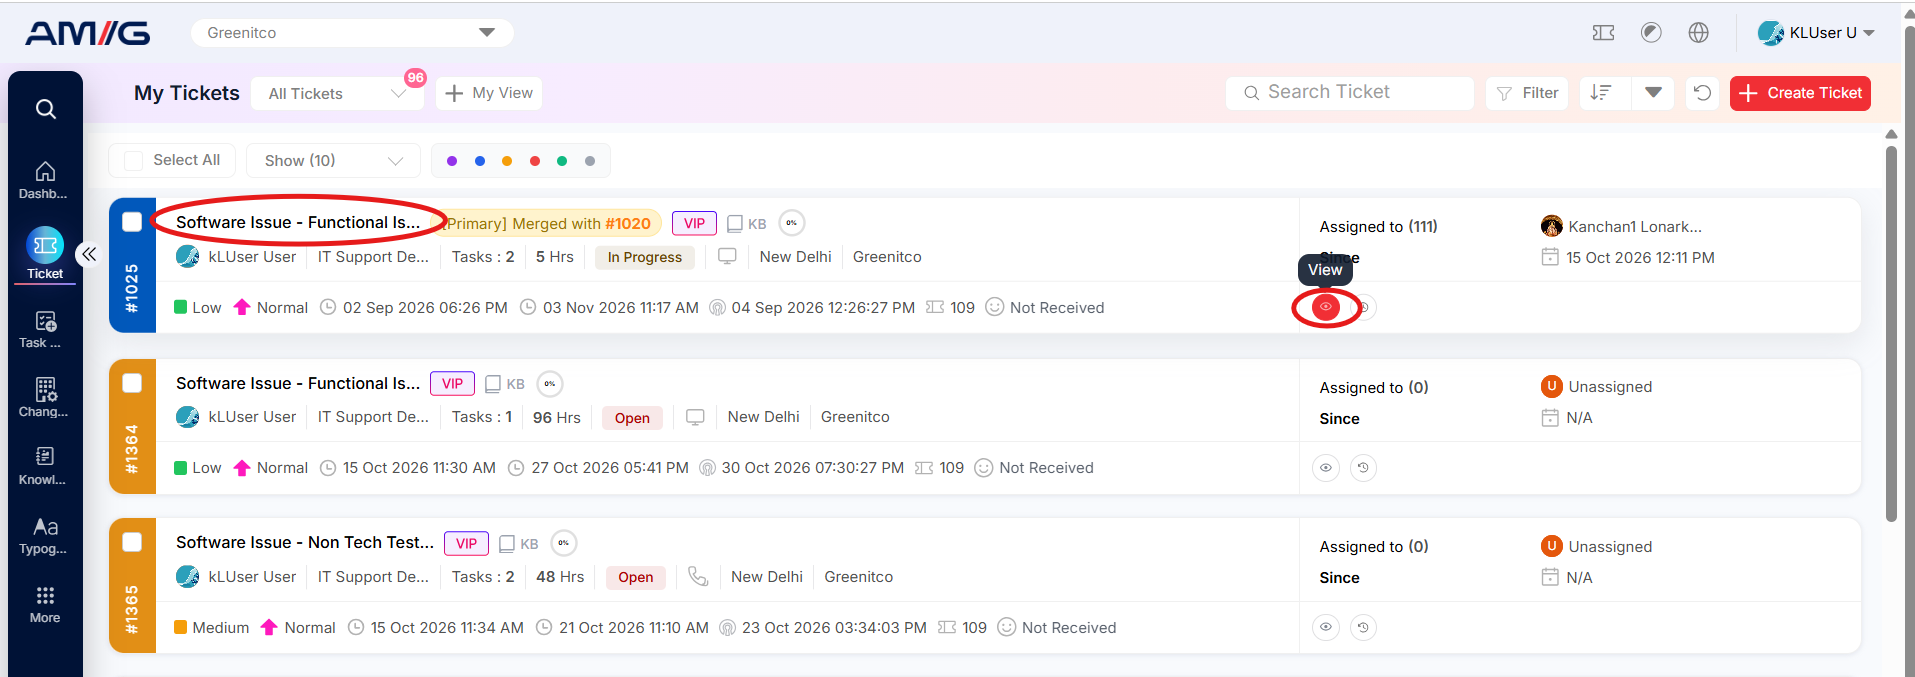
The Ticket Details screen provides a consolidated view of a ticket, allowing users to review its information, monitor its progress, understand customer feedback, and manage ticket-related activities. The screen is organised into three main areas: the Main Ticket Panel, the Top Action Bar, and the Right-Side Panels, along with a Conversation Area for reviewing and adding messages.
The information and actions available on the Ticket Details screen may vary depending on the ticket's status, the listing from which it was opened, and the user's role and permissions.
Main Ticket Panel
The main ticket panel displays the key details of the selected ticket, including its status, priority, ownership, classification, and creation information.
Table: Main ticket panel fields
| Field | Description |
|---|---|
| Current Status | Displays the ticket's current status. |
| SLA State | Indicates whether the ticket is on time or overdue against the applicable SLA. |
| Turnaround Time (TAT) | Displays the turnaround time configured for the ticket's category. |
| Priority | Displays the priority defined for the ticket's category. |
| Subject | Displays the subject entered when the ticket was created, summarising the reported issue or request. |
| Creator | Identifies the person who originally created the ticket. |
| Assignee | Identifies the person currently assigned to handle the ticket. |
| Company | Displays the company under which the ticket is registered. |
| Department | Displays the department associated with the ticket. |
| Category | Displays the problem category assigned to the ticket. |
| Location | Displays the location associated with the ticket. |
| Ticket Logger | Identifies the person who logged the ticket on behalf of the creator, when someone other than the creator submitted it. |
| Expiry Date | Displays the date and time when the ticket's configured TAT expires. |
| Created At | Displays the date and time when the ticket was created. |
| Updated At | Displays the date and time when the ticket was last updated. |
| Creation Channel | Displays the channel through which the ticket was created, such as Call, Phone, Mail, Portal, or Bot. |
| Ticket Type | Displays the type used to classify the ticket. |
Note: Fields are displayed or populated according to the information available for the selected ticket.
Right-Side Panels
The right-side panels provide supporting information about the customer, ticket participants, tags, knowledge resources, and ticket activity.
Table: Right-side panels
| Panel | Description and Usage |
|---|---|
| Customer Feedback | Displays an overview of customer feedback associated with the ticket, including the current feedback and a summary of the latest comment. This helps users understand the customer's experience and most recent response. |
| Creator Information | Provides details about the ticket creator. Expand the collapsible section to view the creator's name and other relevant information available in the system. |
| Knowledge Documents | Displays knowledge documents available for the ticket's department and category. Click a knowledge document to open its corresponding page and review guidance or information relevant to the issue. |
| Ticket Timeline | Displays the primary timeline of the ticket, providing a chronological view of its recorded progress and activities. |
The information available in these panels depends on the ticket details, associated records, and the user's access permissions.
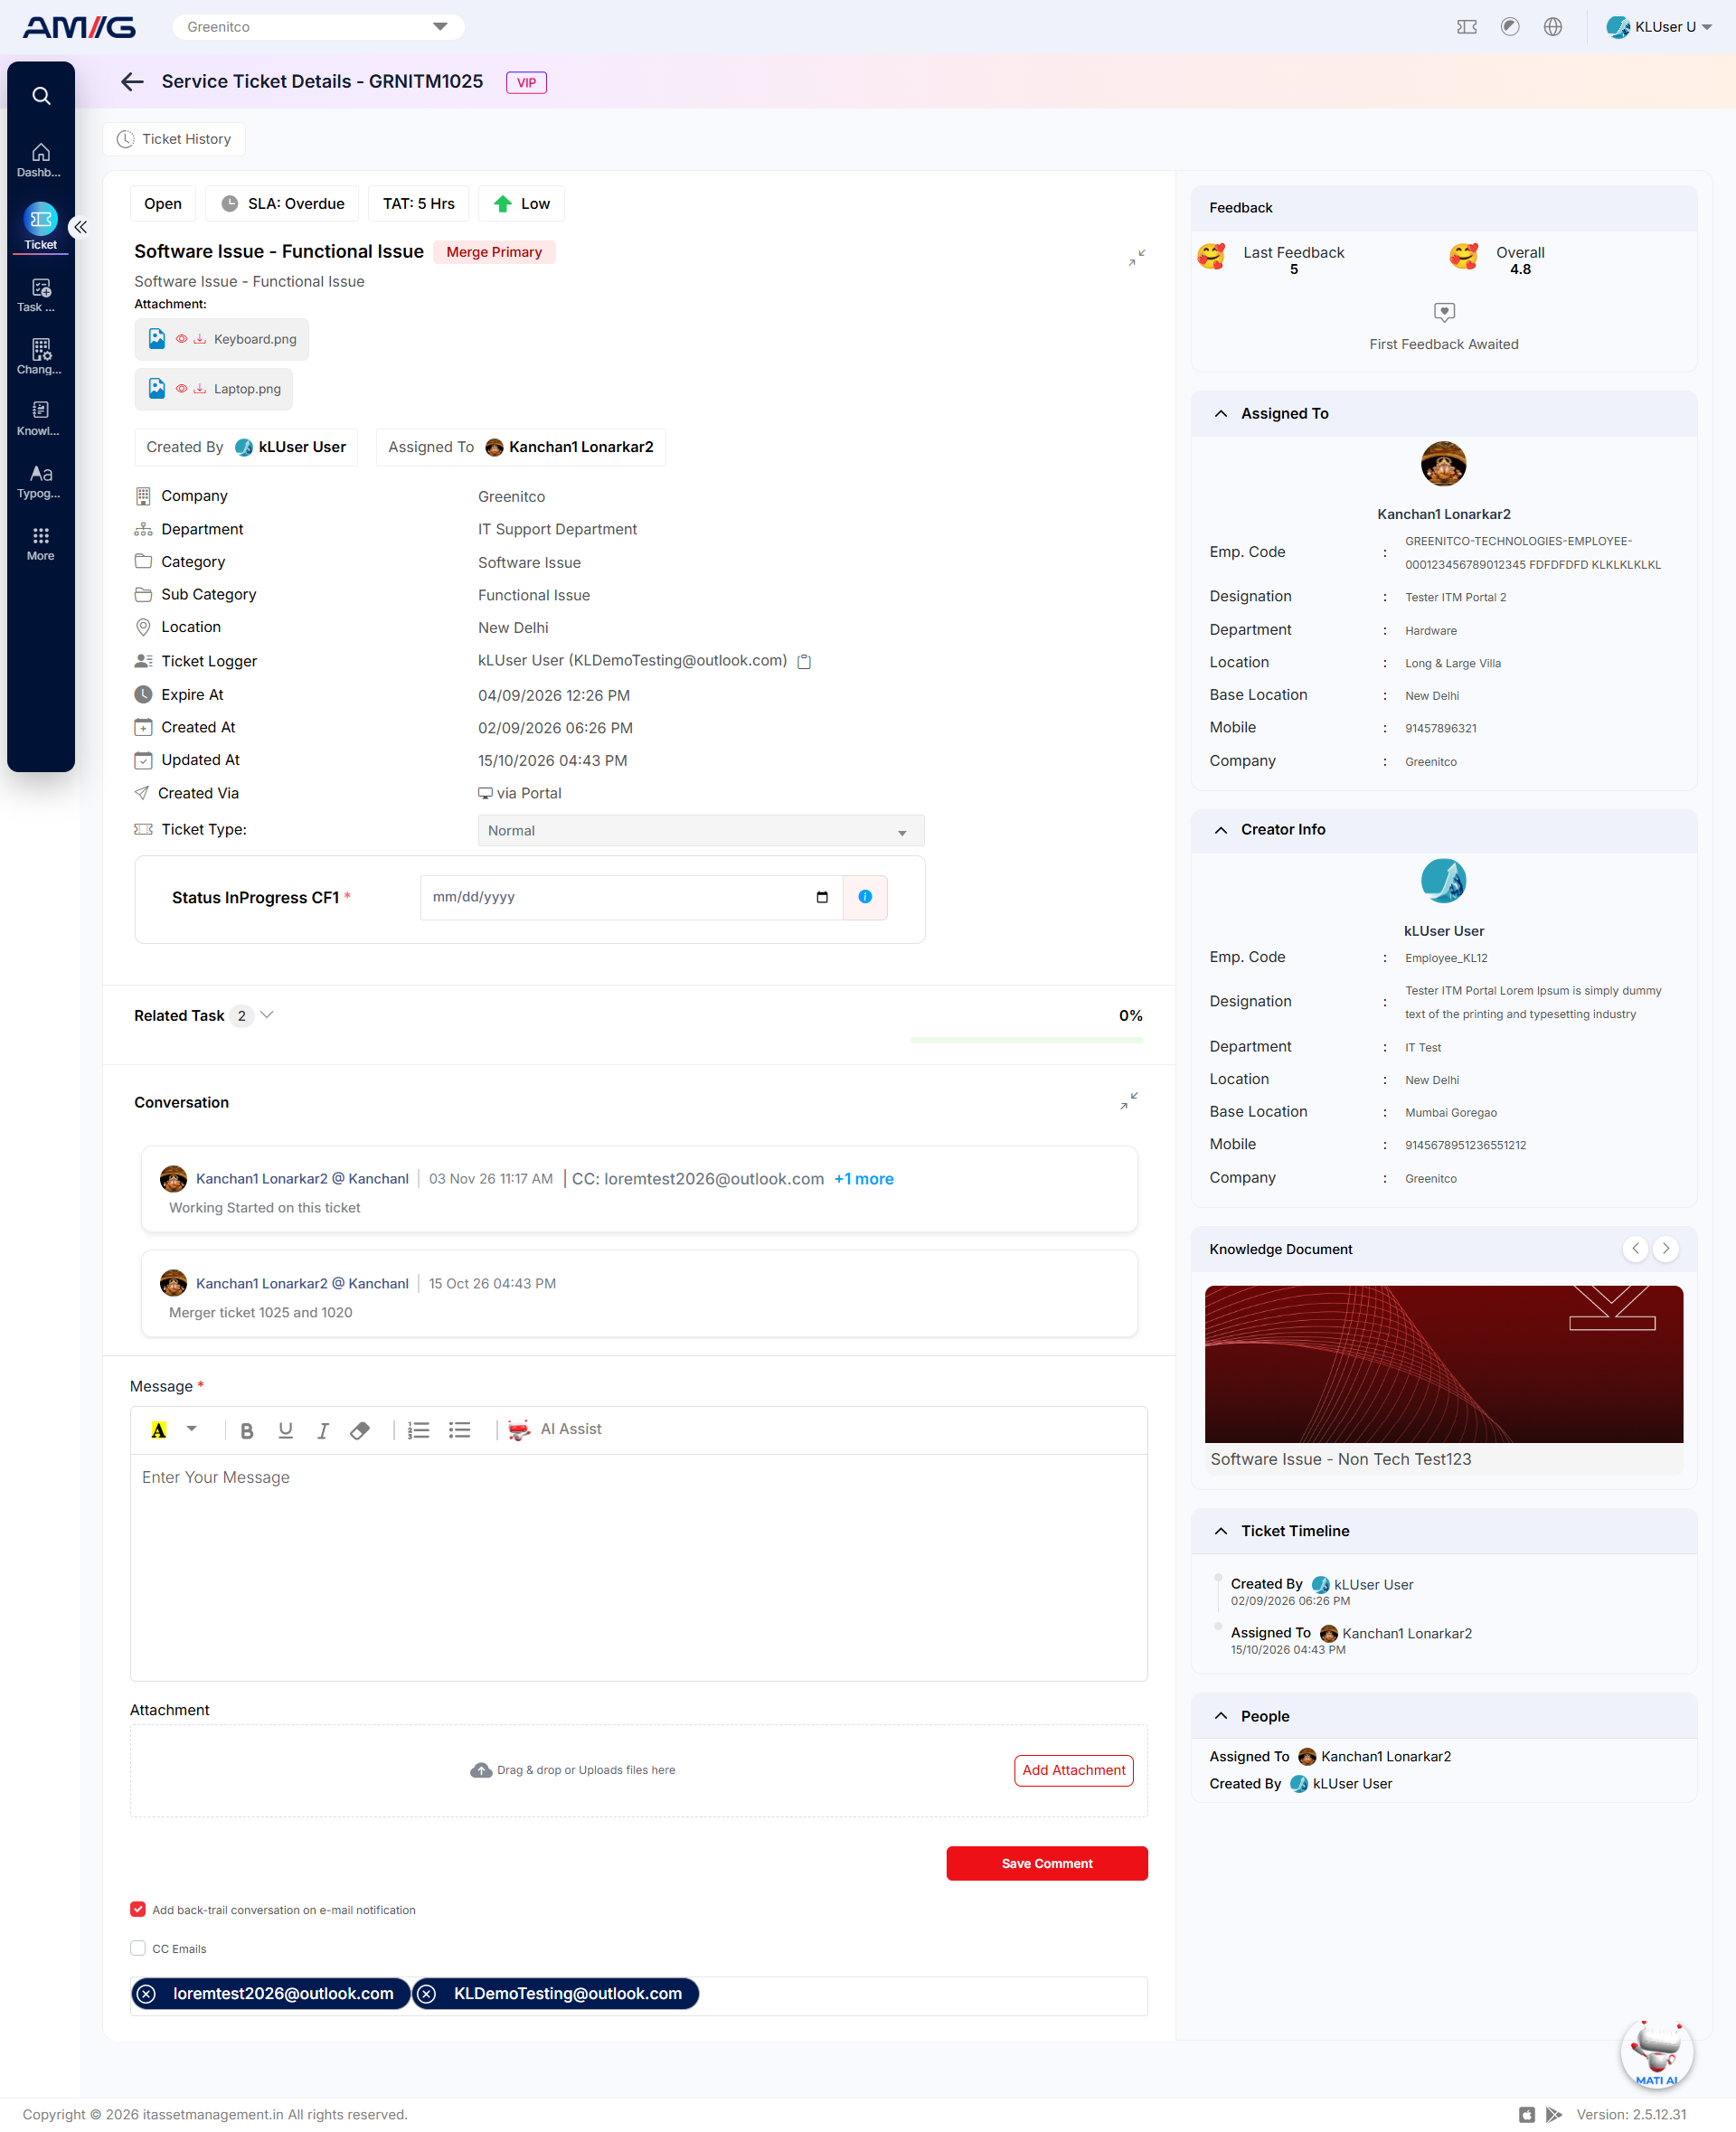
Figure: Ticket Details screen – ticket information and update controls
Note: The Ticket Details layout and visible controls may differ slightly according to the ticket, user role, and permissions.
Ticket Actions
The action bar at the top of the Ticket Details screen provides shortcuts for common actions on your ticket.
Table: Top action bar actions
| Action | Description |
|---|---|
| Add Star | Click to mark the ticket as starred for easier access. Starred tickets can also be identified or filtered from the ticket listing page. |
| Ticket History | Opens the ticket's history, allowing users to review recorded actions and changes made to the ticket over time. |
Important: Use only the actions available for the selected ticket and permitted under your role. Some actions may not be available for every ticket or in every listing.
Reviewing Ticket History
Step 1: Find the ticket and click its History action (clock/history icon), where available.
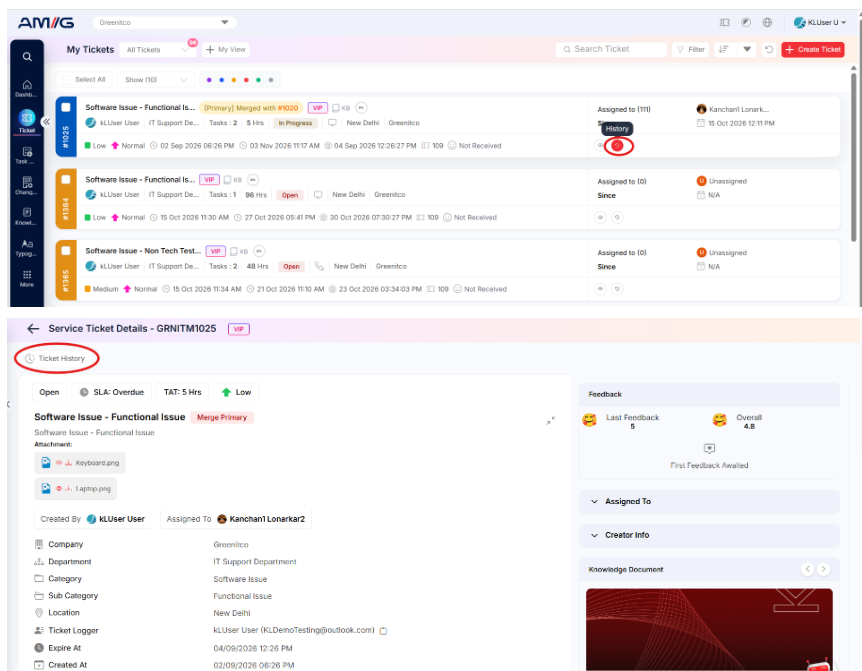 Step 2: Review the ticket summary at the top of the history window, including the subject, ticket ID, company, department, category and subcategory.
Step 3: Review the timeline to see recorded changes, who made them and when they occurred. The event label identifies the type of change, such as a task, TAT, priority or subcategory update.
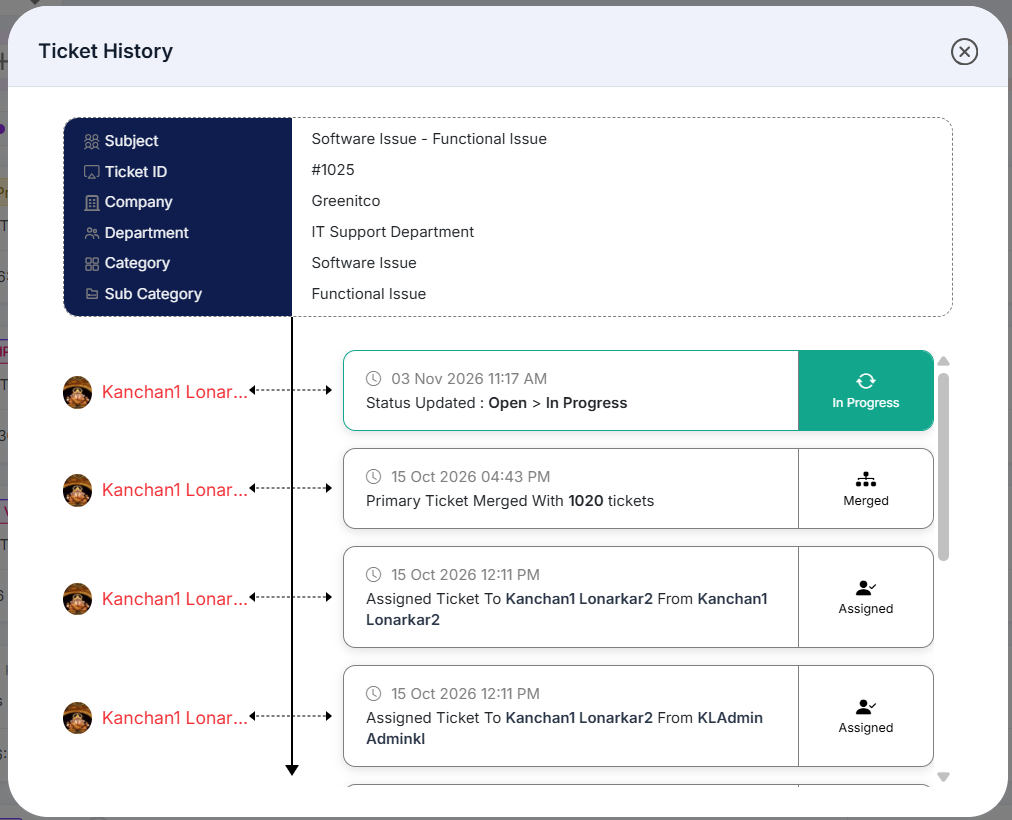
Figure: Ticket History timeline