How to manage Devices ?
To add a new device from the list.
To add a new Device
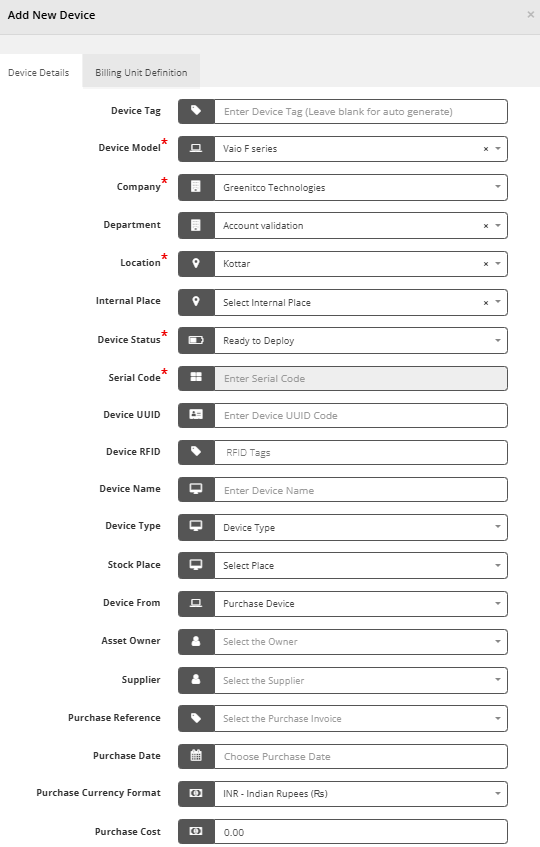
Go to the left sidebar and select Devices >Device Details > Click on the plus icon > Add New Device Details > Click on Add New Device.
When adding a new device, the notification will be sent to the mail address which has provided in the general settings.

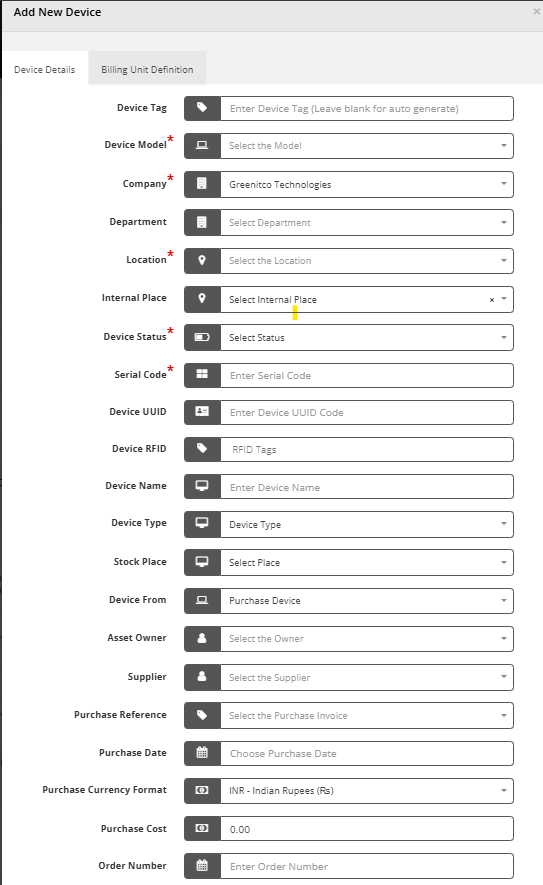
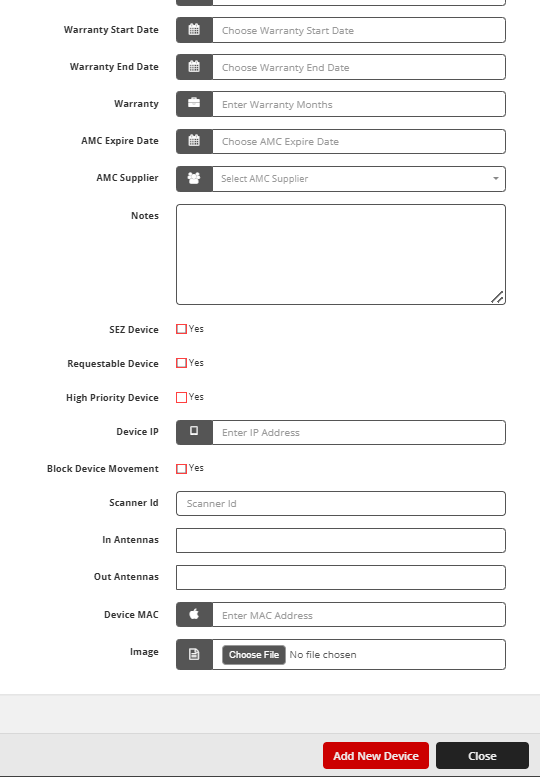
- Device Tag: For auto generation leave it blank or enter the new device tag.
- Internal Place: Place is the internal place where the assets are in, refer click at section
- Stock Place: Stock Place is the internal place where the assets are in, refer click at section
- Company: To customize, refer click at section
- Category: To customize, refer click at section
- Device Model: To customize, refer click at section
- Device Status: To customize, refer click at section
- Department: To customize, refer click at section
- Location: To customize, refer click at section
- Supplier: To customize, refer click at section
- Purchase Reference: It is the invoice given while adding the new purchase. To customize, refer click at section
- Asset Owner: The responsible person for an asset
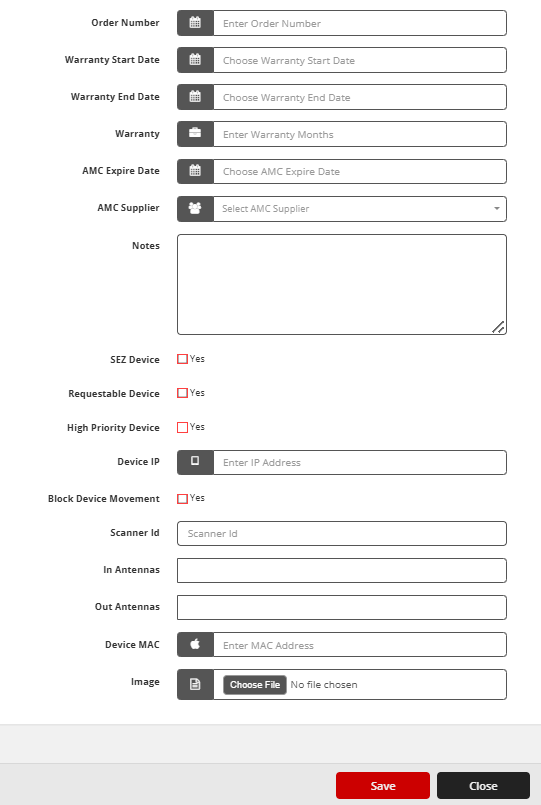
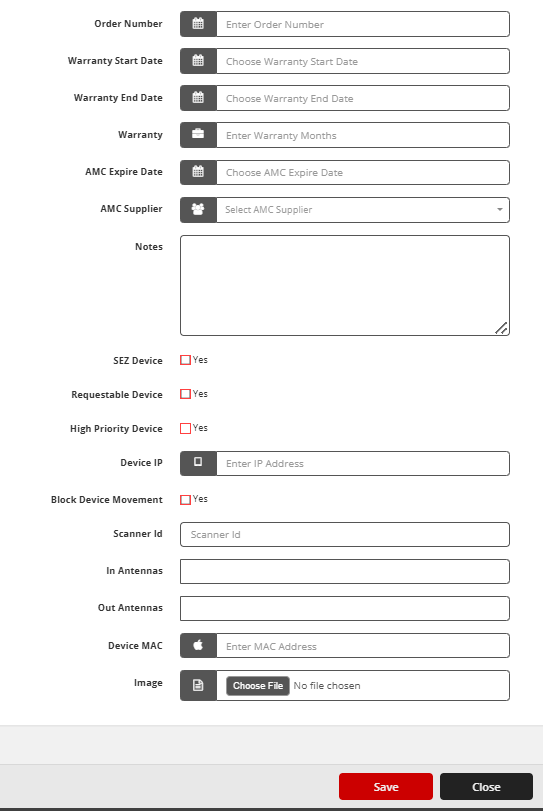
- Requestable Devices: If the device can check out to anyone, then click the radio button of the Requestable device to add this device on the Requestable device list.
- High Priority Devices: If the device is a high priority device, click the radio button. The complete life-cycle of the device is given below
To edit a device from the list.
To Edit a Device
Go to the left sidebar and select Devices >Device Details > Click on the action control of the particular Device > Click on the pencil icon > Edit Device Details > Save.
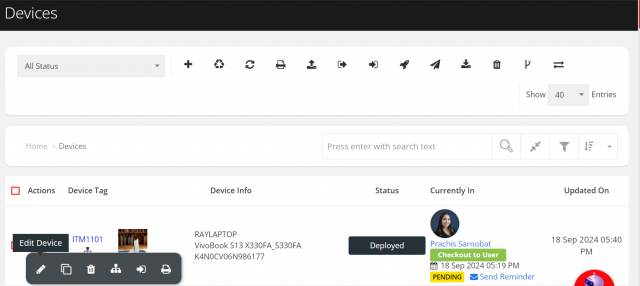
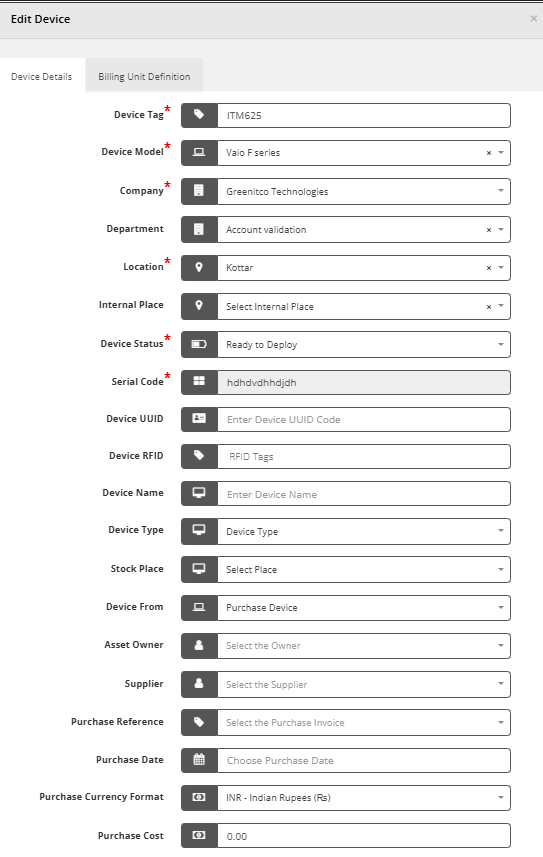
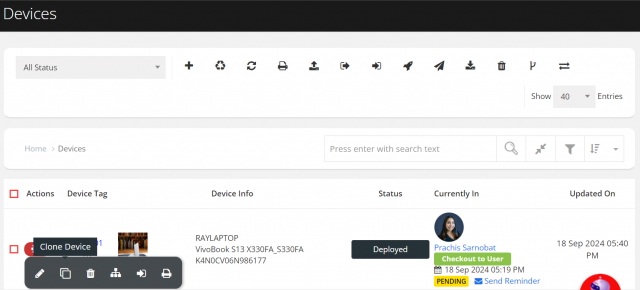
When adding a new device, if it is similar to the existing device, then the clone function would be used. Only the device tag and a serial number of the new device needs to change. Because they must be unique and specifies a particular device
To Clone a Device
Go to the left sidebar and select Devices >Device Details > Click on the action control of the particular Device > Click on the copy icon > Update the details > Save.
When adding a new device, the notification will be sent to the mail address which has provided in the general settings.
To remove a device from the list.
To Remove a Device
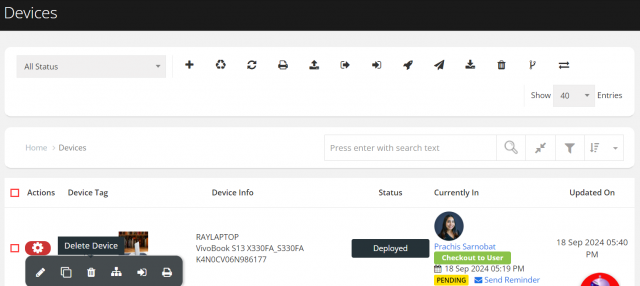
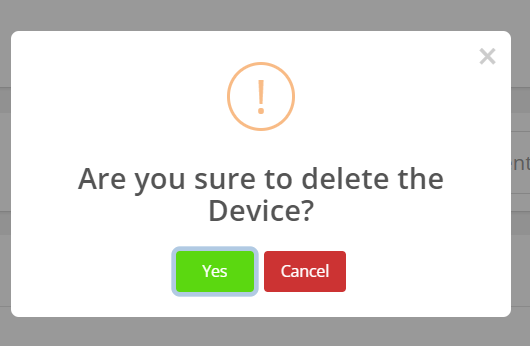
Go to the left sidebar and select Devices >Device Details > Click on the action control of the particular Device > Click on the trash icon > Click Yes to proceed.
To get data filtered data from device listing
Go to device listing page and click Device-> Filter button you can select any filter from following list
-
Filter By Manufacturer:
Select a specific manufacturer to view devices made by that brand. -
Filter By Model:
Filter devices based on their specific model name. -
Filter By Location:
Show devices available at a particular location. -
Filter By Category:
Filter devices by categories such as Laptop, Desktop, etc. -
Filter By Assigned User:
Display devices currently assigned to a specific user. -
Filter By Date:
Filter data by a single selected date (e.g., purchase date). -
Filter By Date Range:
View devices based on a range between two selected dates. -
Filter By Department:
Show devices assigned to or used by a specific department. -
Filter By Assigned Place:
Filter based on the place where the device is physically assigned. -
Filter By Stock Location:
Filter devices available in a specific stock location or warehouse. -
Filter By Stock Place:
Refine search by the exact place inside a stock location. -
Filter By Device From:
Identify devices by the source of procurement (Project Device, Purchase Device, Rental Device, Customer owned). -
Filter By Project:
Filter devices associated with a particular project. -
Filter By User Department:
Show devices assigned to users from a specific department. -
Filter By Asset Owner:
Display devices based on ownership (company/user-owned). -
Filter By Assigned To:
Show devices currently assigned to any user or place. -
Filter By Device Added By:
Filter devices added manually, via Network, via Azure, or via N/S. -
Filter By Warranty Status:
Filter devices based on warranty status (e.g., active, expired). -
Filter By Allocation Type:
Select devices based on allocation types (e.g., permanent, temporary). -
Filter By Audit Confirmation:
Show devices based on their last audit confirmation status (Accepted, Rejected, or Pending). -
Filter By Asset Tag:
Filter by unique asset tags assigned to each device. -
Filter By Assigned User Location:
View devices based on the location of the assigned user. -
Filter By Assigned User Internal Place:
Filter using internal locations of the user the device is assigned to. -
Filter By User Base Location:
Filter devices assigned to users based at a specific location. -
Filter By Internal Place:
View devices stored in or associated with internal places (e.g., floors, sections). -
Filter By Custom Field:
Filter by user-defined custom field names. -
Filter By Custom Field Value:
Filter by specific values assigned to custom fields. -
RDP Status:
Show devices with RDP status enabled or disabled. -
Filter By Detected On:
Filter devices based on when they were detected in the system. -
Filter By High Priority:
View only those devices marked as high priority. -
Filter By Under Transfer:
Show devices that are currently in transfer between locations or users. -
Filter By Requestable:
Display devices that are marked as available for request. -
Total Assigned Devices By User:
Count of total devices currently assigned to each user. -
Filter By User Assign Condition:
Filter based on specific conditions applied during user assignment. -
Filter By SEZ:
Filter devices used in or assigned to SEZ (Special Economic Zone) areas. -
NI Detected Location:
View devices detected by the Network Inventory system at specific locations. -
Filter By Device Type:
Filter devices by type like Laptop, Desktop, Printer, etc. -
Filter By RFID:
Filter devices based on RFID tagging information.
according to need also the no of filter is shown on filter icon and using clear button clear all filter applied.