

Introduction
The Custom Report feature allows users to create and configure their own ticket reports based on specific reporting requirements. Users can define which columns should appear in the report and configure custom rules to determine which ticket records should be included in the results.
It provides flexibility to control the report structure, select relevant information, and apply conditions to retrieve records that meet specific criteria. This enables users to focus on the information that is important to their operational or management requirements rather than relying only on predefined reports.
Custom reports can be configured with specific fields, conditions, and values, allowing users to create reports for different analysis requirements. Once created, reports are available through the All Custom Report section, where users with the necessary access can select and view the report results.
The Custom Report module consists of two screens:
-
Custom Report Definition: Used to create and configure custom reports by defining the report name, company, report type, status, selected columns, and filtering rules.
-
All Custom Report: Used to access and view the results of configured custom reports.
Overall, the Custom Report feature provides greater flexibility in reporting by allowing users to define their own report structure and selection criteria, helping them retrieve relevant ticket information and support specific operational and management analysis needs.
Navigation Path: Sidebar > Reports > Custom Report > Custom Report Defination
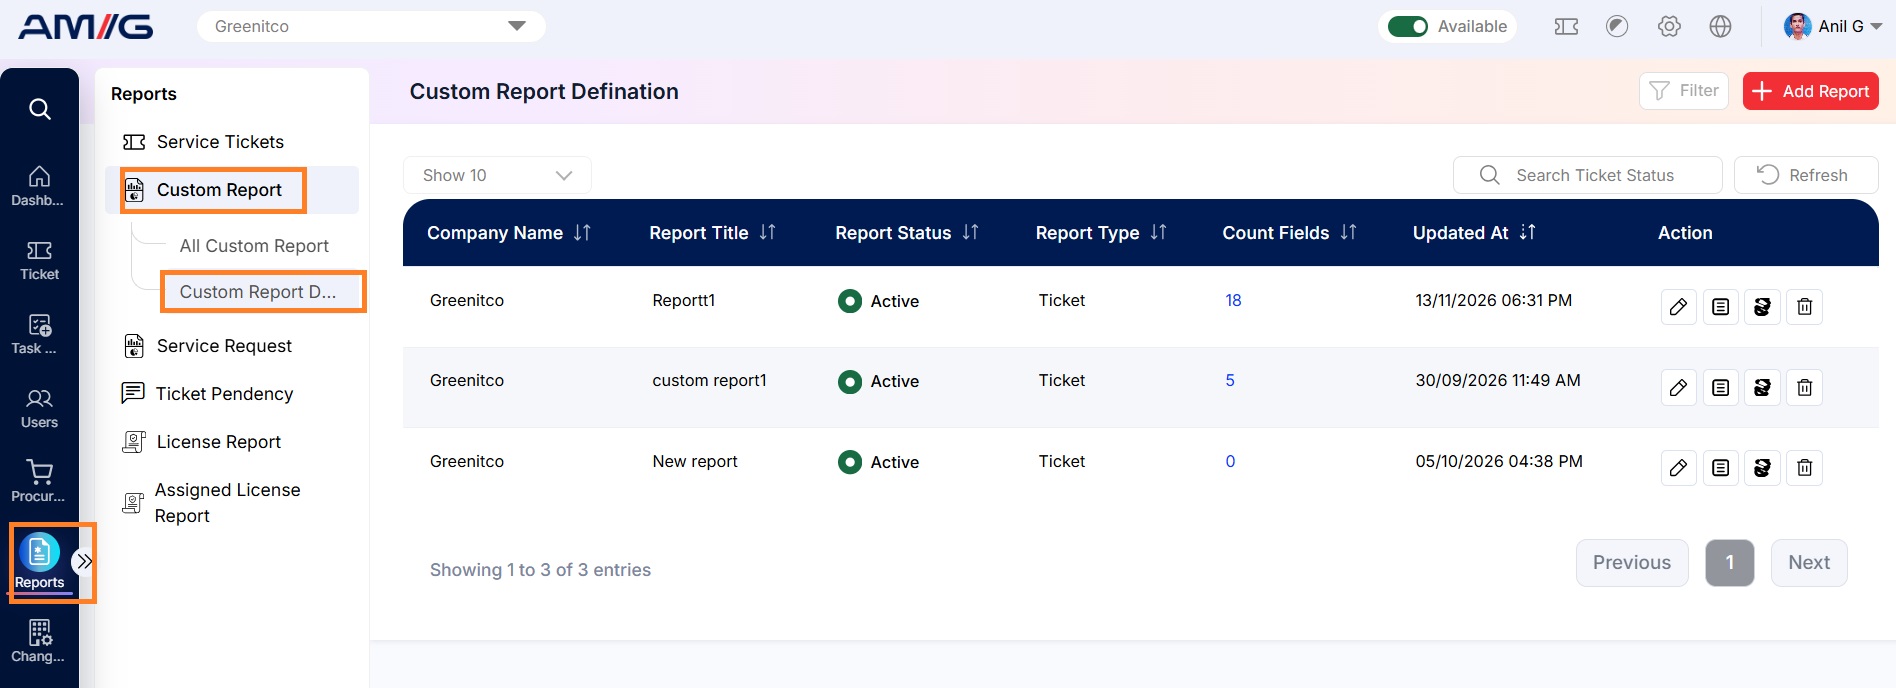
Viewing Custom Report Definitions
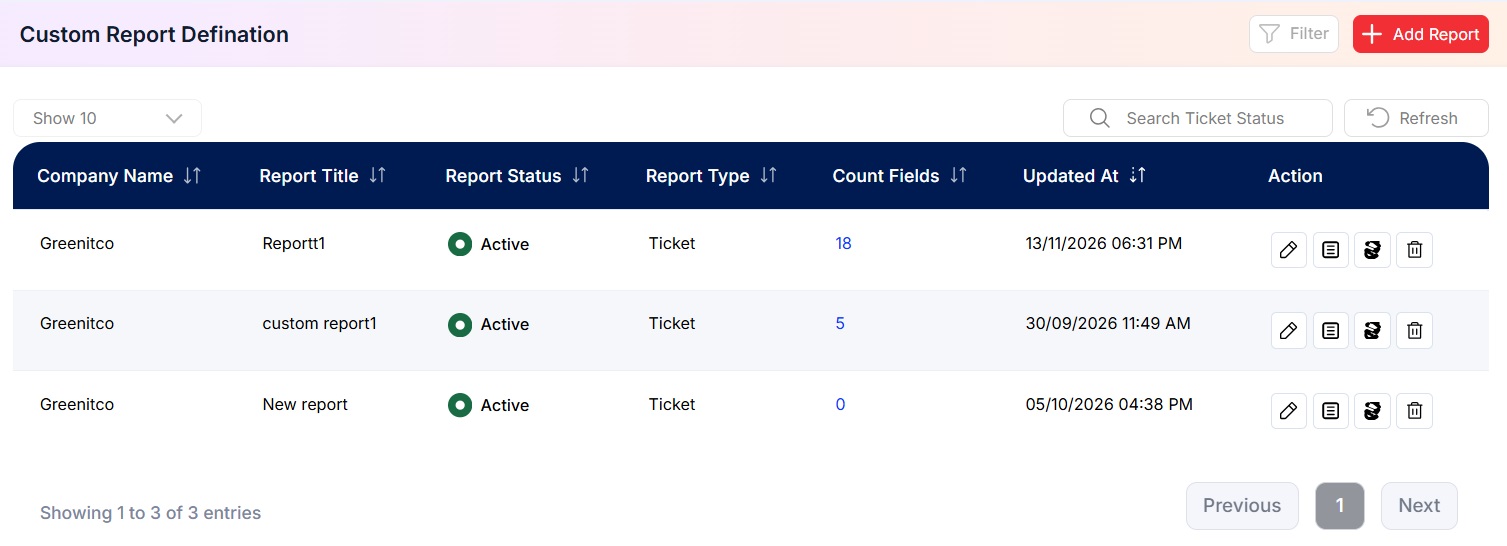
Figure 2.12.1: Custom Report Definition – report listing
Table 2.12.1: What each column shows
| Column | What it shows |
|---|---|
| Company Name | Displays the name of the company associated with the custom report. |
| Report Title | Displays the title or name assigned to the custom report for identification. |
| Report Status | Indicates the current status of the custom report. |
| Report Type | Displays the type of report configured, identifying the category of report being created. |
| Count Fields | Displays the number of fields selected for inclusion in the custom report. |
| Updated At | Displays the date and time when the custom report was last updated. |
| Action | Provides available actions to manage the custom report definition. |
There is no filter panel on this screen. Click a column header to sort the list.
Creating a Custom Report
Step 1: Go to Sidebar > Reports > Custom Report > Custom Report Definition.
Step 2: Click Add Report. The New Custom Report window opens.
Step 3: Enter the Report Name.
Step 4: Select the Company, Report Type and Status.
Step 5: Click Create to save the report.
Table 2.12.2: New Custom Report fields
| Field | Required? | What to enter |
|---|---|---|
| Report Name | Yes | The name of the custom report. |
| Company | Yes | The company the report belongs to. |
| Report Type | Yes | The type of report, such as Ticket/Asset. If selected asset asset related column are shown and vice versa for ticket. |
| Status | Yes | Whether the report is active. It will be visible in report only if its active |
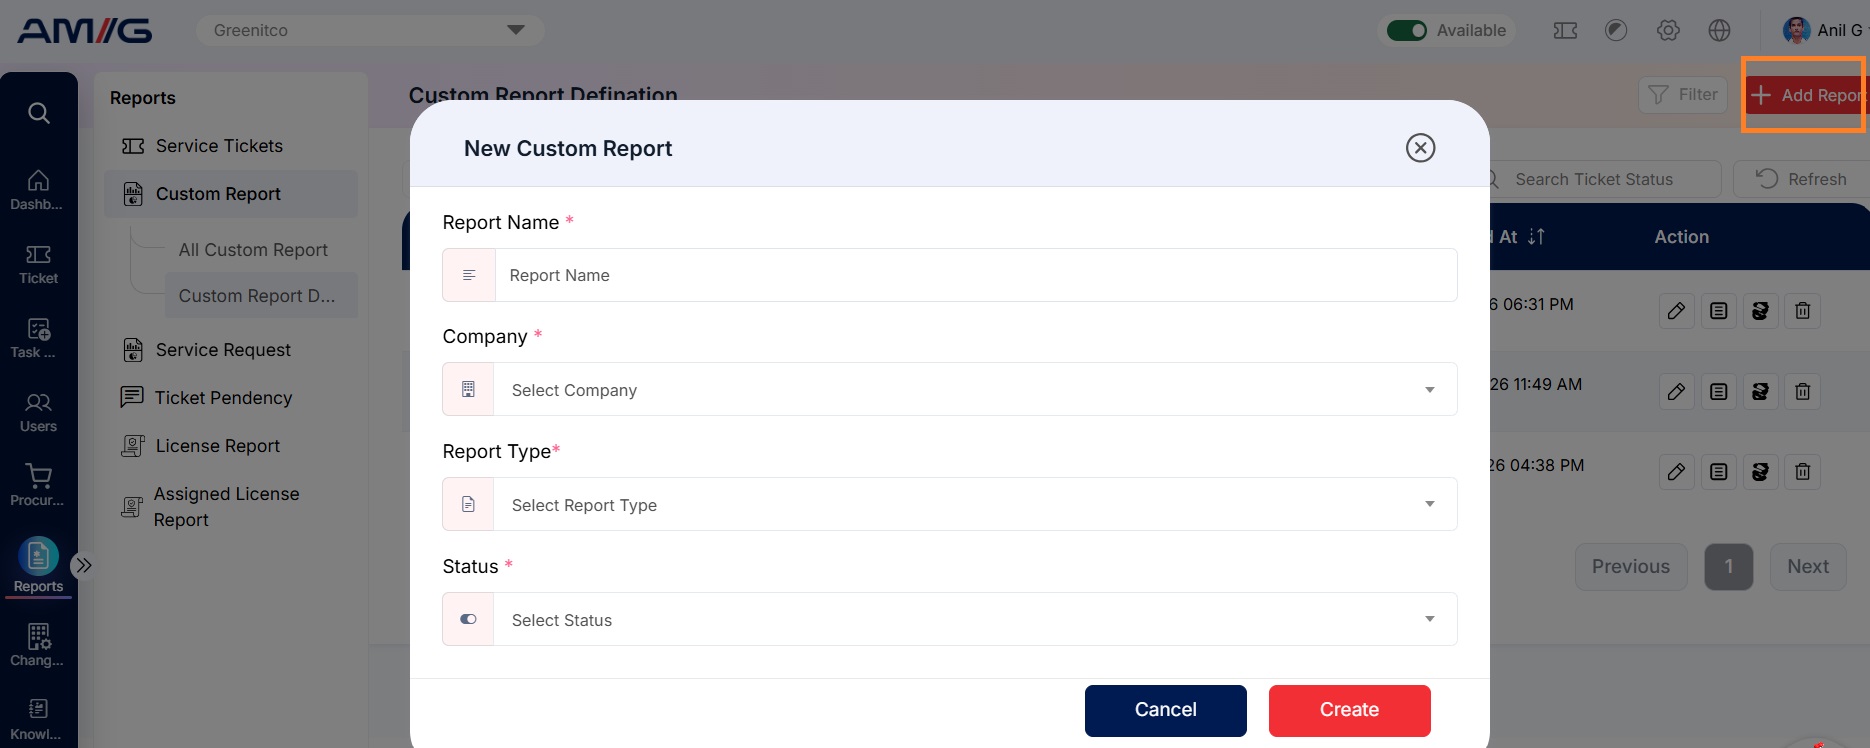 Figure 2.12.2: New Custom Report – creation form
Next, choose the report’s columns with Update Report Fields and its conditions with Update Report Rules.
Configuring Report Fields
The Update Report Fields window has two lists. Fields on the left shows every field you can add. Report Fields on the right shows the fields already in the report.
Step 1: Open Update Report Fields for the report.
Step 2: Click the arrow next to a field in Fields to add it to the report.
Step 3: Click the remove icon next to a field in Report Fields to take it out.
Step 4: Drag a field by its handle to change the column order.
Step 5: Click Save Changes.
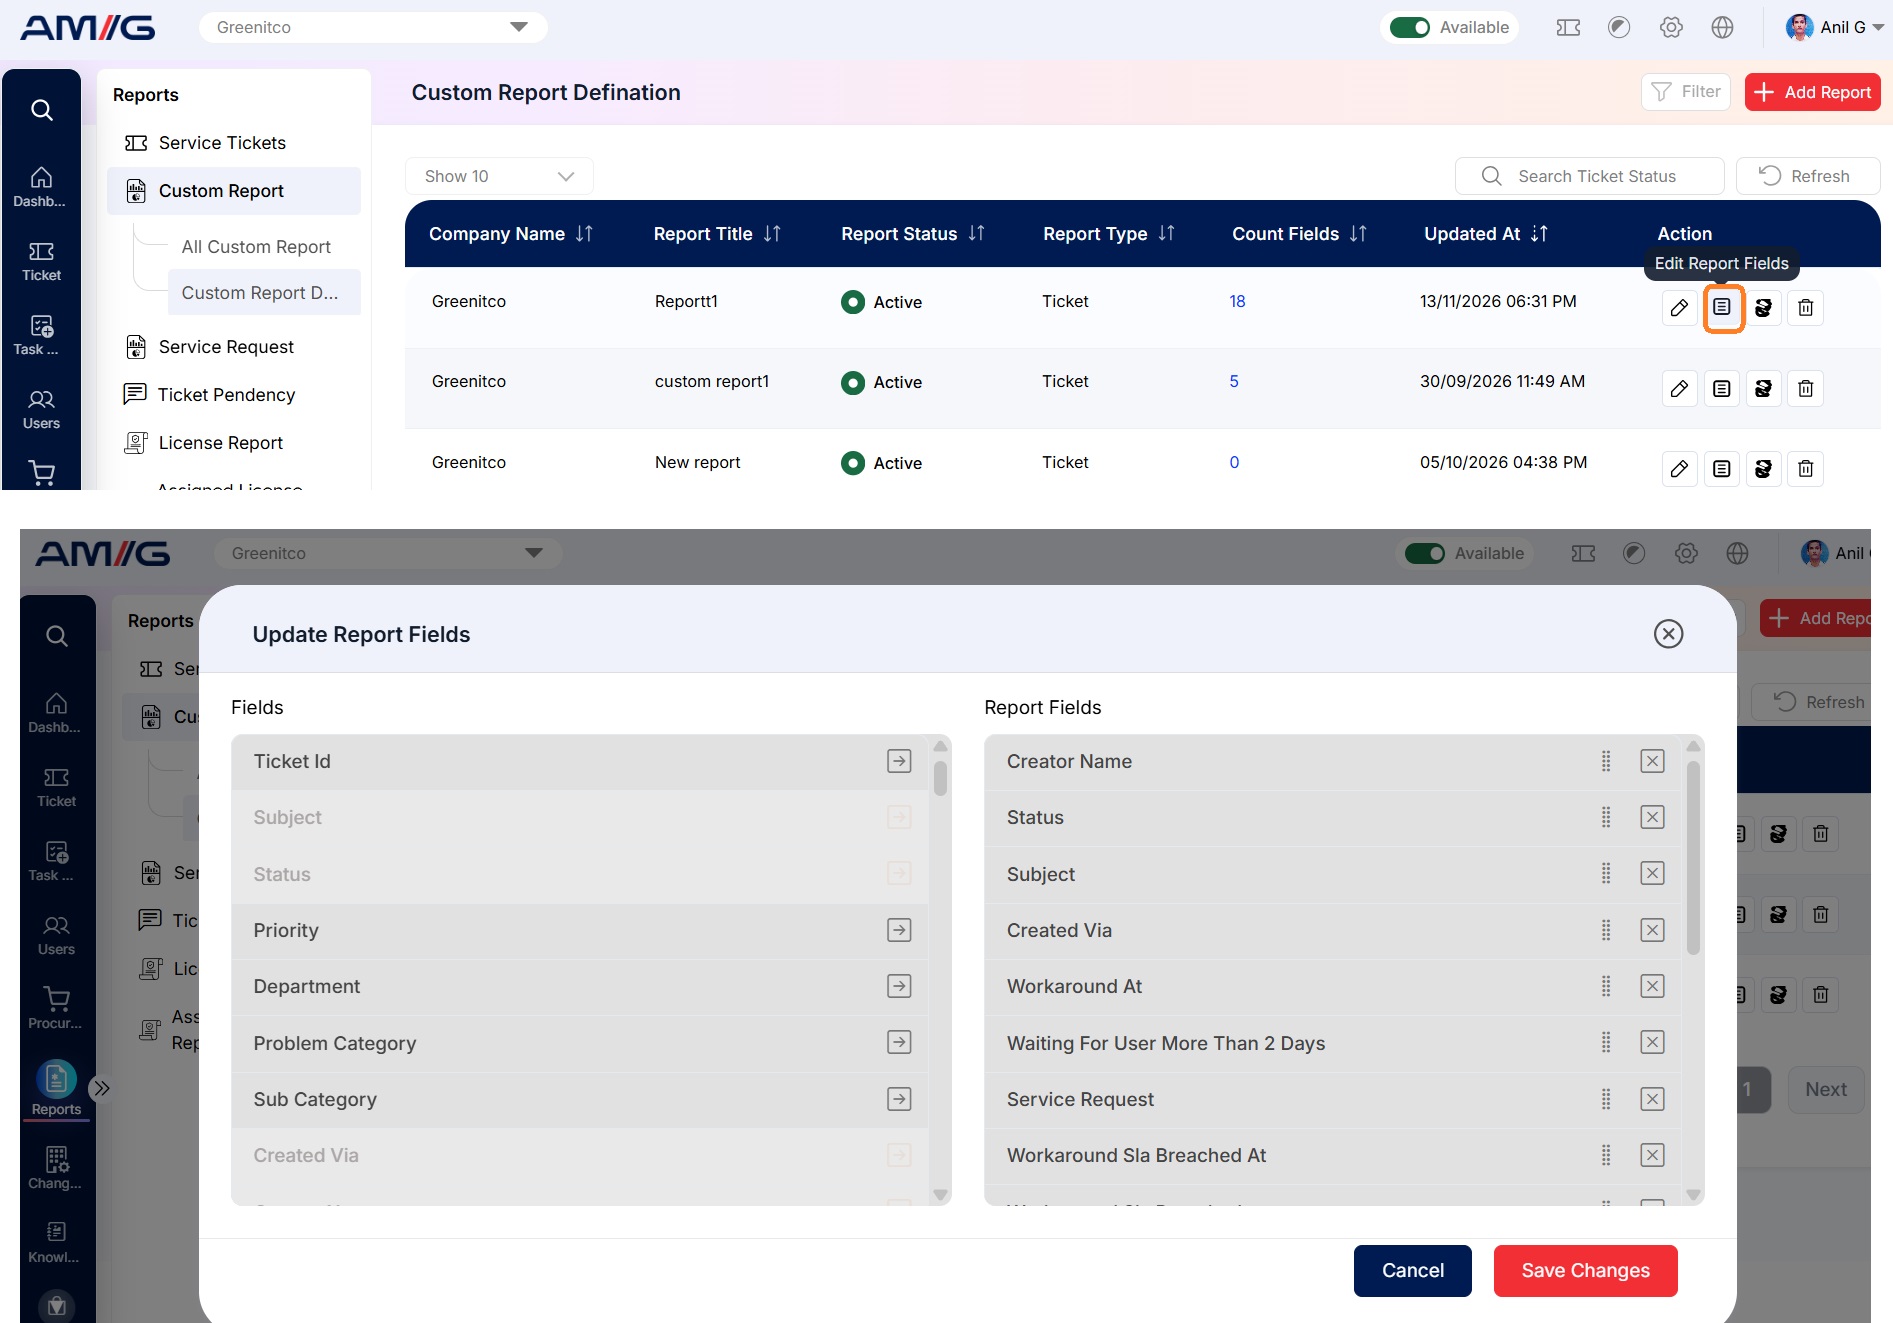 Figure 2.12.3: Update Report Fields – field configuration
Configuring Report Rules
Rules decide which tickets appear in the report.
Step 1: Open Update Report Rules for the report.
Step 2: Click Add Rule.
Step 3: Select the Field the condition applies to.
Step 4: Select the Condition, such as Equal to, Not equal or Includes.
Step 5: Enter the Value to compare against.
Step 6: Click Save Changes.
Step 7: Repeat for each rule you need, then close the window.
Tip: To combine several rules, use And, Or and brackets in Rule Dictation.
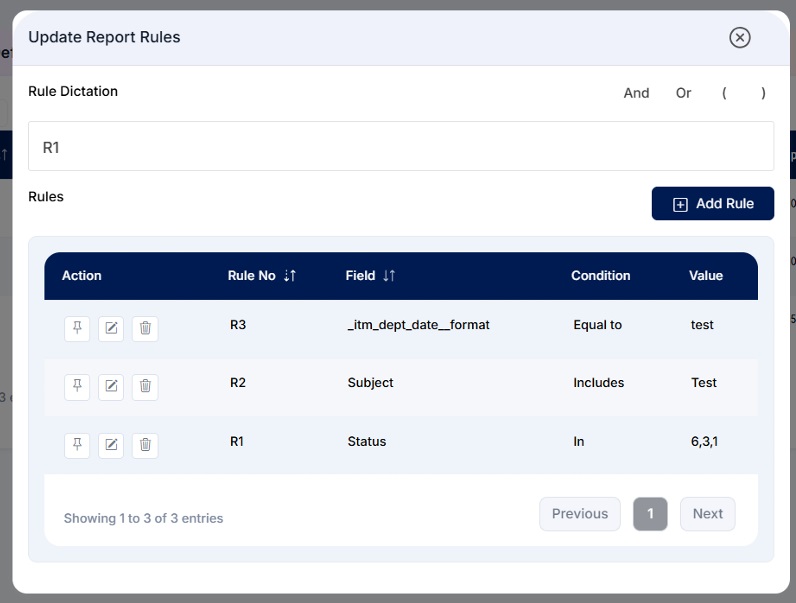 Figure 2.12.4: Update Report Rules – rules listing
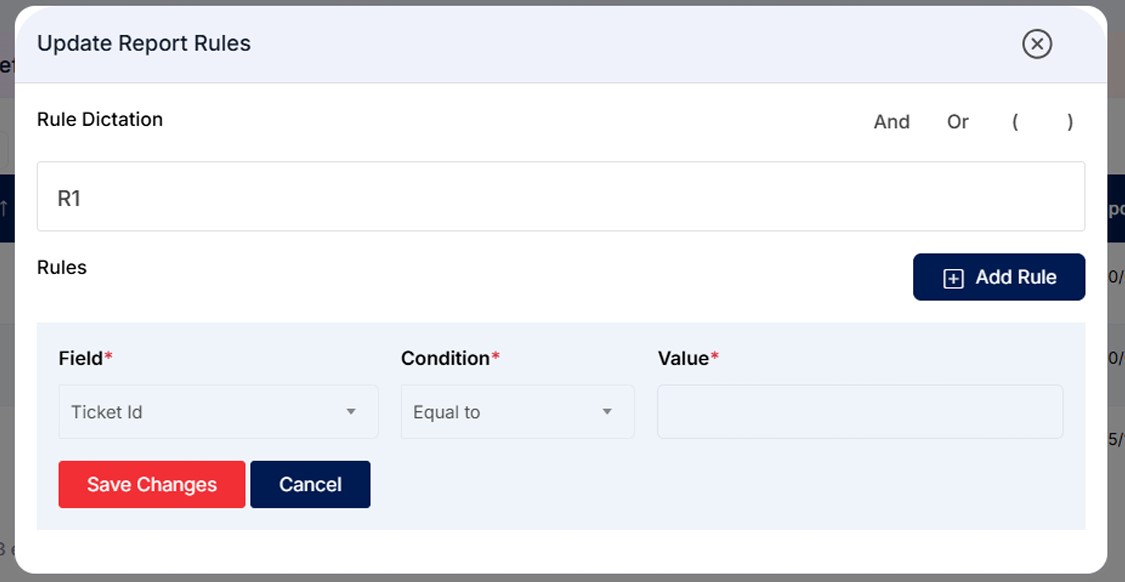 Figure 2.12.5: Update Report Rules – add or edit rule form
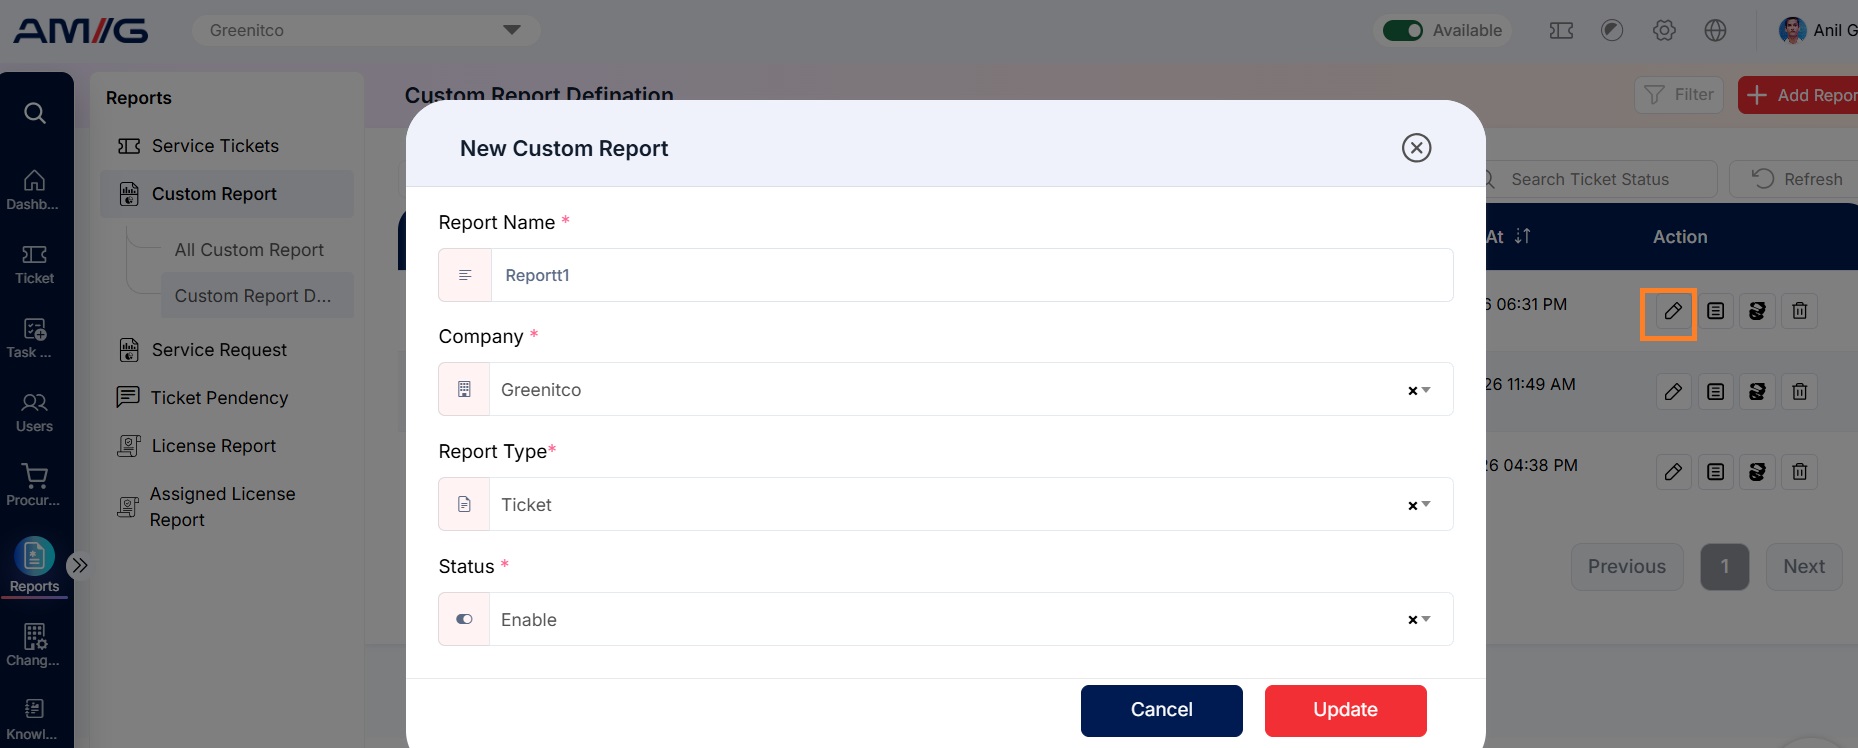
Edit Custom Report
Step 1: Click the Pencil (Edit) icon against the required trigger.
Step 2: Update the details in the pop-up window.
Step 3: Click Save to apply changes or Cancel to discard them.
Delete Custom Report
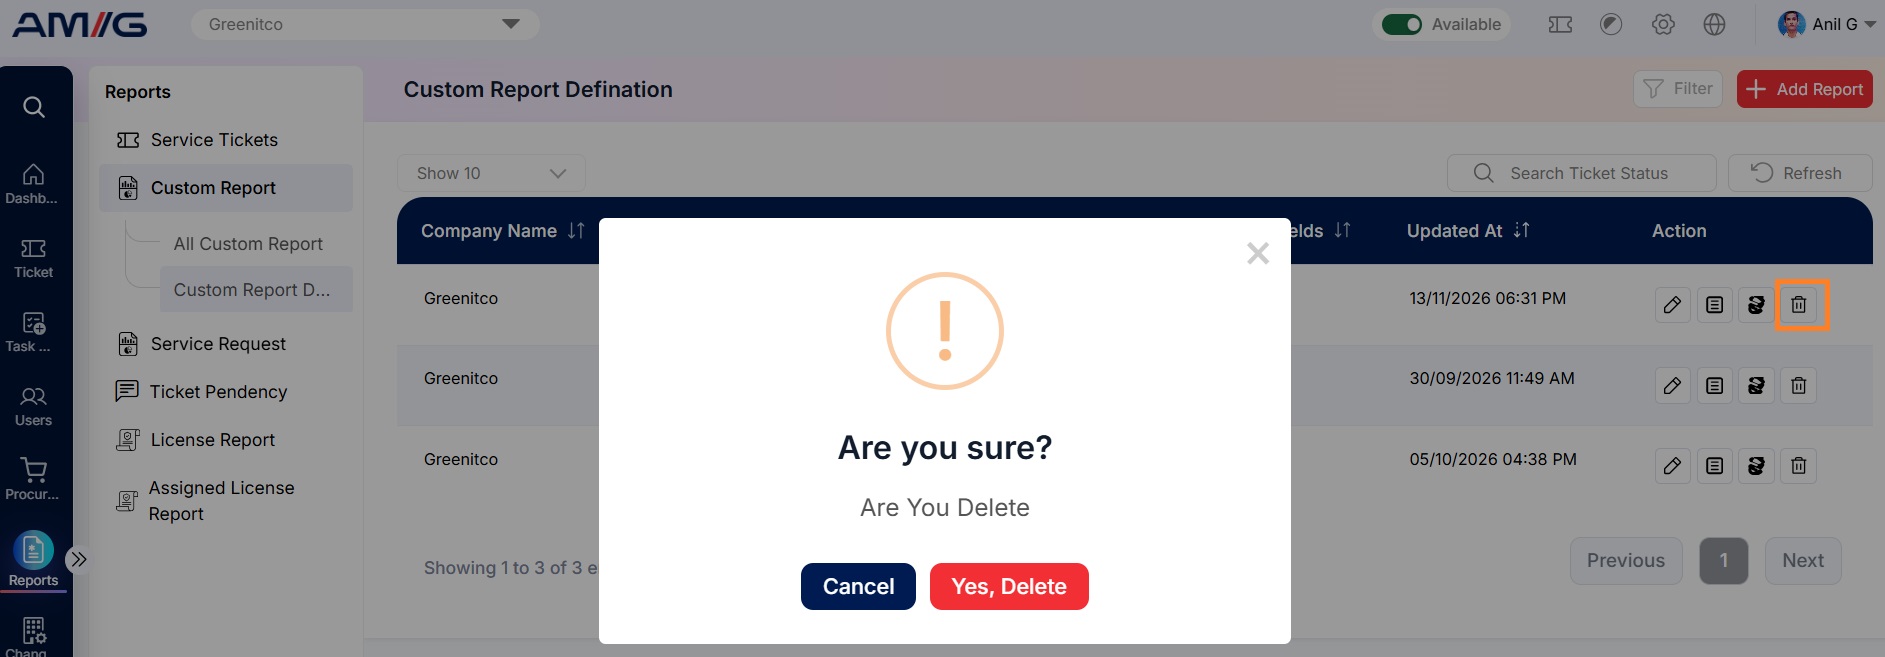
Step 1: Click the Trash (Delete) icon against the required trigger.
Step 2: Confirm the deletion in the confirmation pop-up.
Step 3: Click OK to delete or Cancel to discard the action.
Viewing a Custom Report
Step 1: Go to Sidebar > Reports > Custom Report > All Custom Report.
Step 2: Select the report from the Select Report dropdown.
Step 3: Review the records. The columns shown are the ones set in Update Report Fields.
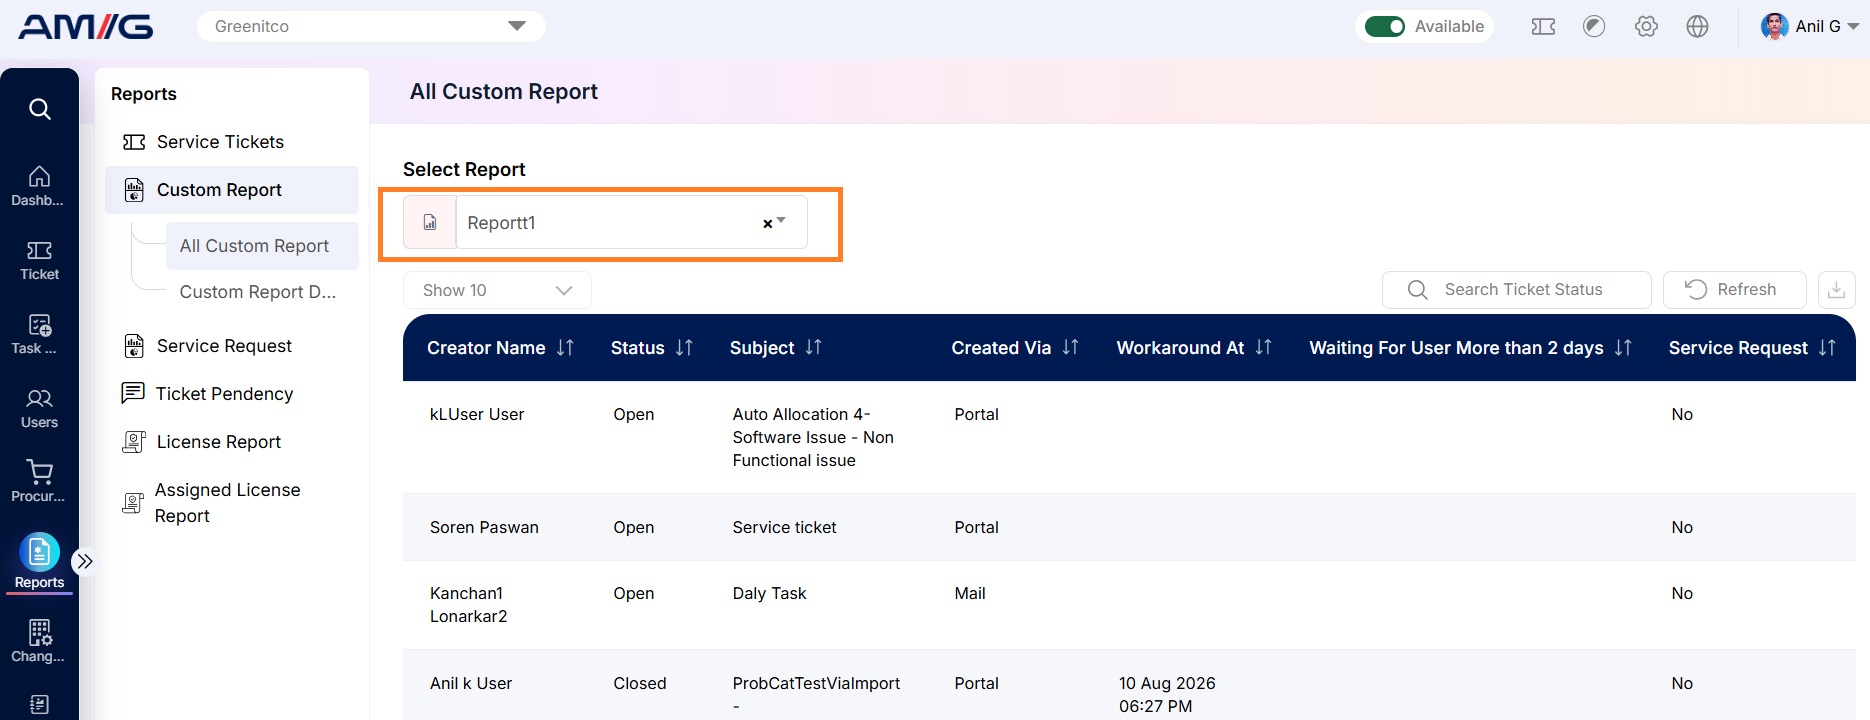 Figure 2.12.6: All Custom Report – report view