

Introduction
Use the Conversation Area at the bottom of the Ticket Details screen to talk to the user and to leave notes for other technicians. Previous messages and system updates are shown in order, so anyone opening the ticket can see what has happened.
Step 1: Open the ticket Details and scroll to the Conversation Area.
Step 2: Type your message or comment.
Step 3: Attach any supporting files, such as screenshots or logs.
Step 4: If the comment is for technicians only, select Internal Comment. Internal comments are shown in yellow.
Step 5: Choose whether to Include Back-Trail Conversation in the email, and add any CC Email Recipients.
Step 6: Review the message and options, then click Save Comment.
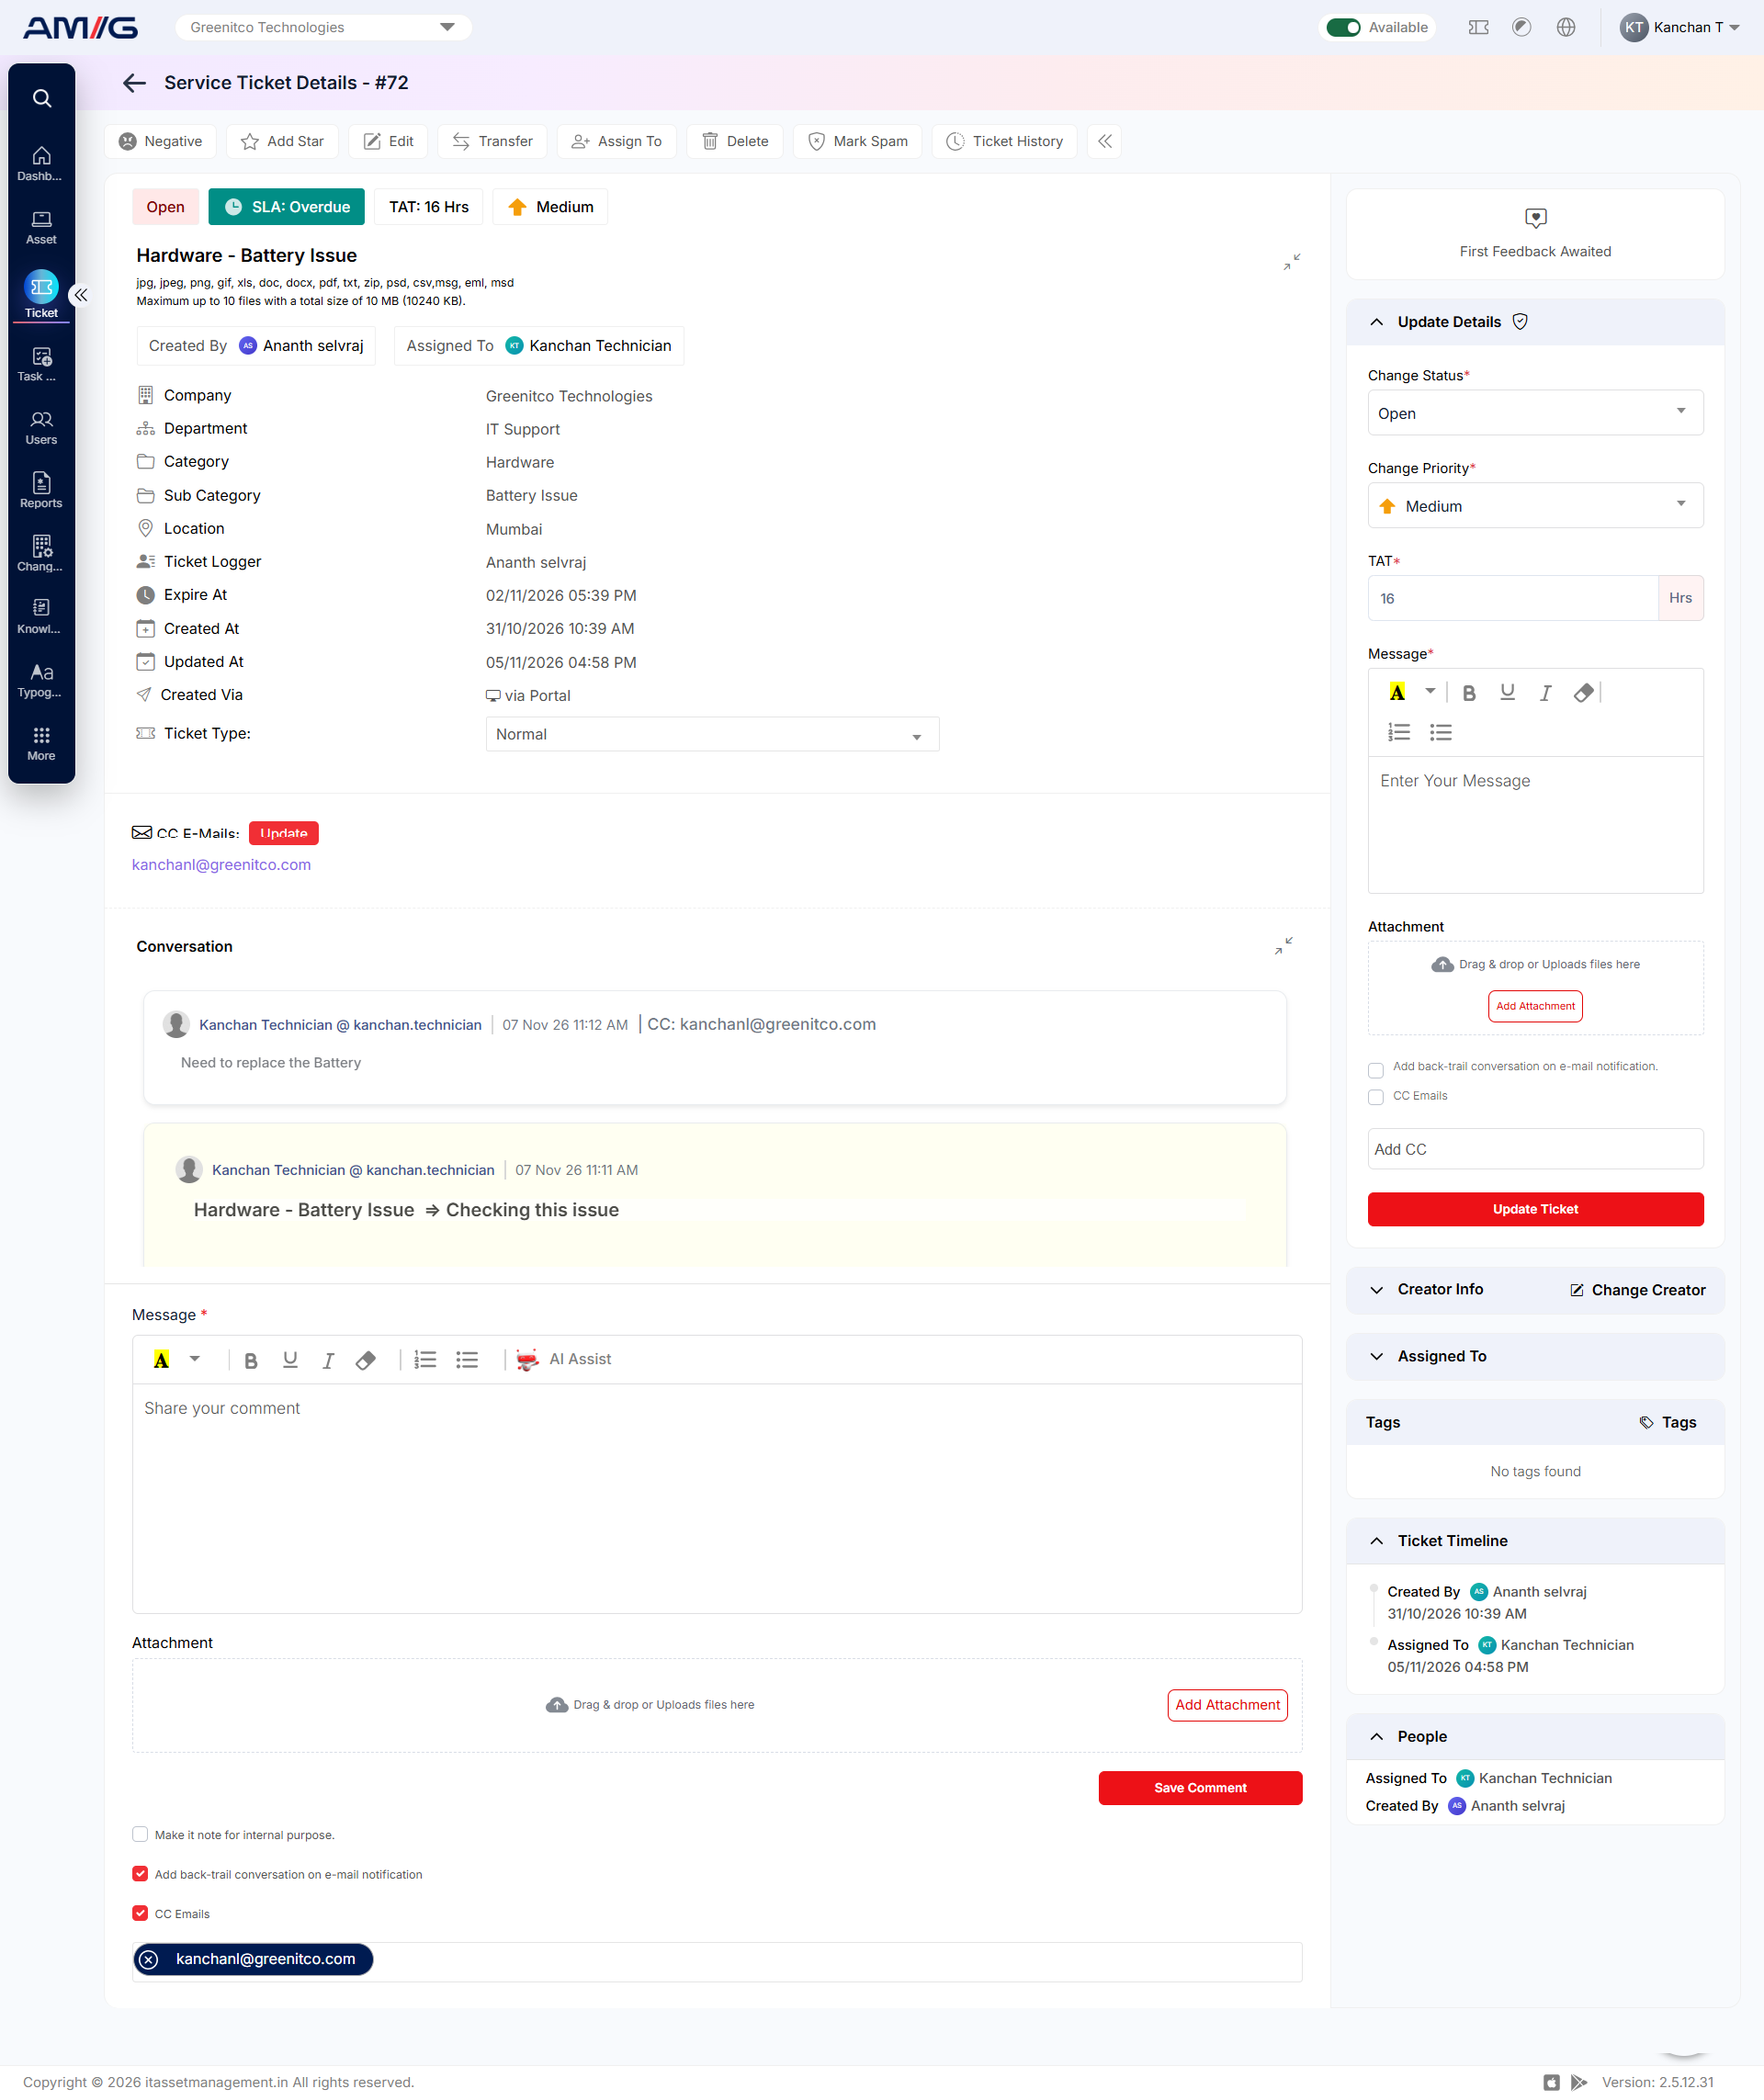
Figure : Ticket Details screen – conversation
Table 2.2.7: Conversation area options
| Option | Description |
|---|---|
| Message or comment | The text added to the ticket conversation. |
| Attach Files | Supporting files for the comment. |
| Internal Comment | Marks the comment for internal use rather than as a customer-facing message. Internal comments appear in yellow. |
| Include Back-Trail Conversation | Includes the earlier conversation in the email notification, where available. |
| CC Email Recipients | Additional people who should receive the email notification. |
| Save Comment | Saves the comment to the ticket. |
Important: Before saving, check the Internal Comment setting and the CC recipients. A note meant for colleagues should never be sent to the user by mistake.
Tip: To record progress and change the status in one go, use the Status Update form instead (section 2.2.6). Its comment is added to the conversation automatically.