

Introduction
Problem Management helps you identify, investigate, and resolve the underlying causes of issues that affect multiple tickets, devices, or business operations. Instead of handling each ticket separately, you can record the common problem in one place and link all related tickets and affected devices to it.
For example, if multiple users raise tickets about a network outage, you can create a problem record, link the affected tickets and devices, and investigate the root cause to prevent the issue from recurring.
Using this section, you can:
-
Record and Track Problems: Create problem records with a description, priority, category, department, and assigned handlers.
-
Link Related Tickets: Associate multiple tickets with a single problem to manage related issues together.
-
Track Impacted Devices: Identify and link devices affected by the problem.
-
Perform Root Cause Analysis: Investigate the underlying cause of recurring issues and document the findings.
-
Plan Resolution and Recovery: Maintain details such as the problem's impact, rollback plan, and fallback plan to support safe resolution and recovery.
-
Manage the Problem Lifecycle: Track the problem until it is resolved and closed.
These features help your organisation manage recurring issues more effectively, reduce repeated incidents, and maintain a complete record of problem investigation and resolution.
Navigation Path: Sidebar > Ticket > Problem Management
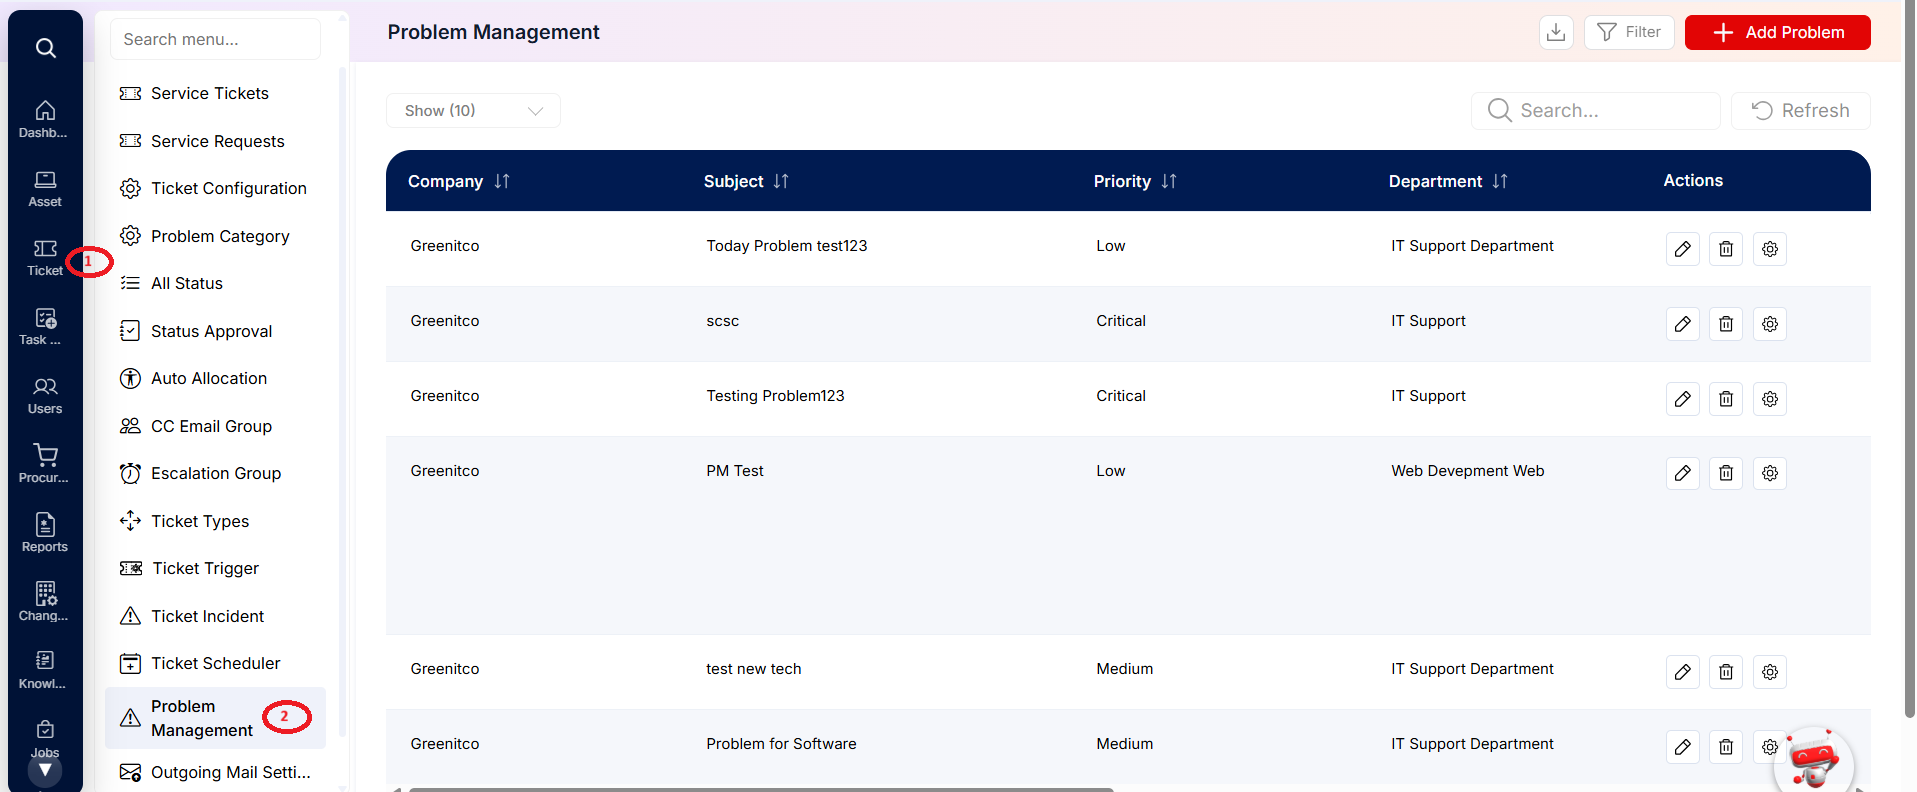
Important: When a problem is closed, the system also resolves the tickets linked to that problem. Ensure that the related issues have been addressed before closing the problem.
Viewing Problems
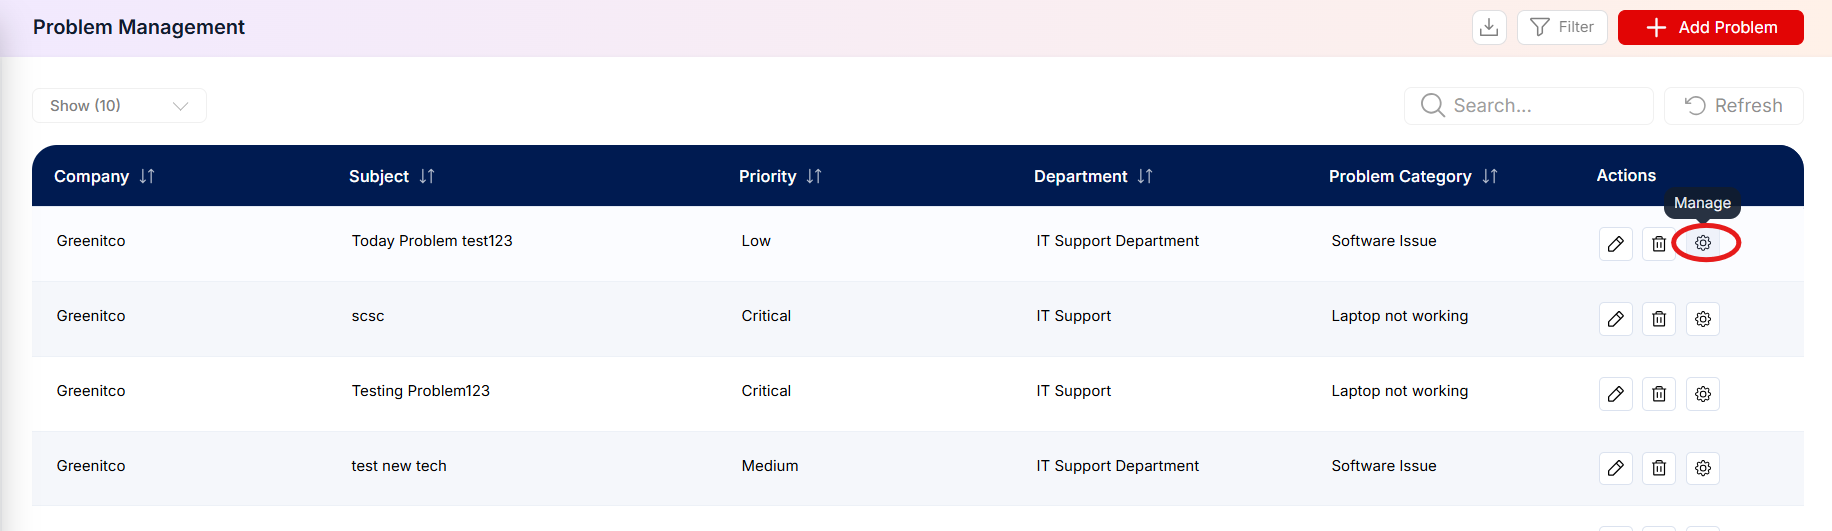
Open Problem Management to see existing problems. Use Search and Refresh, and scroll horizontally to see more columns. The list shows the company, subject, priority, department, category, and the percentage of impacted devices and tickets completed.
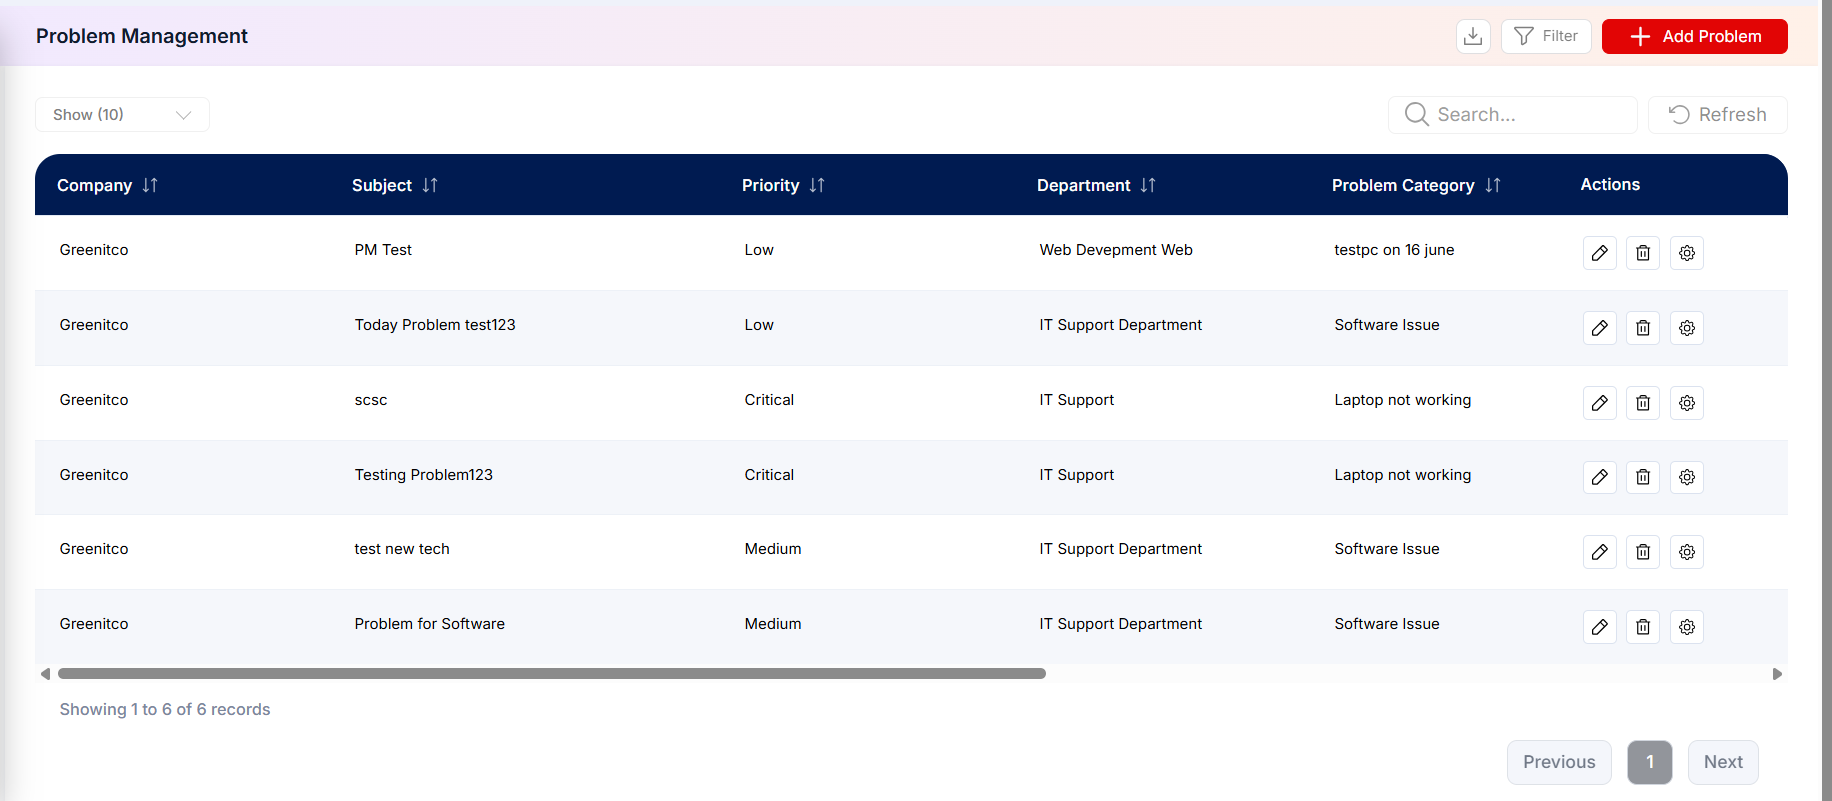
Figure 2.4.1: Problem Management list
Creating a Problem
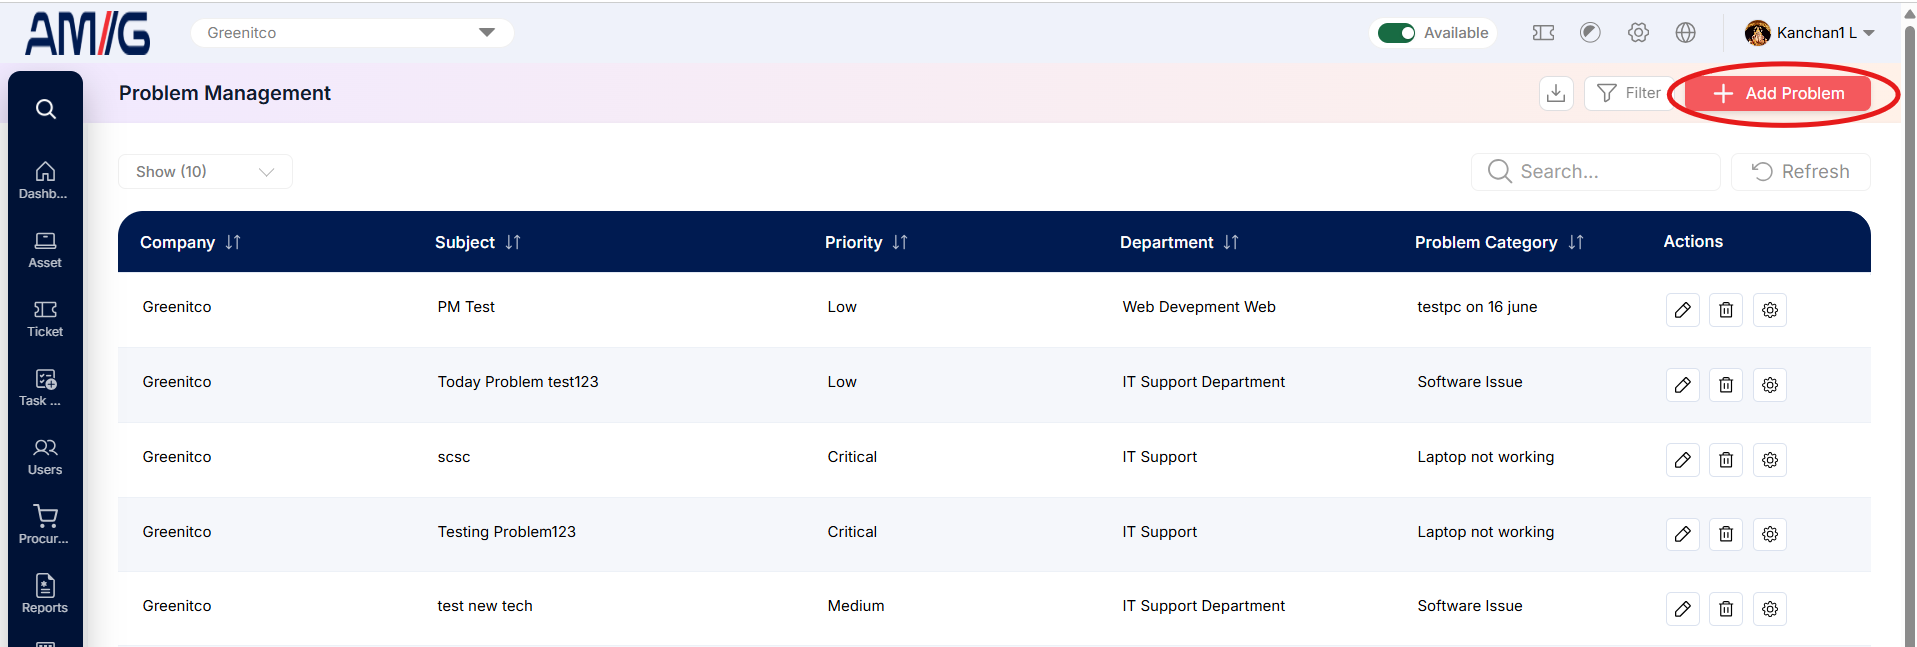
Step 1: Click Add Problem.
Step 2: Enter the Subject, select the Company and write a clear Description.
Step 3: Select the Department, Problem Category and Priority, then the Handler(s). Only handlers can manage the problem.
Step 4: On the Impacted Devices tab, select the affected devices. Remove any selected by mistake with the Delete icon.
Step 5: On the Impacted Tickets tab, select the related tickets, or tick Select all tickets from selected department and categories. Only tickets from the problem's department and category are shown.
Step 6: Click Save.
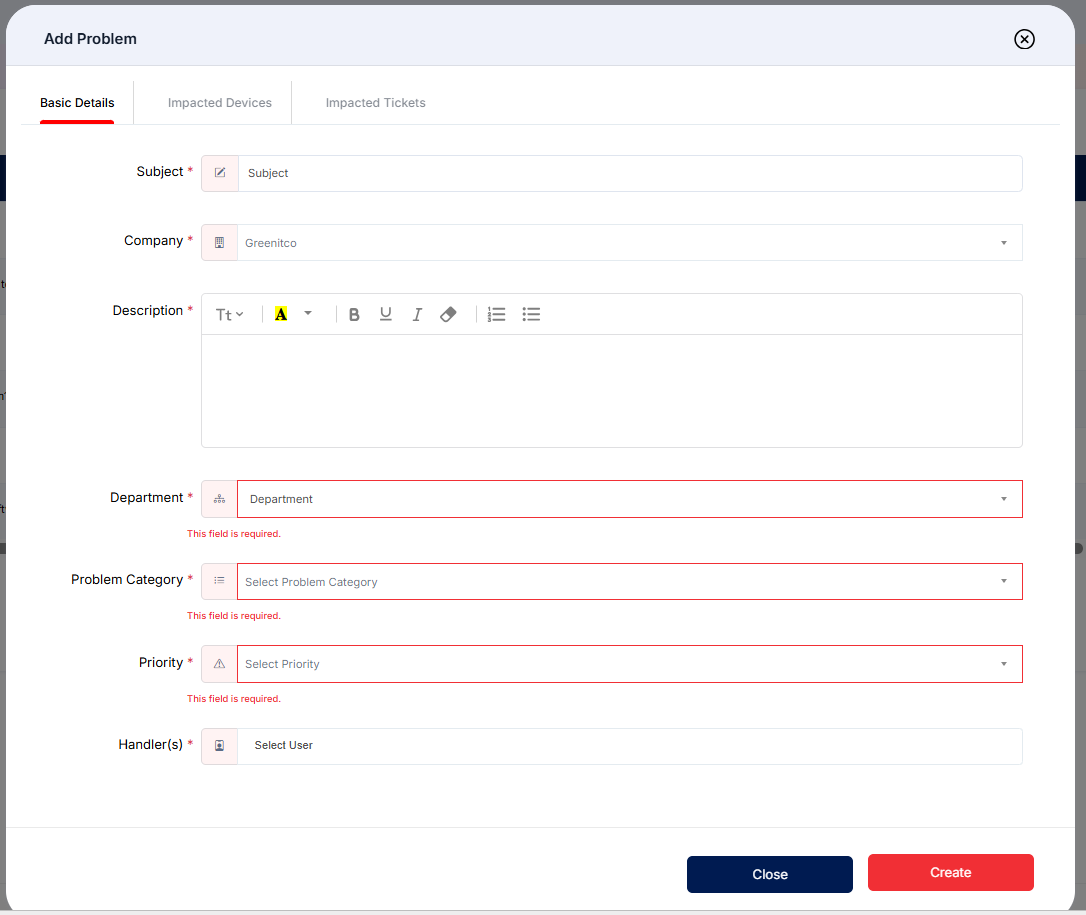
Figure 2.4.2: Add Problem – Basic Details tab
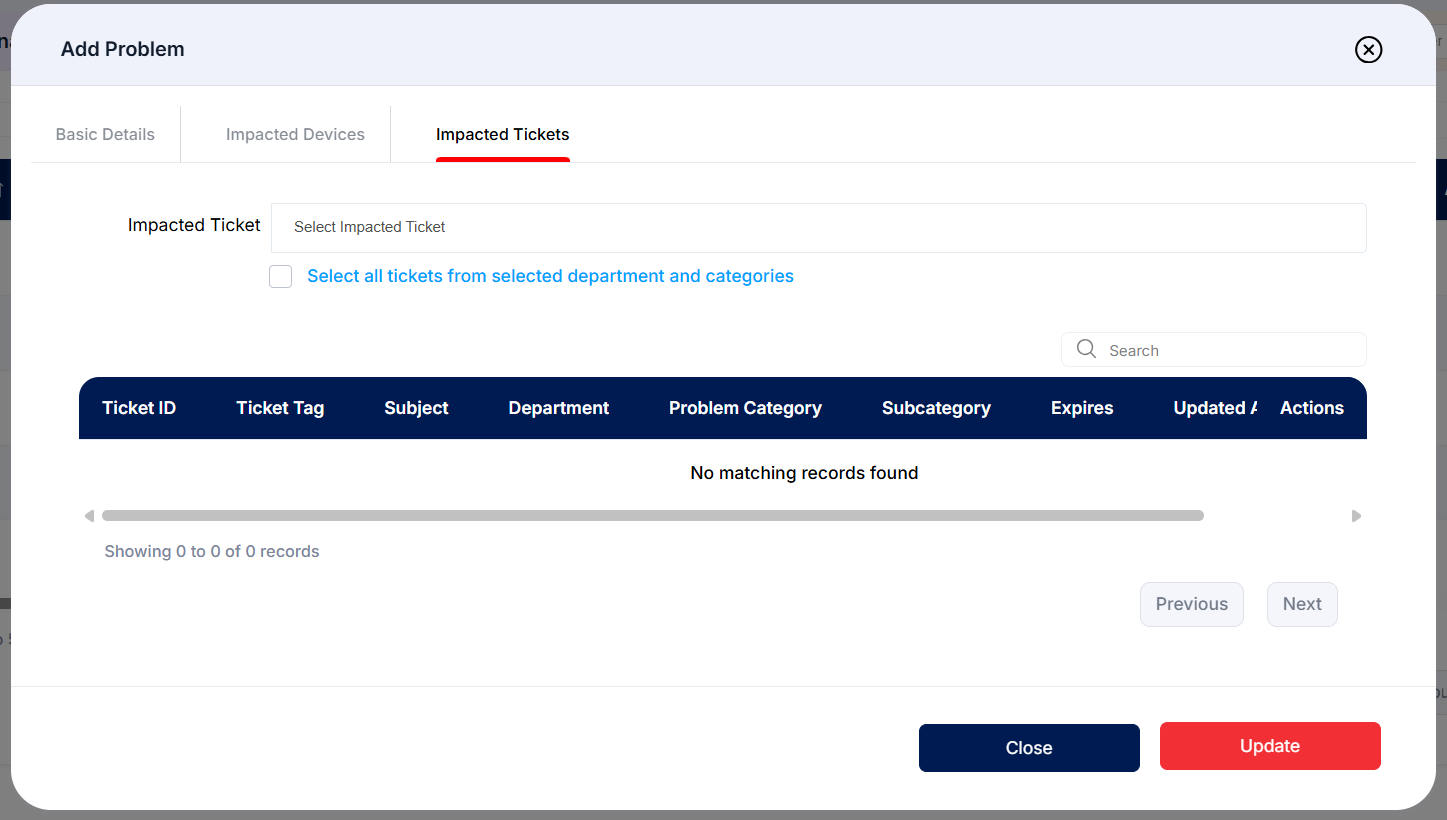
Figure 2.4.3: Add Problem – Impacted Tickets tab
Working a Problem
Step 1: In the list, click the management (settings) control for the problem.
 Step 2: Review the handler and subject, then use the Impacted Ticket and Impacted Devices tabs to check linked records and their status.
Step 3: Select impacted items with their checkboxes and use the buttons above the table to resolve or reopen them as the fix is applied.
Step 4: Use History to review changes made to the problem.
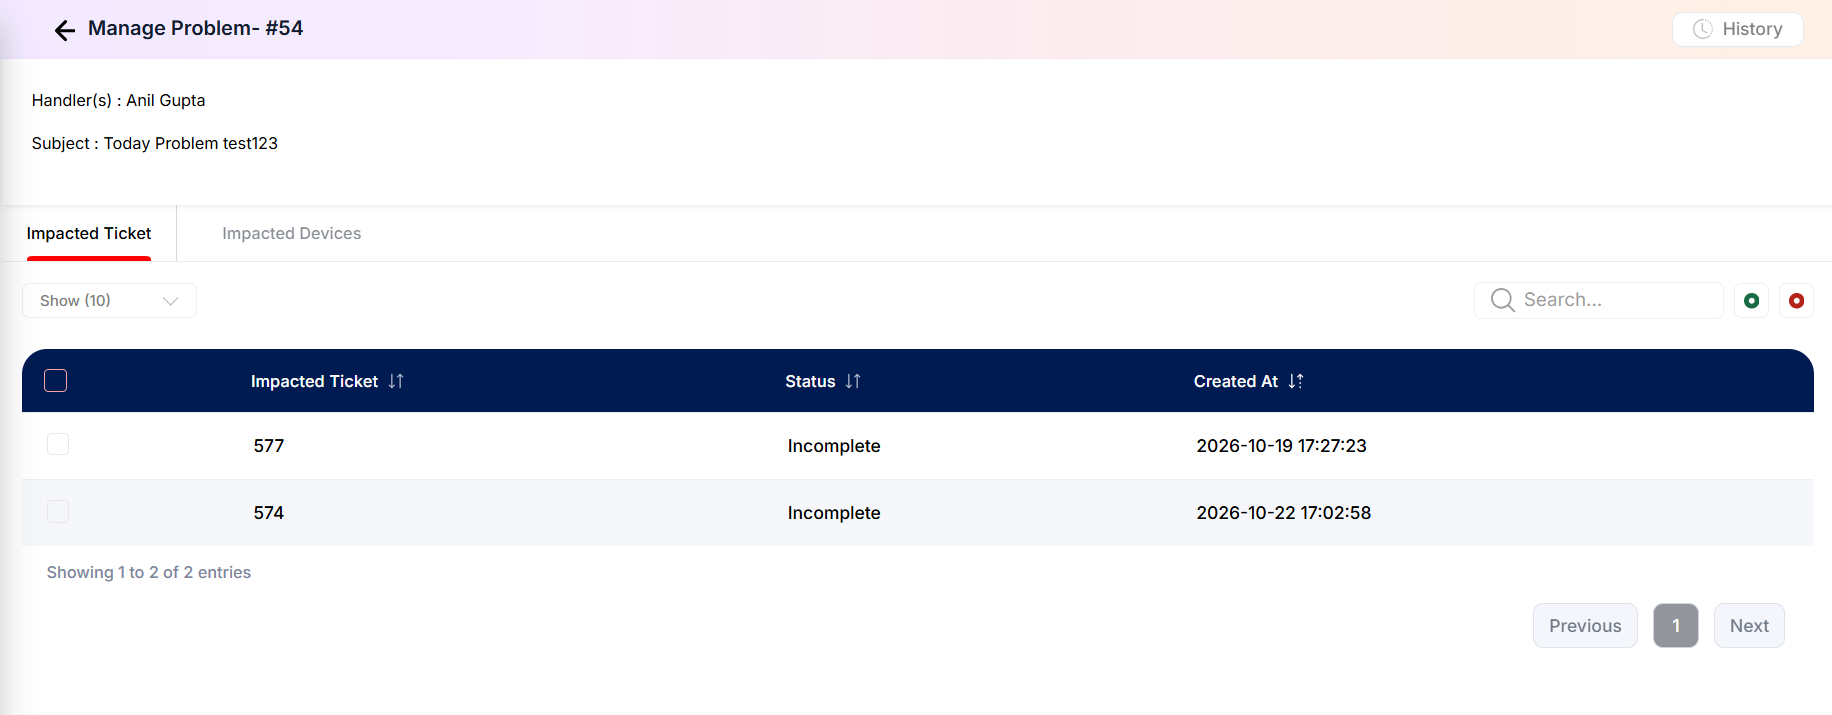
Figure 2.4.4: Manage Problem screen