

Introduction
Transfer a ticket when it belongs to another department or needs a different category, for example when a network issue was raised under Hardware. A transfer can also update the category, priority, TAT, assignee, tags and device.
Step 1: Open the ticket and click Transfer, or click Transfer Ticket on the ticket card.
Step 2: Select the destination Department, Problem/Request Category and Sub Category. Review Priority and TAT, Assign To, Tag and Device.
Step 3: Enter the mandatory Reason for transfer ticket. Select Make it note for internal purpose if the reason should be an internal note.
Step 4: Click Transfer to confirm, or Cancel to leave the ticket unchanged.
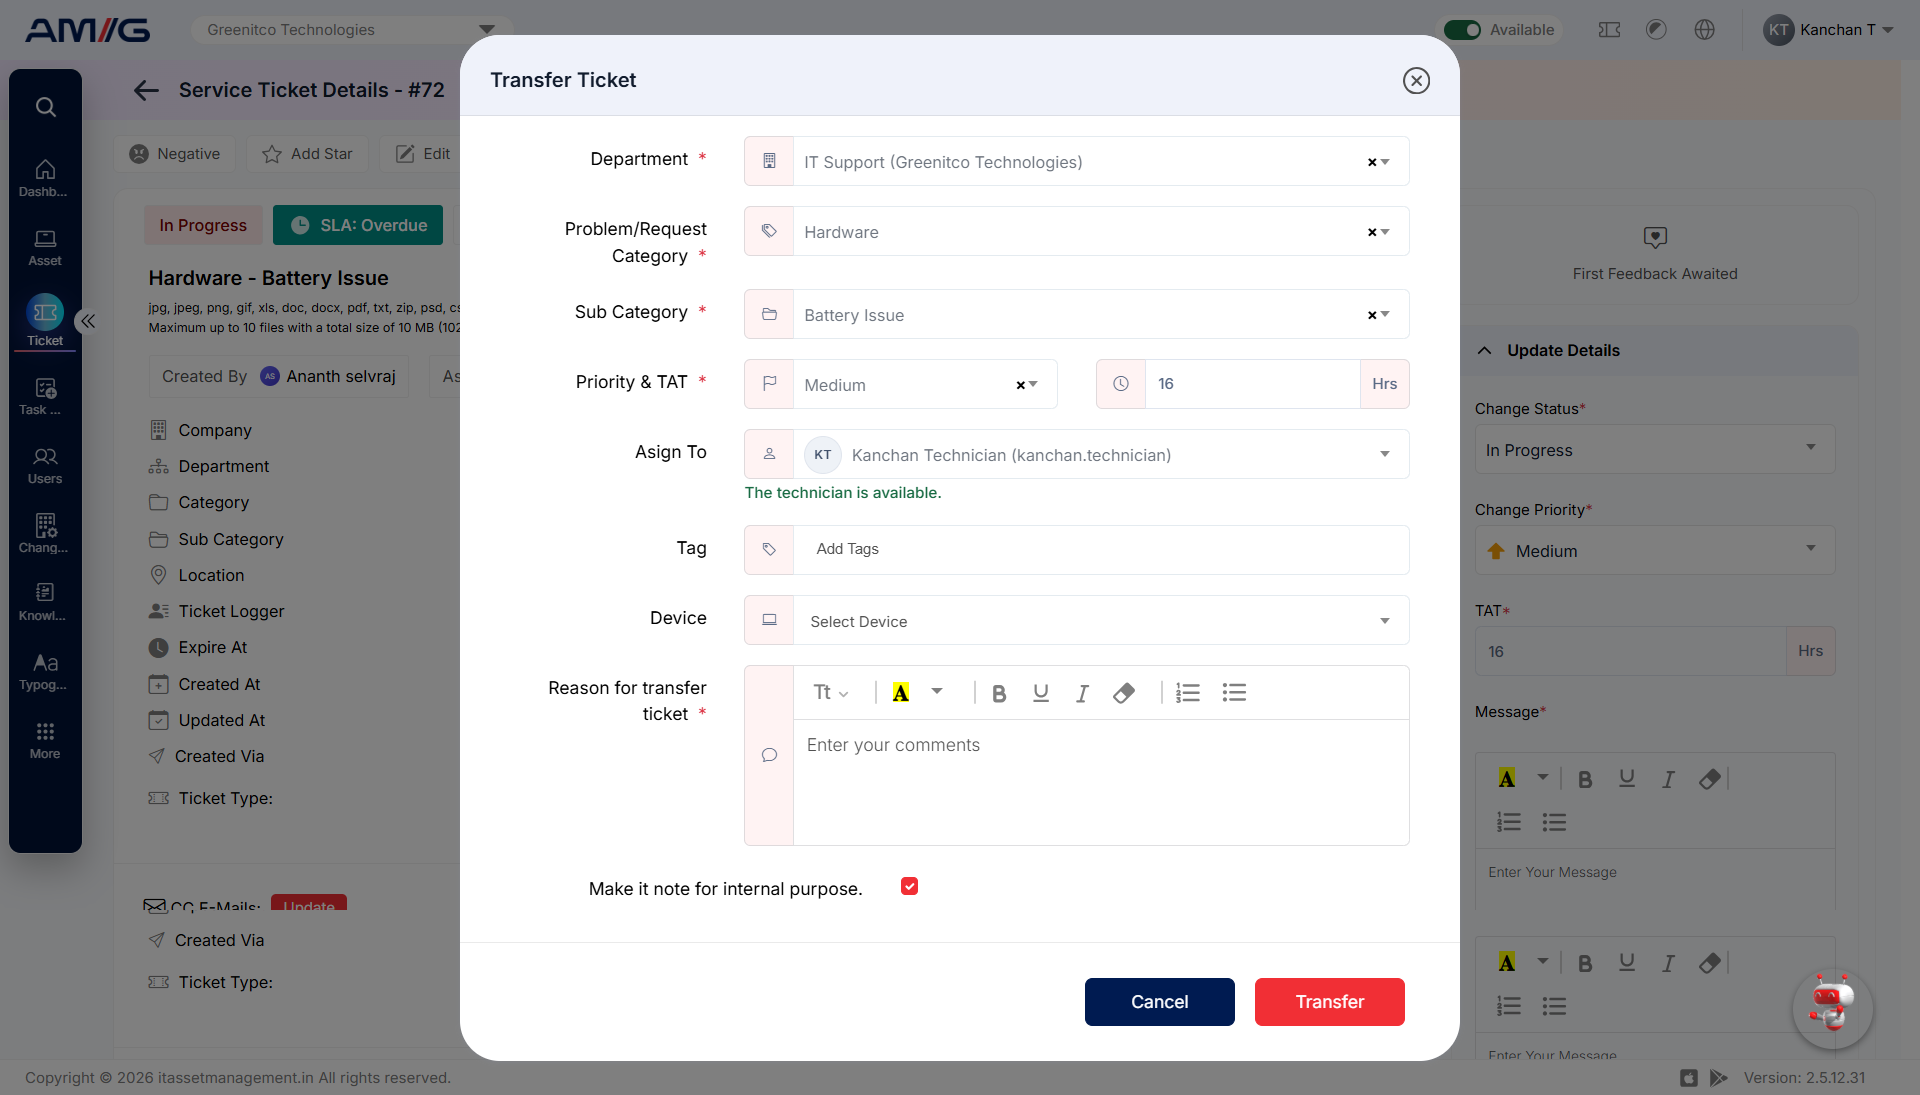
Figure 2.2.16: Transfer Ticket dialog
Tip: Write a reason that helps the receiving team start straight away: what you found, what you tried, and why the ticket belongs with them.