

Introduction
Self-assigning lets you take ownership of an unassigned or any ticket without waiting for a lead to allocate it. Self Assign is available to technicians who have access to the ticket's department.
Step 1: Open Sidebar > Ticket > Service Ticket > Select Ticket List and choose a ticket. Check the priority, TAT and VIP indicator first.
Step 2: Open the ticket and click Self Assign in the action bar.
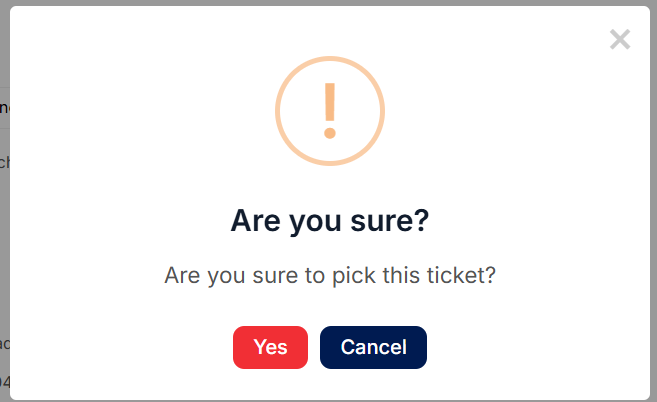
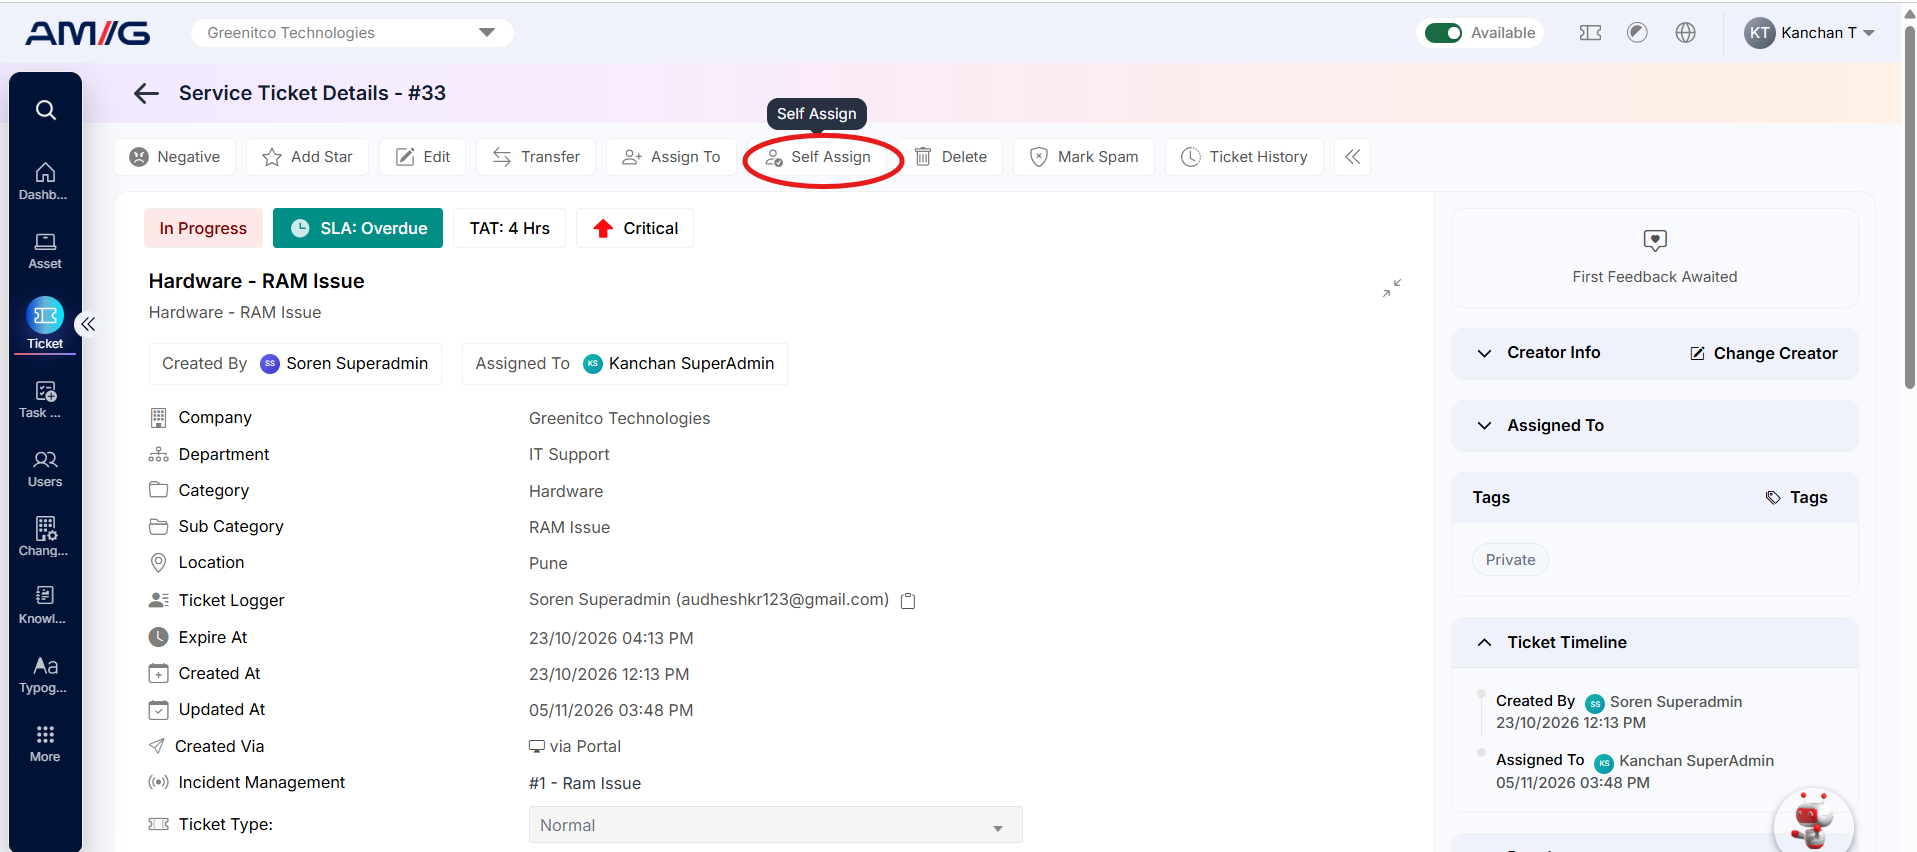 Step 3: The ticket is assigned to you and appears in Assigned Tickets. The Status Update form becomes available.
Assigning a ticket to someone else
Team leads and technicians with the required access can assign a ticket to another technician.
Step 1: Open the ticket and click Assign To.
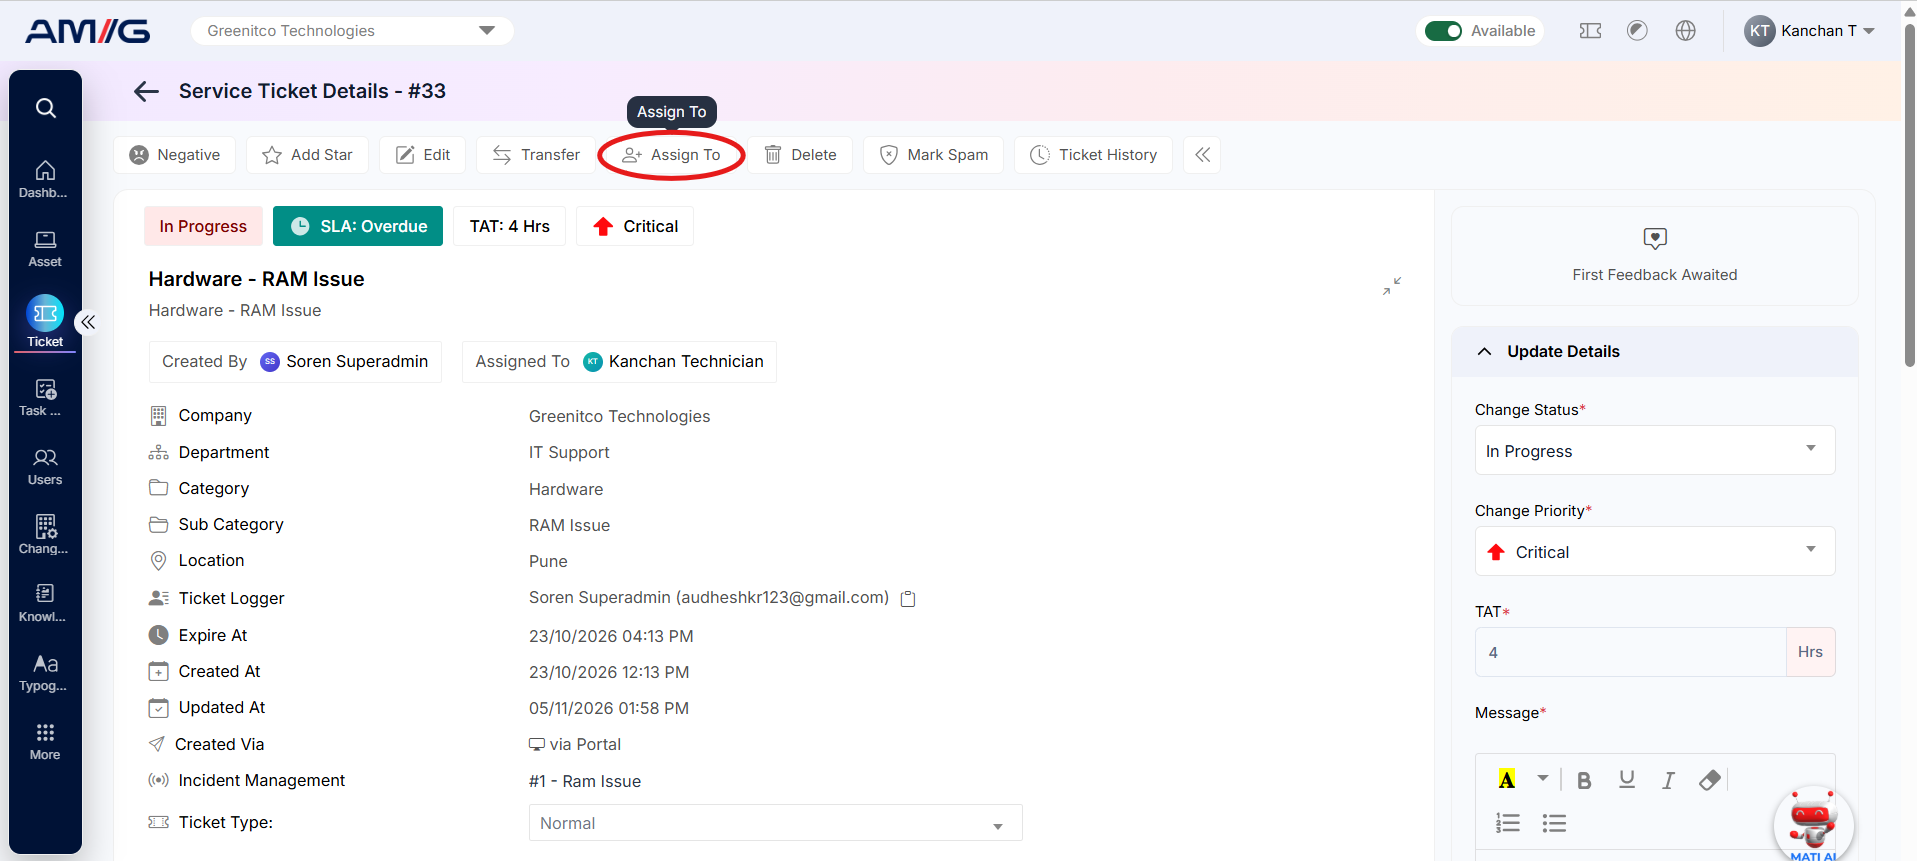 Step 2: In the Assign Ticket To dialog, select the technician from the Assign To drop-down.
Step 3: Click Assign To to confirm, or Close to cancel.
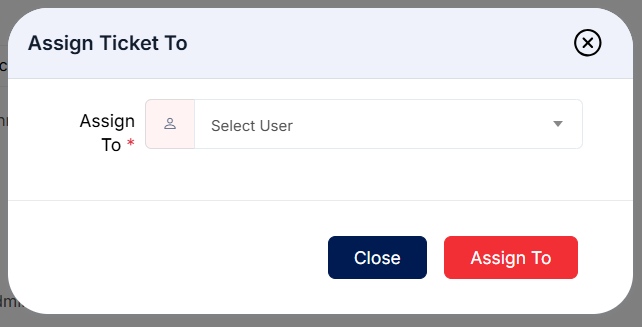
Figure 2.2.15: Assign Ticket To dialog
Tip: To assign several tickets at once, select them in the list and use Bulk Assign (section 2.7.1).