
Introduction
The Ticket Details screen provides a consolidated overview of a ticket, helping users understand its current status, progress, and activity. It brings together key information such as ticket details, priority, assignment, conversations and comments, related tasks, feedback, and the activity timeline. Users can review previous updates, understand what has happened so far, identify who is handling the ticket, and determine the next steps based on the information available.
Tickets are organised into separate listing views to support different workflows: My Tickets, All Tickets, Assigned Tickets, Not Assigned Tickets, Spam Tickets, and Archived Ticket. Open a ticket by selecting its subject or ticket card from the relevant listing. The Ticket Details screen displays the information and actions available for that ticket. Available actions may vary depending on the listing, the ticket's current status, and the user's role and permission.
Navigation Path: Sidebar > Ticket > Service Ticket > select a list > click the ticket subject
Understanding the Ticket Details Screen
The screen has four areas: the Main Ticket Panel, the Top Action Bar, the Right-Side Panels and the Conversation Area.
Main Ticket Panel
Table 2.2.4: Main ticket panel fields
| Field | Description |
|---|---|
| Current Status | The ticket's current status. |
| SLA State | Whether the ticket is on time or overdue against the applicable SLA. |
| Turnaround Time (TAT) | The turnaround time configured for the ticket's category. |
| Priority | The priority defined for the ticket's category. |
| Subject | The subject entered when the ticket was created. |
| Creator / Ticket Logger | The person who raised the ticket, and the person who logged it on their behalf, if different. |
| Assignee | The person currently assigned to handle the ticket. |
| Company / Department / Category / Location | Where the ticket belongs and how it is classified. |
| Expiry Date | When the ticket's TAT expires. |
| Created At / Updated At | When the ticket was created and last updated. |
| Creation Channel | How the ticket was created, such as Call, Phone, Mail, Portal or Bot. |
| Ticket Type | The type used to classify the ticket. |
Top Action Bar
Table 2.2.5: Top action bar actions
| Action | Description |
|---|---|
| Customer Sentiment | Opens the sentiment analysis of the ticket conversation. |
| Add Star | Marks the ticket as starred so you can find or filter it quickly. |
| Edit | Opens the Edit Ticket pop-up to update ticket information. |
| Transfer | Moves the ticket to another department or technician (section 2.2.8). |
| Assign To | Assigns the ticket to a department or technician you have access to (section 2.2.7). |
| Delete | Deletes the ticket when permitted (section 2.2.13). |
| Mark Spam | Moves the ticket to Spam Tickets (section 2.2.12). |
| Ticket History | Shows every recorded action and change on the ticket. |
| Self Assign | Assigns the ticket to you (section 2.2.7). |
Important: Use only the actions available for the selected ticket and permitted under your role. Some actions are not shown for every ticket or in every list.
Right-Side Panels
Table 2.2.6: Right-side panels
| Panel | Description and usage |
|---|---|
| Status Update | The form you use to change the status and record progress. Visible only when the ticket is assigned to you (section 2.2.6). |
| Customer Feedback | The current feedback on the ticket and a summary of the latest comment. |
| Creator Information | Details of the person who raised the ticket. |
| Assigned Technician Information | Details of the technician assigned to the ticket. |
| Tags | Tags on the ticket. Click the Edit (pencil) icon to add or change tags. |
| Knowledge Documents | Knowledge documents for the ticket's department and category. Open one to check for a known fix before you start. |
| Ticket Timeline | A chronological view of the ticket's progress. |
| People Associated with the Ticket | Everyone involved in handling the ticket. |
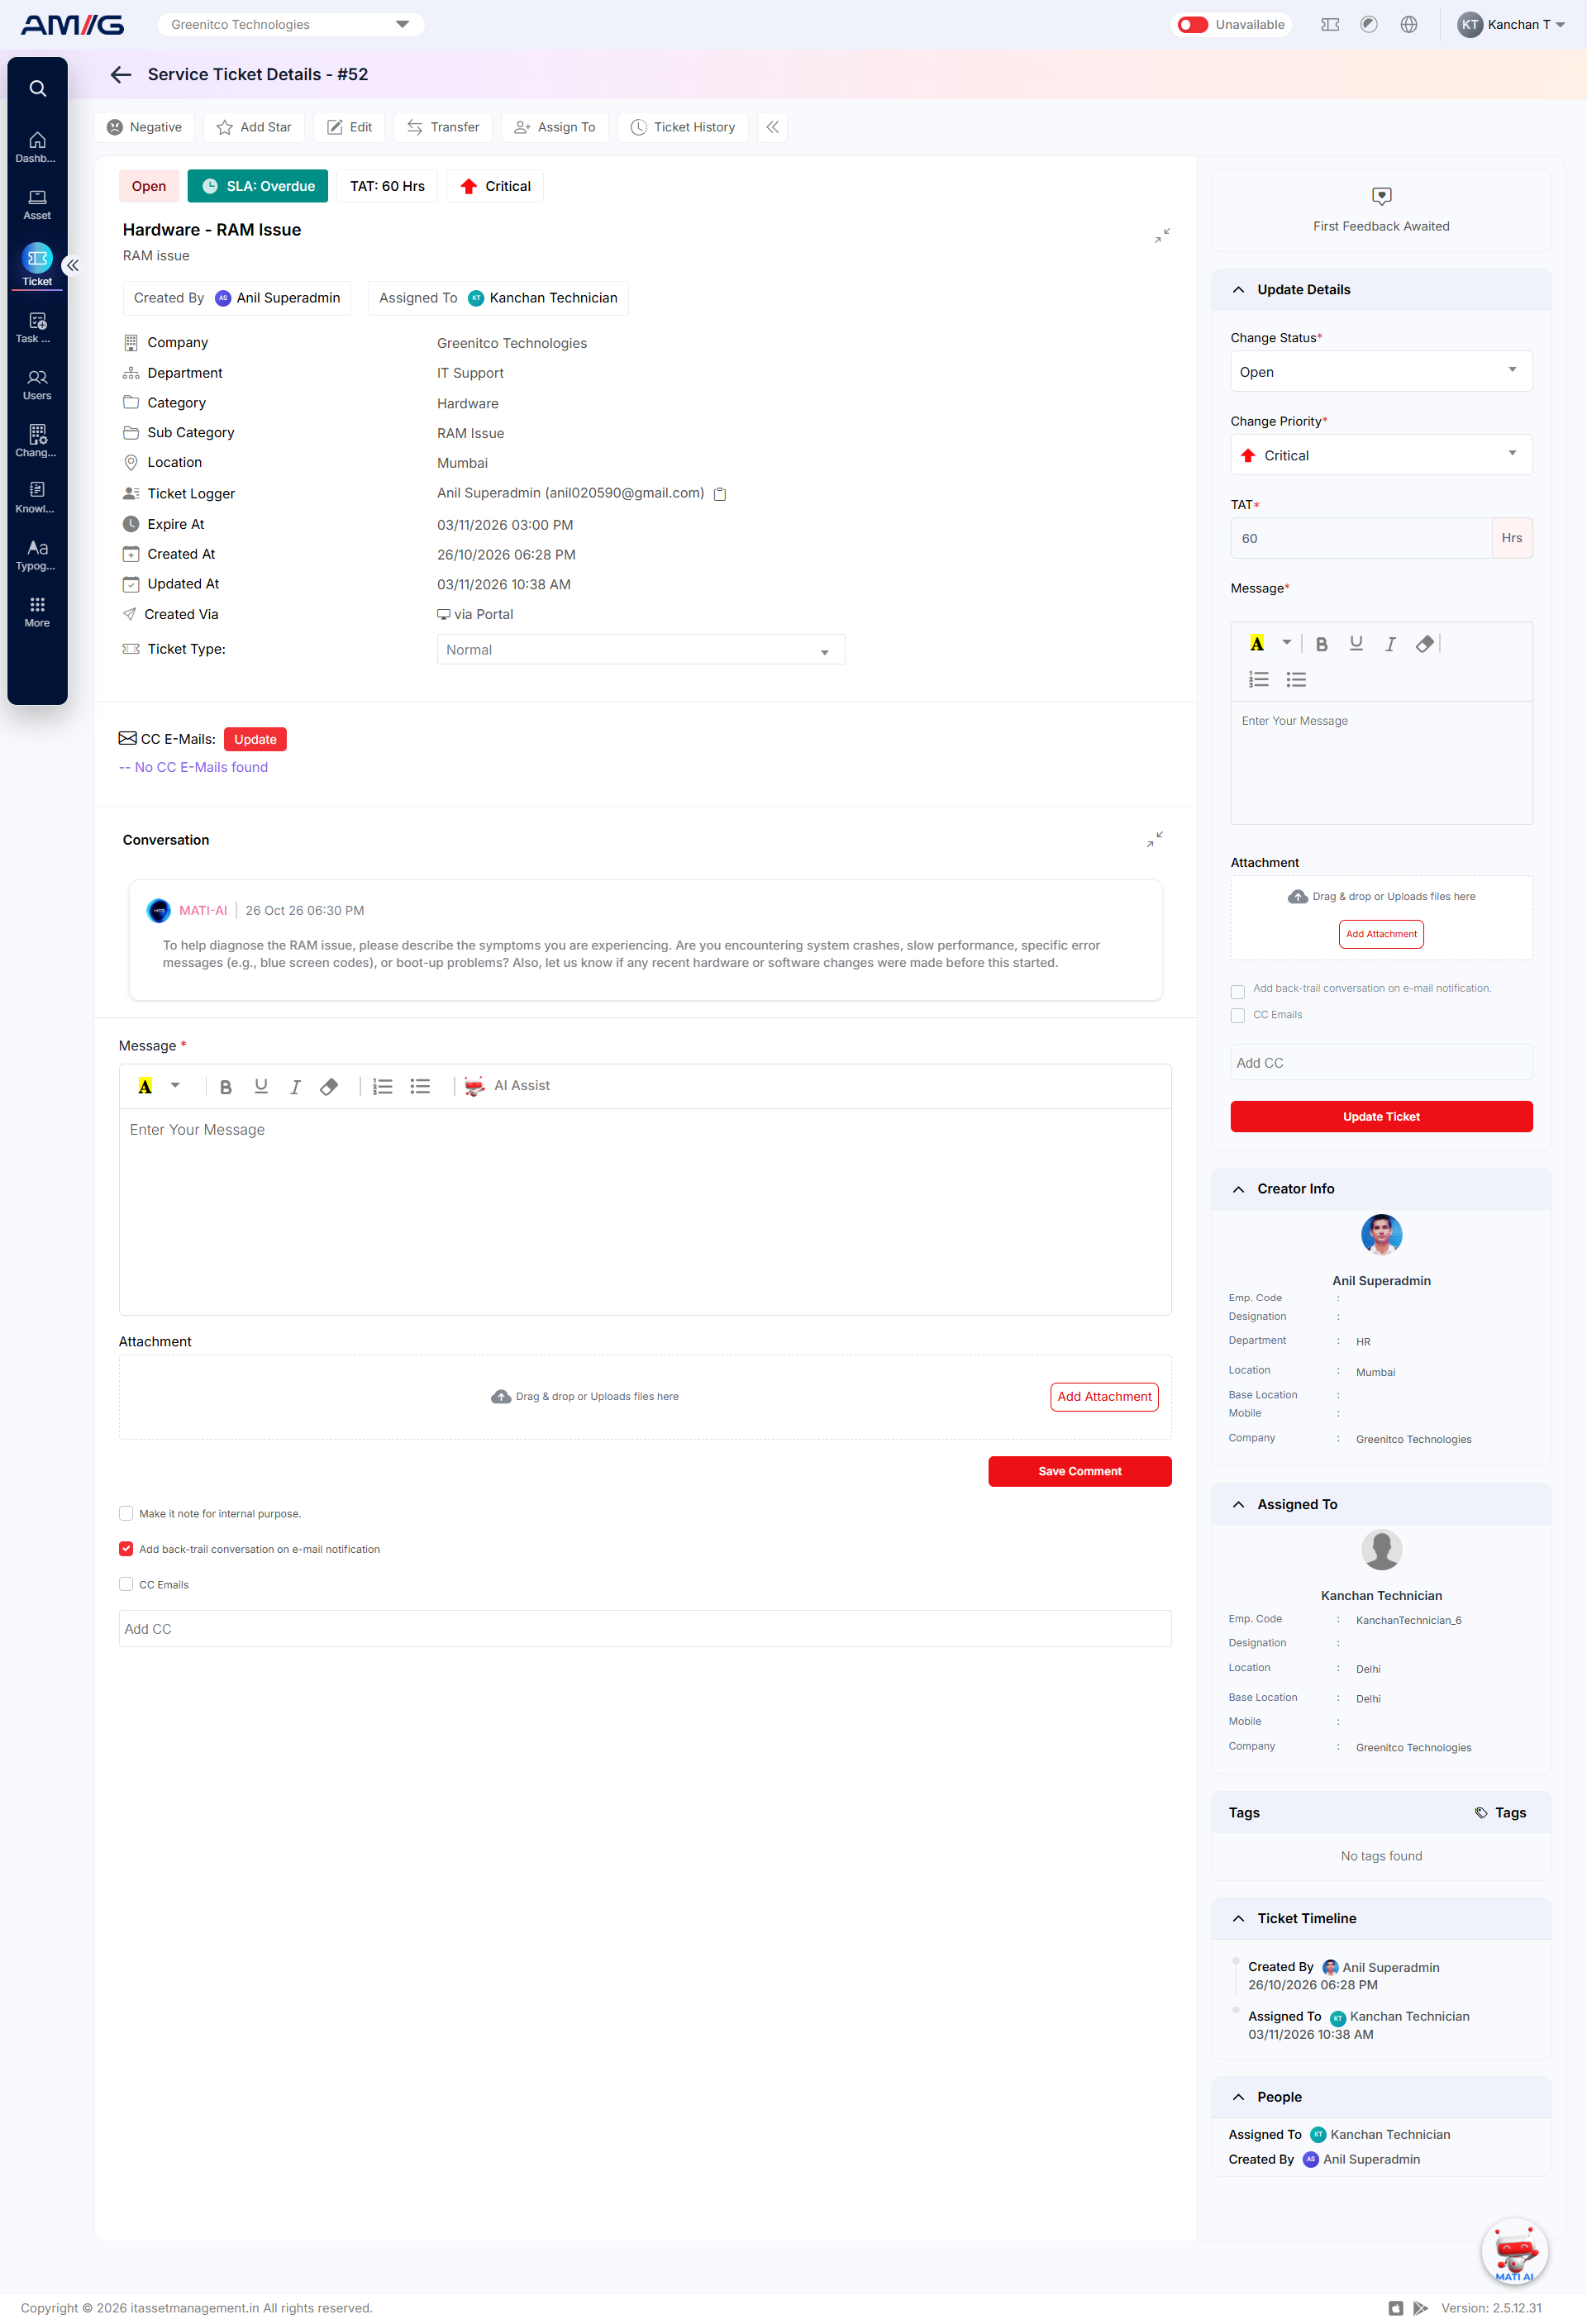
Figure 2.2.3: Ticket Details screen – ticket information and update controls
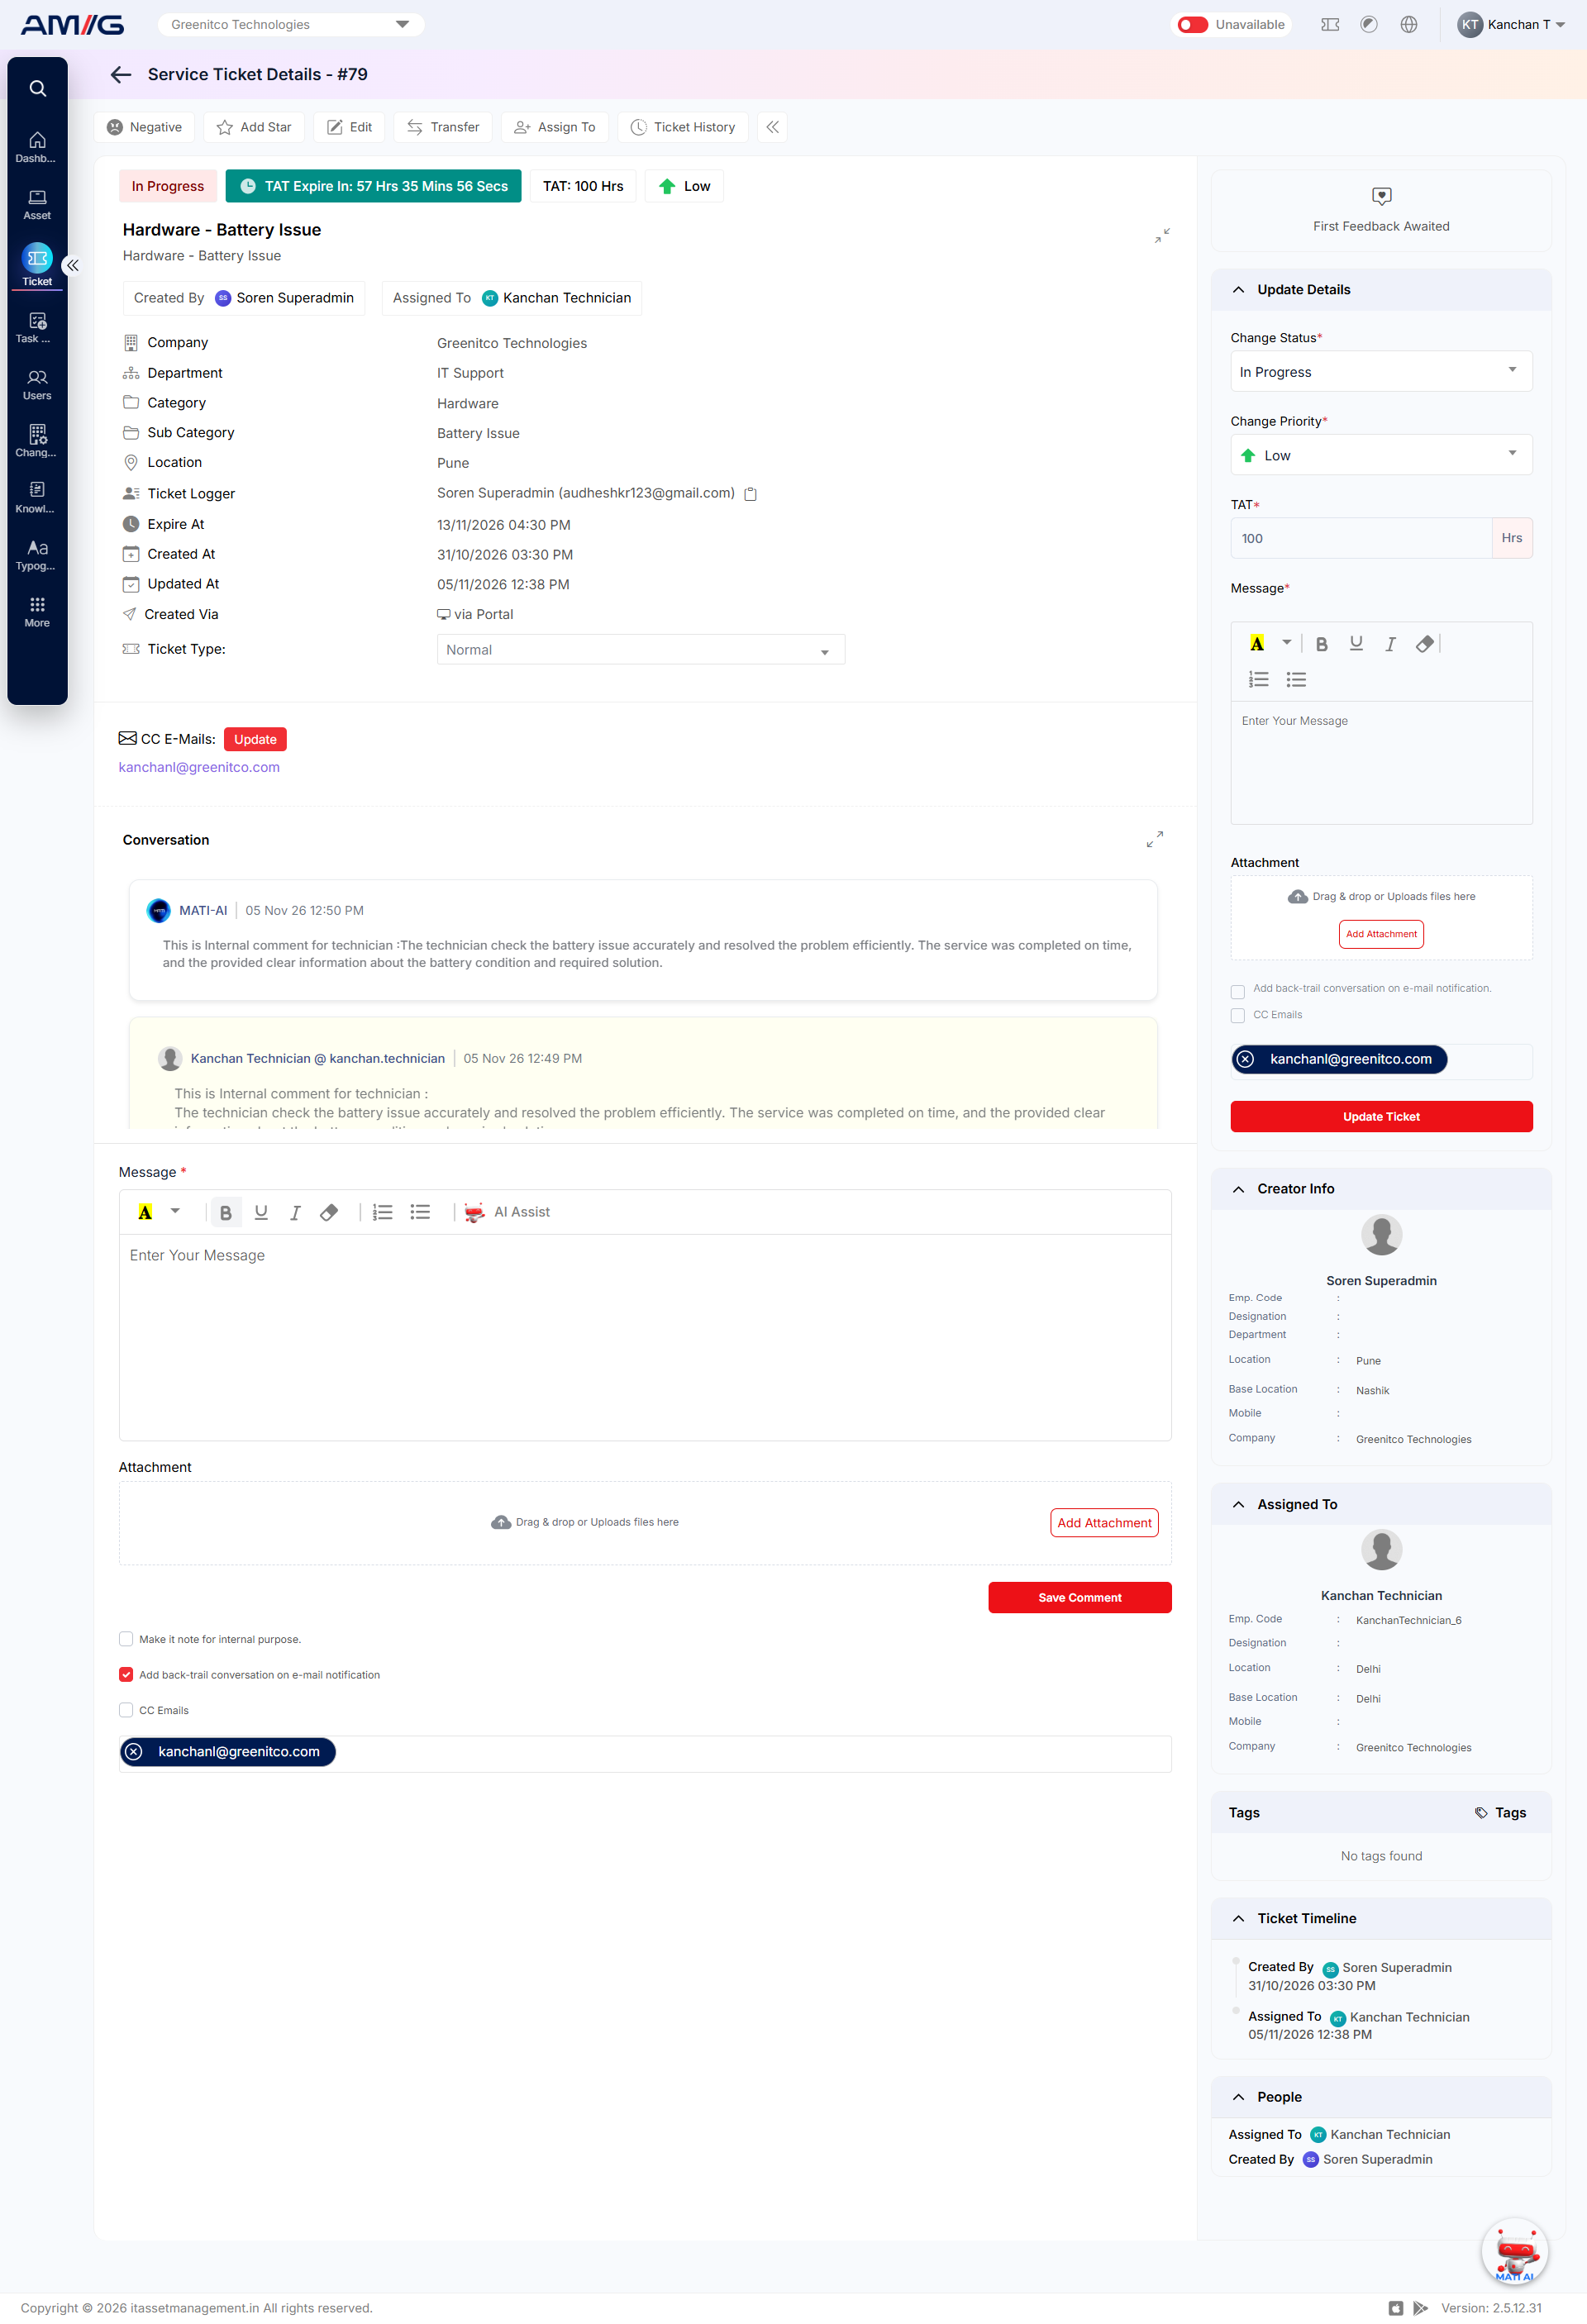
Figure 2.2.4: Ticket Details screen – conversation and ticket timeline
Tip: Before you start work, check the Knowledge Documents panel. A documented fix can save time and keeps answers consistent.
Editing a Ticket
Step 1: Open the ticket and click Edit in the action bar.
Step 2: Review or update the available fields, such as Department, Problem/Request Category, Priority, TAT, Assign To and Device. Required fields are marked with an asterisk (*).
Step 3: Click Update to save, or Cancel to close without saving.
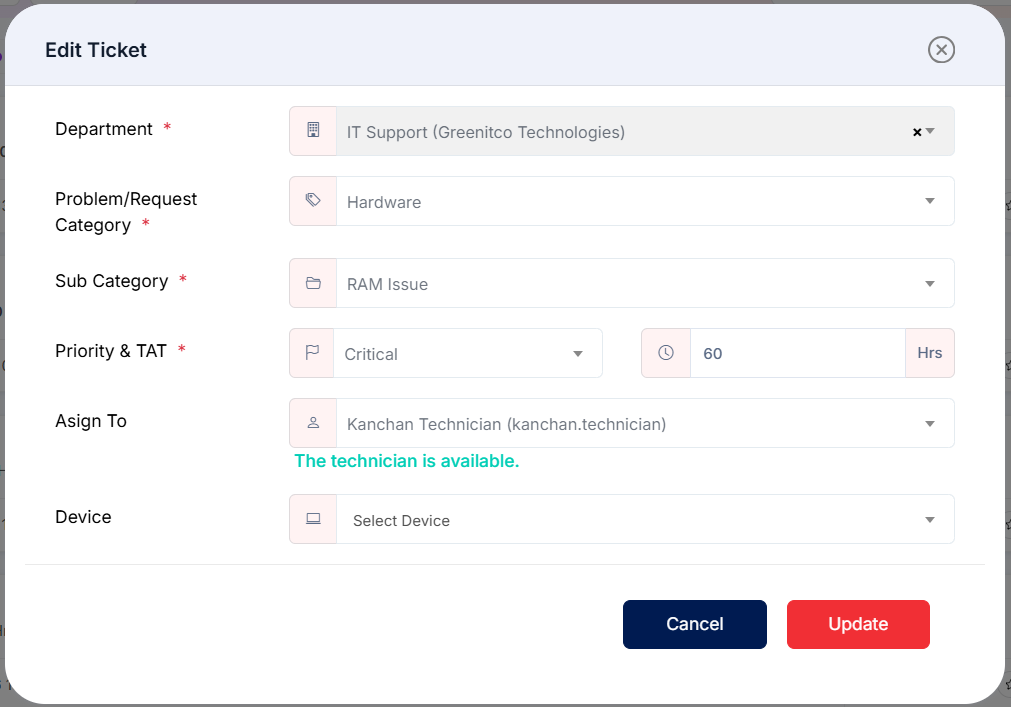
Figure 2.2.5: Edit Ticket dialog
Updating the Ticket Type
Step 1: On the Ticket Details screen, scroll to the Ticket Type drop-down.
Step 2: Select the required ticket type. If custom fields are configured for that type, they appear below; fill them in as needed.
Step 3: Click Save. The ticket type and its custom-field values are updated.
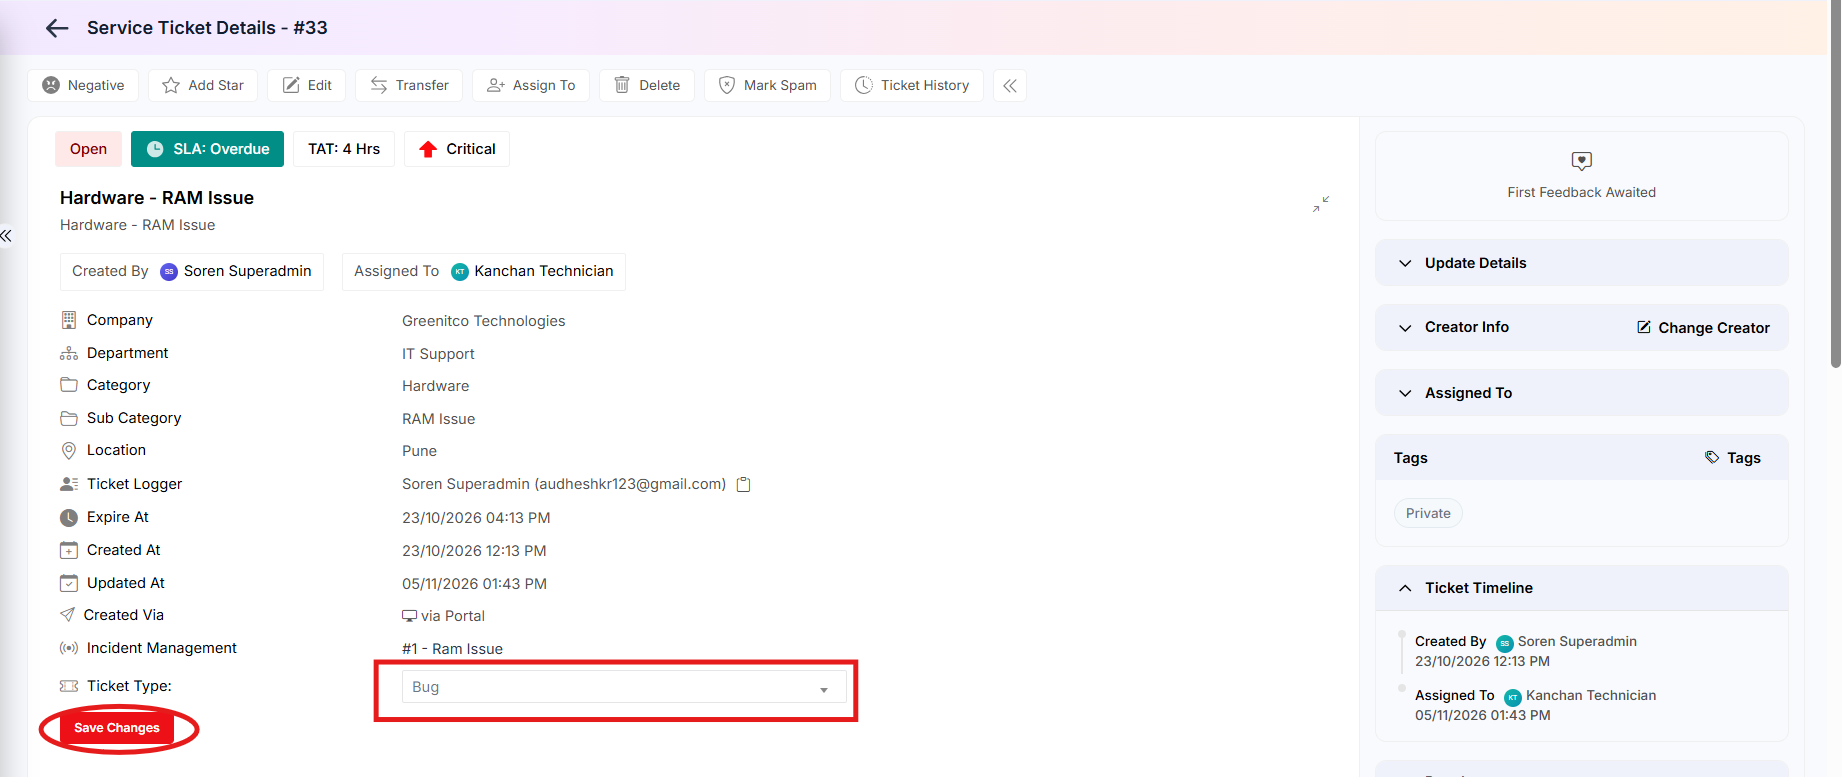
Note: The ticket type can limit which statuses are offered in the Status Update form.
Adding Ticket Tags
Step 1: Click the Pencil icon on the Tags card.
Step 2: Select tags from the drop-down, or type a new tag.
Step 3: Click Save.
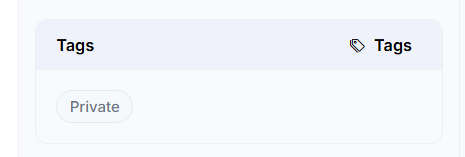
Figure 2.2.6: Tags card
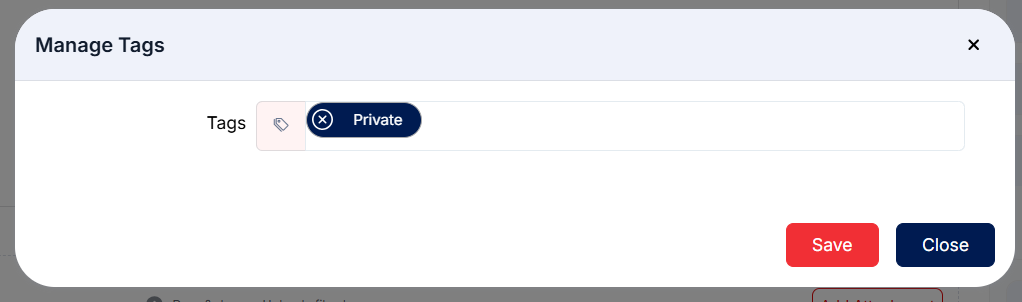
Figure 2.2.7: Manage Tags dialog
Changing the Ticket Creator
If the ticket was raised under the wrong person, you can change the creator, provided this permission has been given to technicians in ticket configuration.
Step 1: Click Change Creator on the Creator Info card.
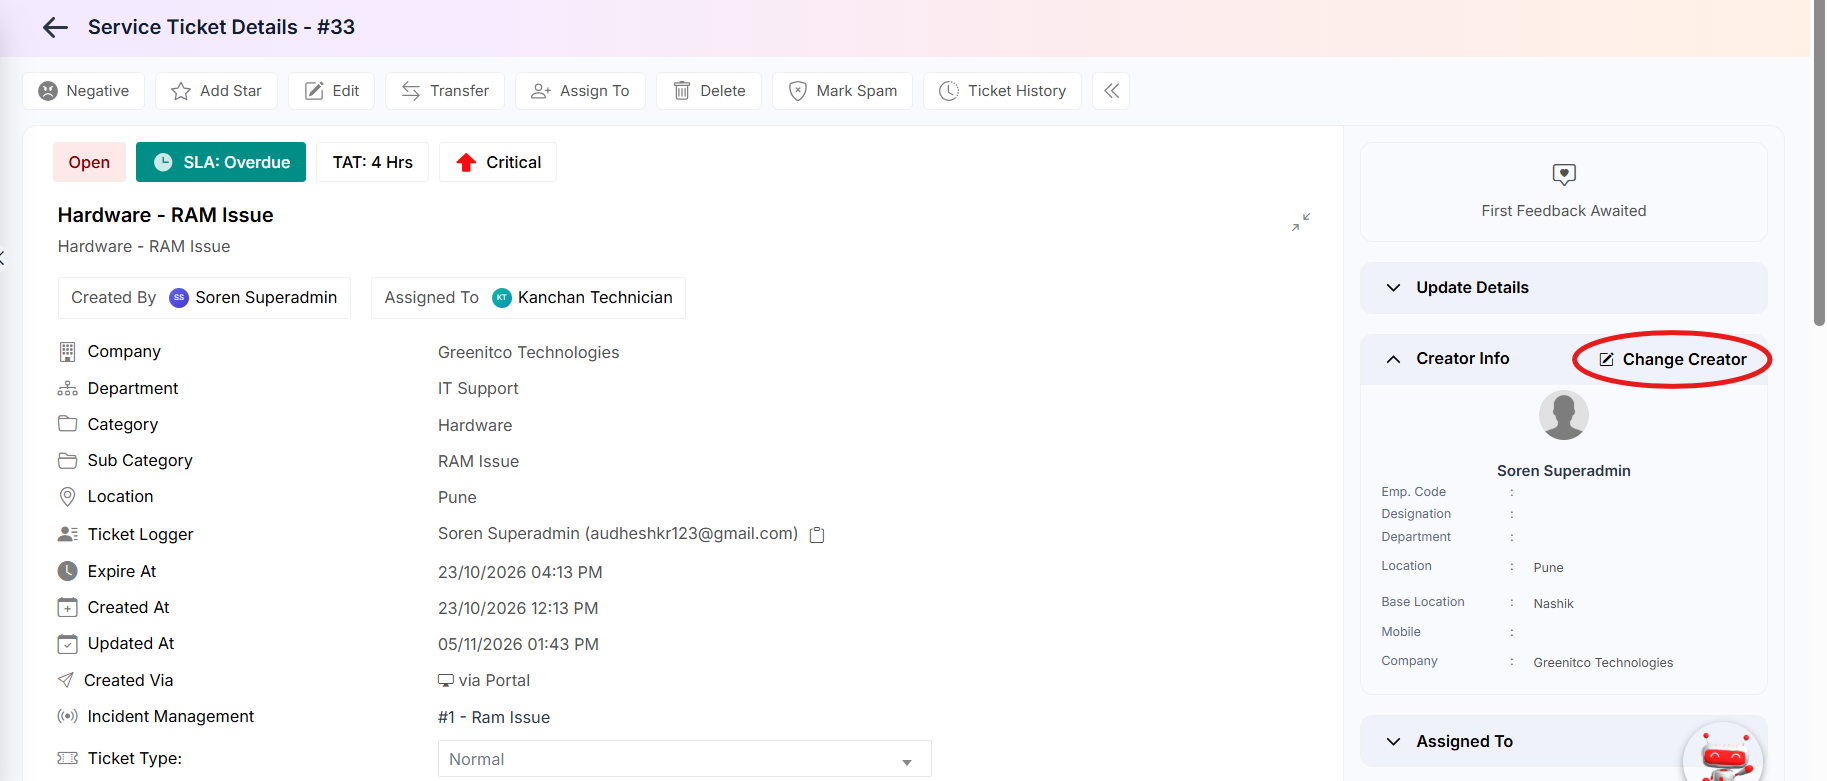 Step 2: Select the correct user from the drop-down.
Step 3: Click Update.
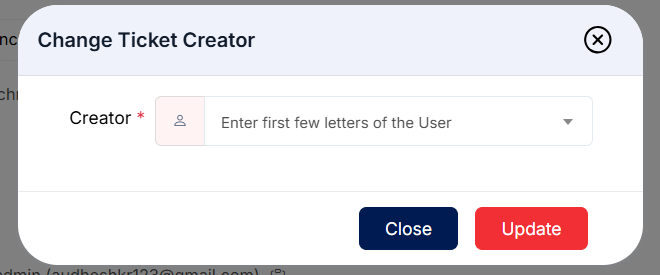
Figure 2.2.8: Change Ticket Creator dialog
Reviewing Ticket History
Step 1: On the Ticket Details screen, or from the History icon on a ticket card, click Ticket History.
Step 2: Review the summary at the top and the chronological timeline. Each event shows the change, who made it (a user or the system) and when.
Step 3: Close the history window to return to the ticket.
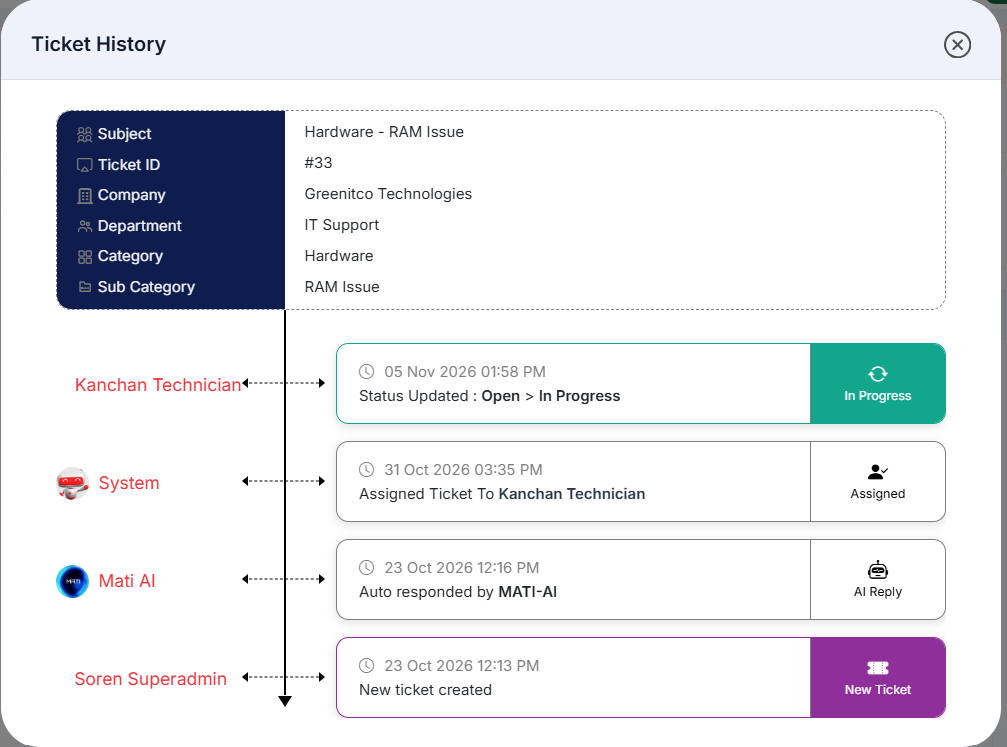
Figure 2.2.9: Ticket History timeline
Filtering, Sorting and Custom Views
Filter the list
Step 1: Click Filter on the ticket list.
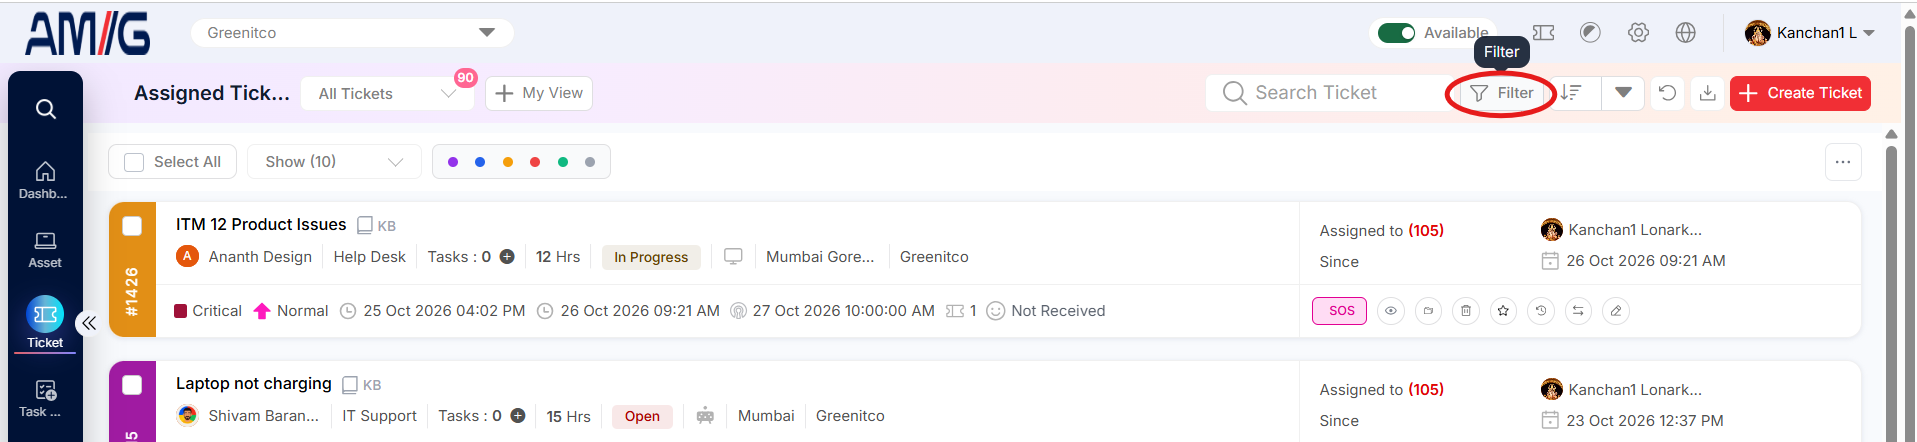 Step 2: Select one or more criteria. Depending on your permissions, you can filter by status, priority, department, problem category, subcategory, ticket type, tag, ticket handler, creator, logger, created via, location, device, task, VIP ticket, SLA breached, feedback, star, custom field, and date or date range.
Step 3: Click Filter to apply the criteria, or Clear to reset them.
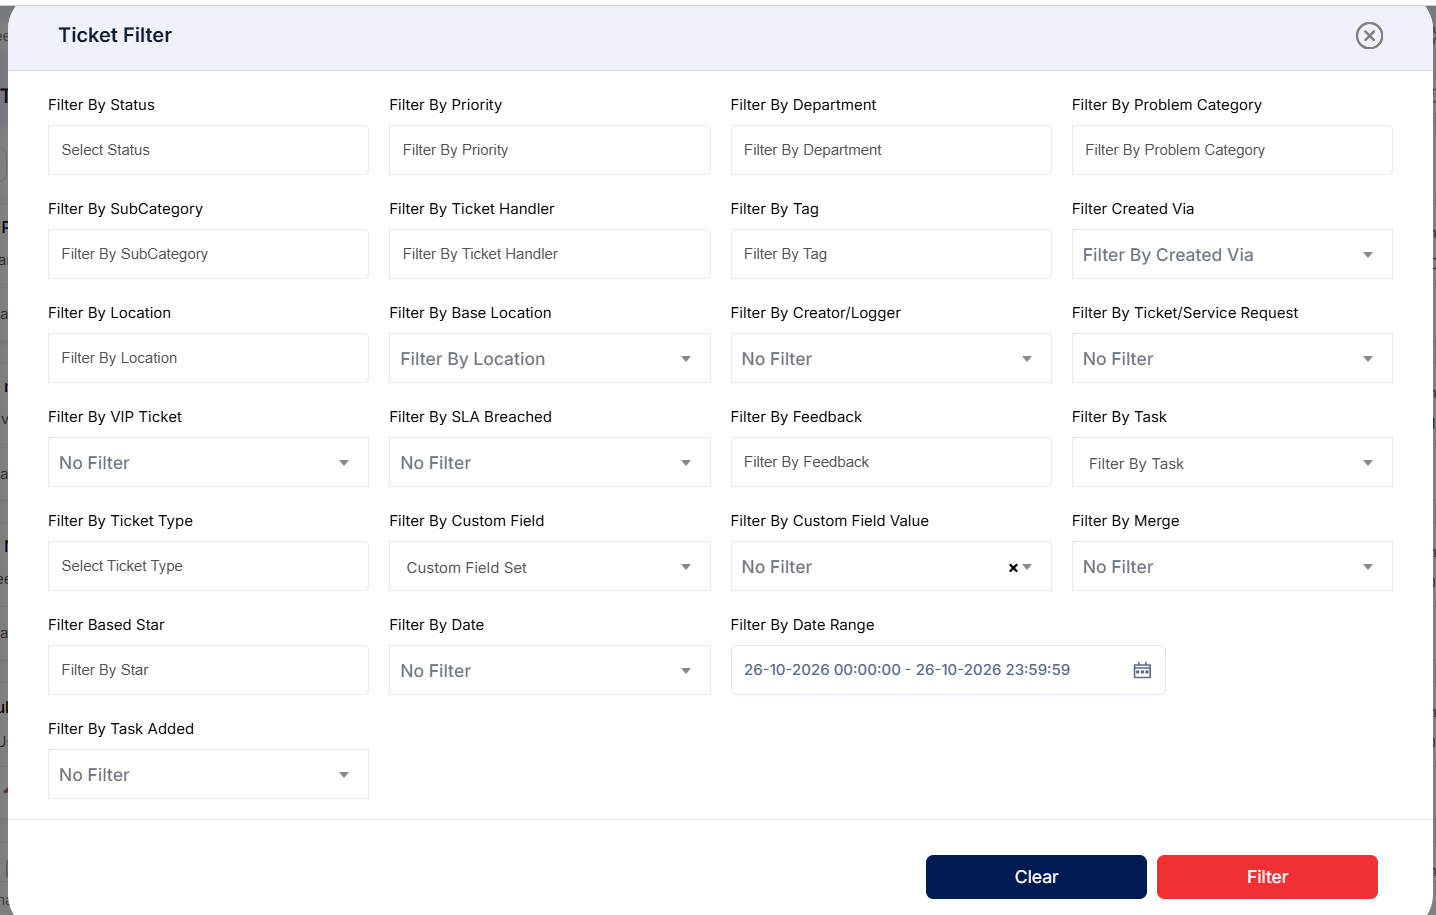
Figure 2.2.10: Ticket Filter options
Sort the list
Step 1: Open the sorting field menu on the ticket list.
Step 2: Select the field to sort by: Ticket ID, Created By, Status, Priority, Assigned To, Created On, Updated On, Reopened On, Star, TAT Expire or Feedback.
Step 3: Use the sort direction control to change the order.
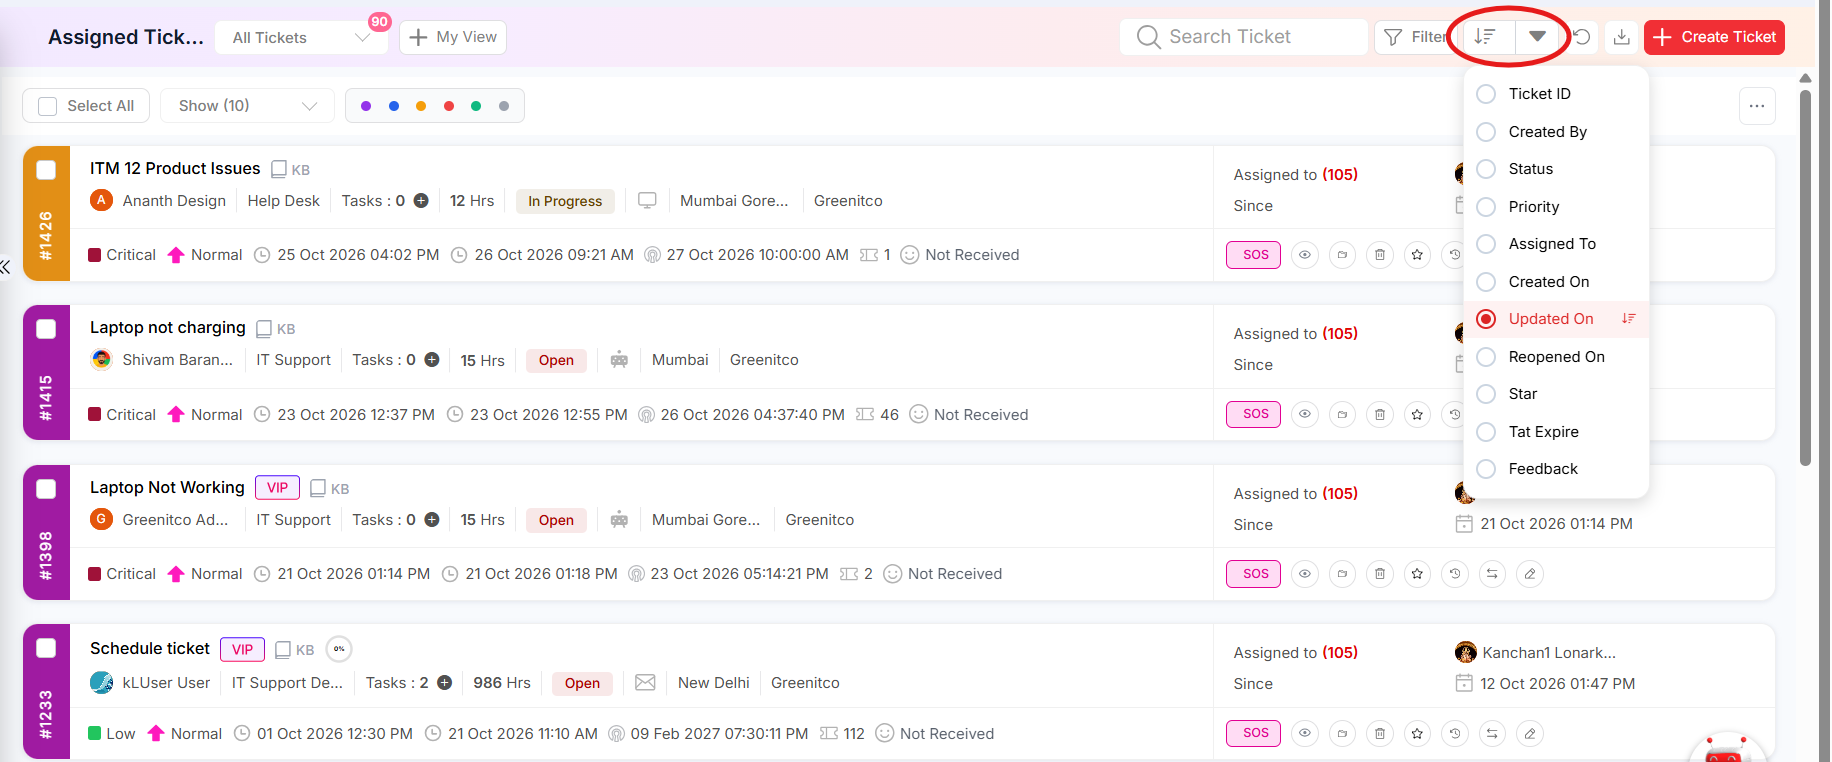
Tip: Sorting by TAT Expire puts the tickets closest to breaching their SLA at the top – a good way to plan your day.
Create a custom status view
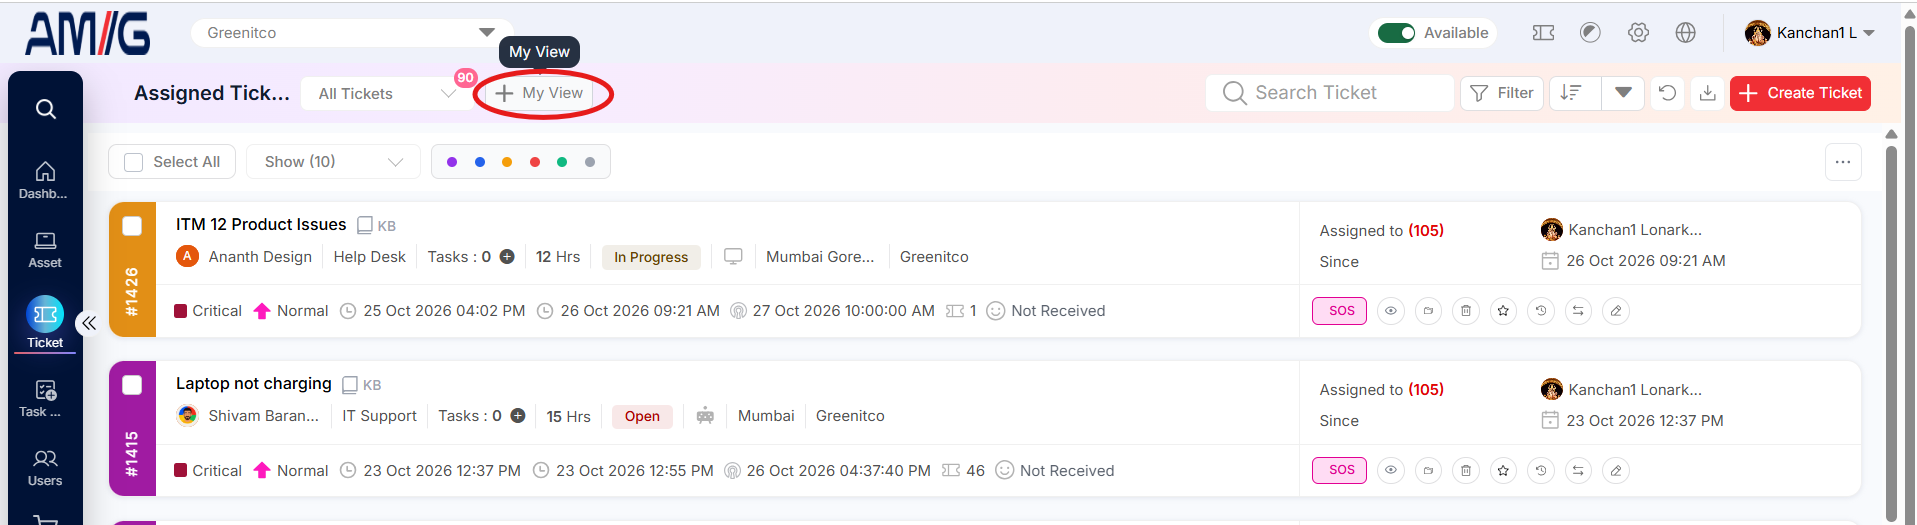
Step 1: Click My View beside the ticket-list selector to open Custom Status View.
Step 2: Enter a View Name and choose the statuses to include.
Step 3: Click Create. The saved view appears in the view selector; select it to filter the list.
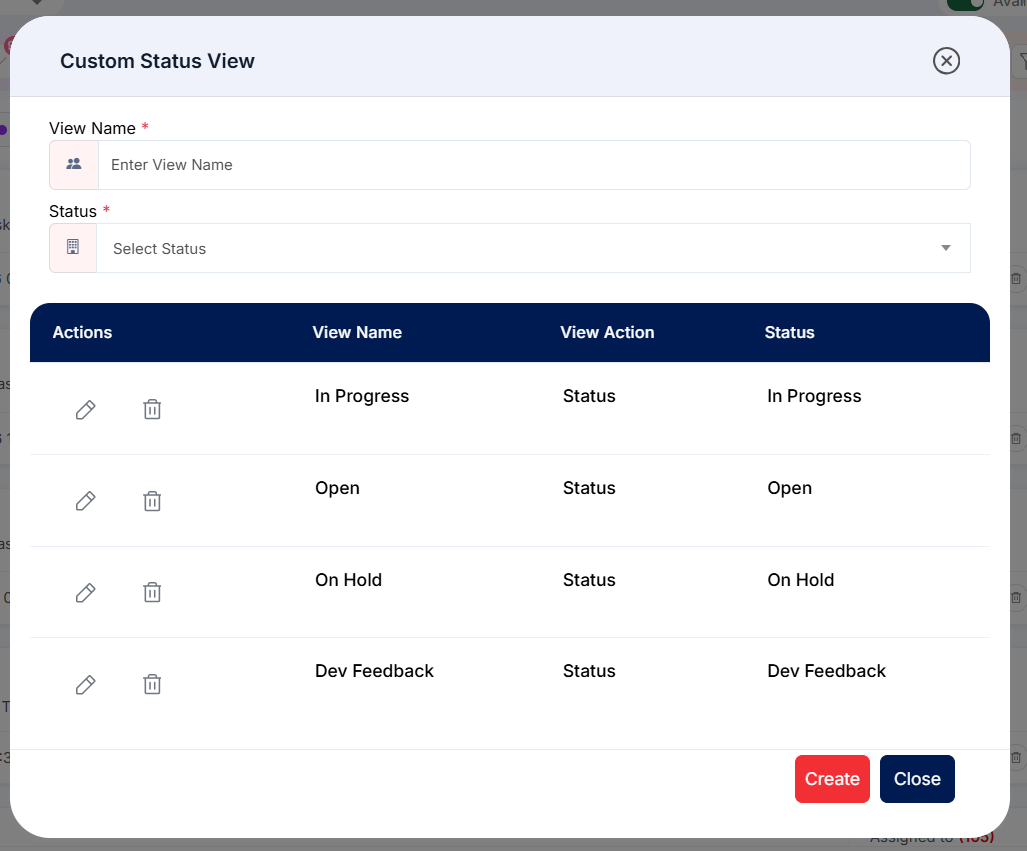
Figure 2.2.11: Custom Status View configuration
Reviewing Customer Sentiment
Step 1: Click the sentiment action on the ticket card, or Customer Sentiment on the Ticket Details screen.
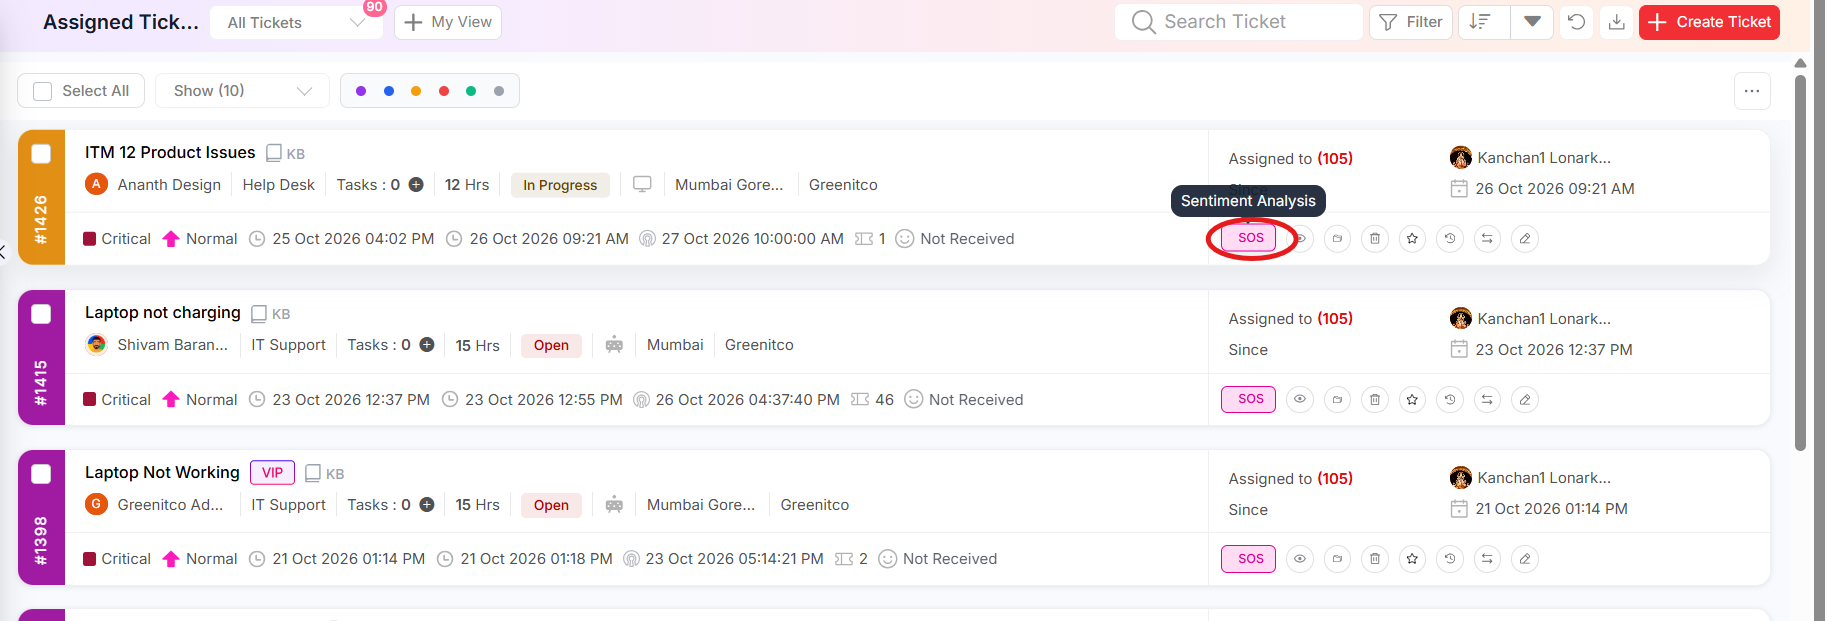
Step 2: Review the sentiment score, its classification, the explanation and the overall tone detected in the conversation.
Step 3: Use the result as an aid when prioritising follow-up. It is an automated analysis, so consider it alongside the ticket context.
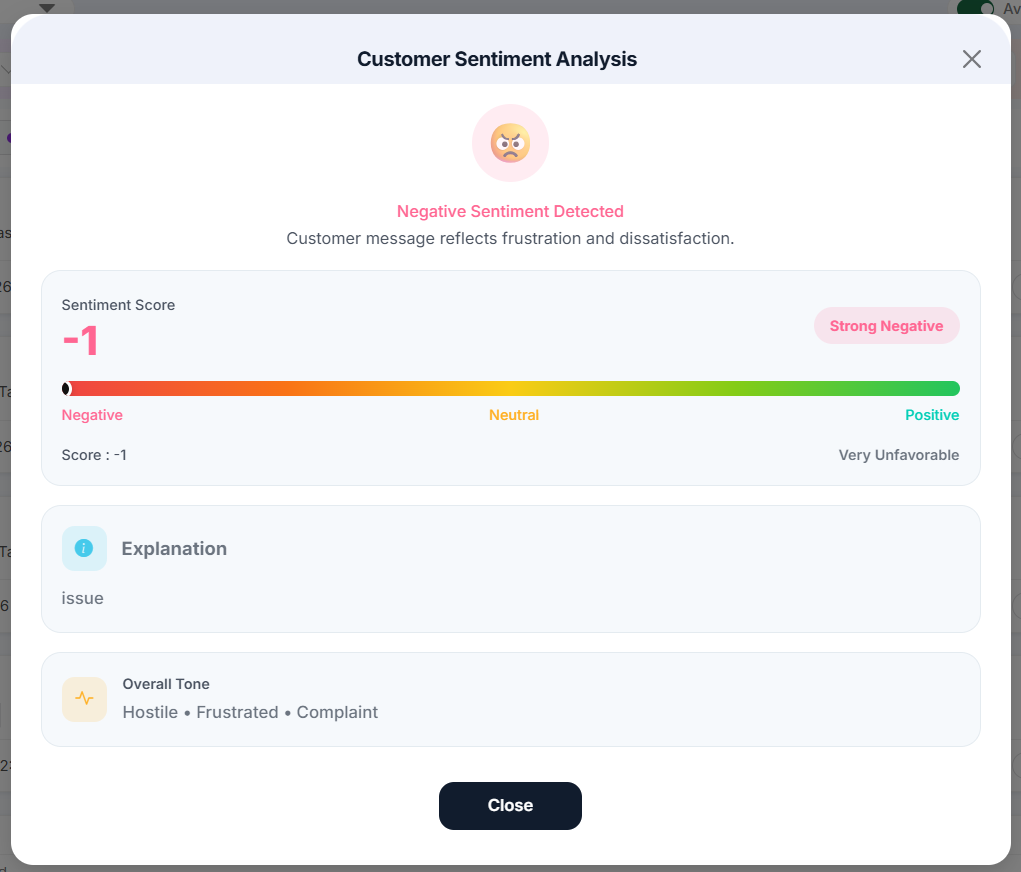
Figure 2.2.12: Customer Sentiment Analysis
Exporting Tickets
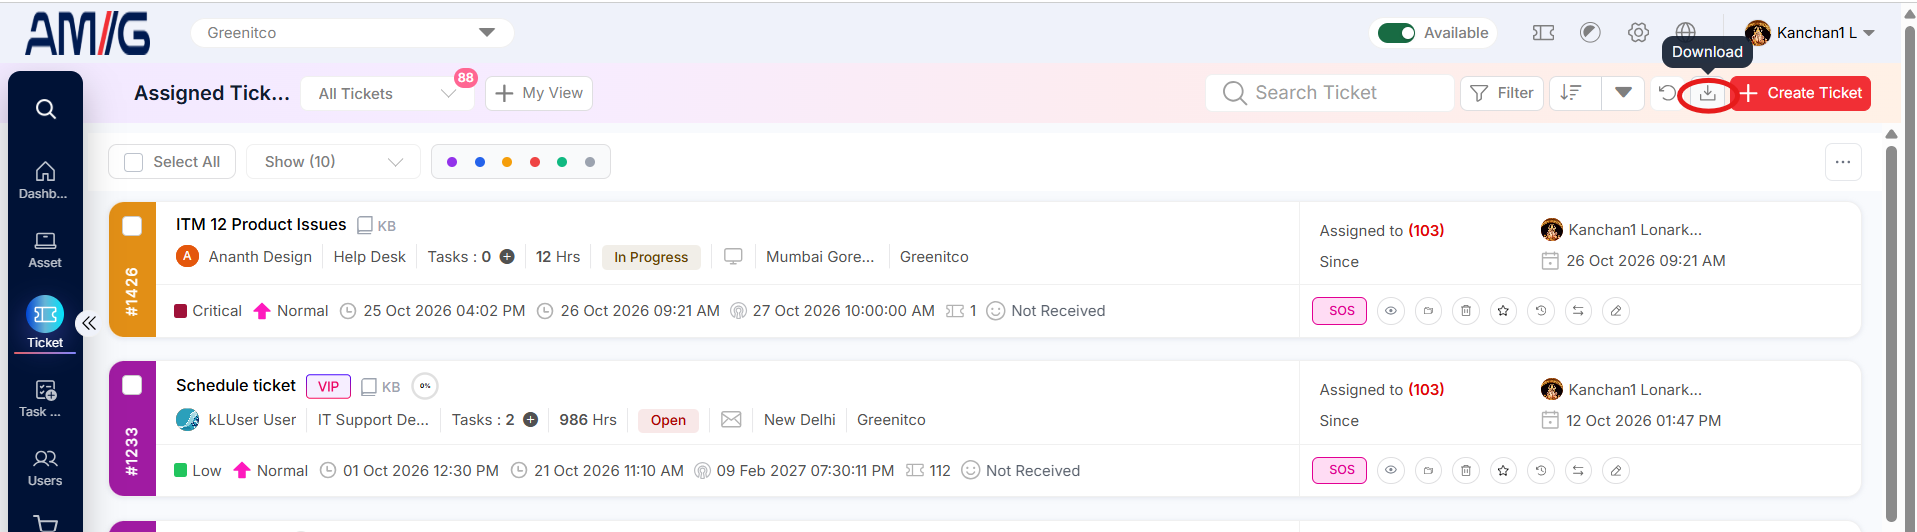
Step 1: On the ticket list, click the Download icon.
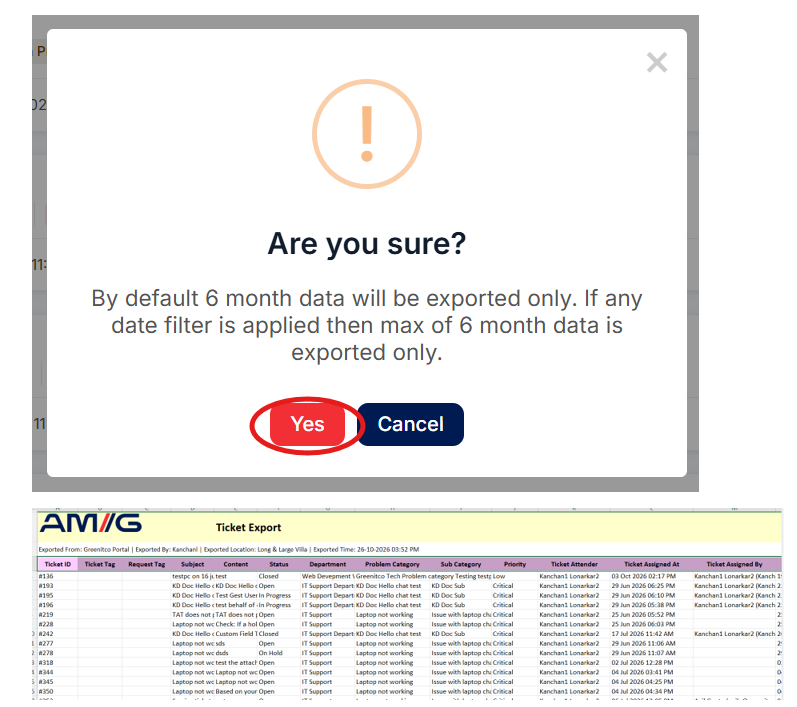
Step 2: Read the confirmation prompt. By default the export covers the last six months, and only six months of data can be downloaded per export. If filters are applied, only matching tickets are included.
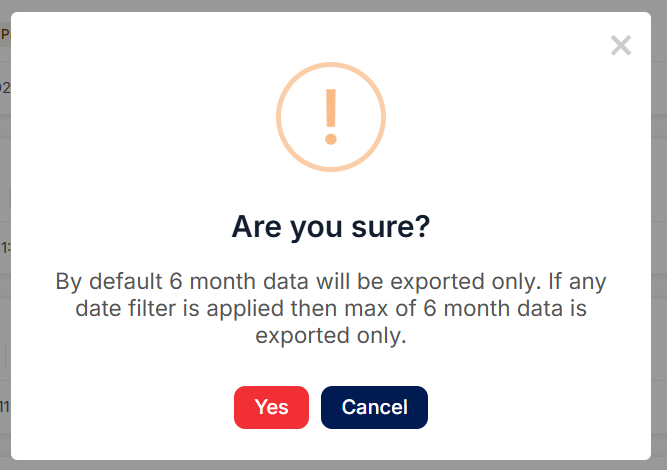
Step 3: Click Yes. The tickets are downloaded as an Excel file.