

Step 1: Open Sidebar > Ticket > Ticket Incident. Use Search to find a record, Filter to narrow the list and Refresh to reload it. Scroll horizontally to see more columns.
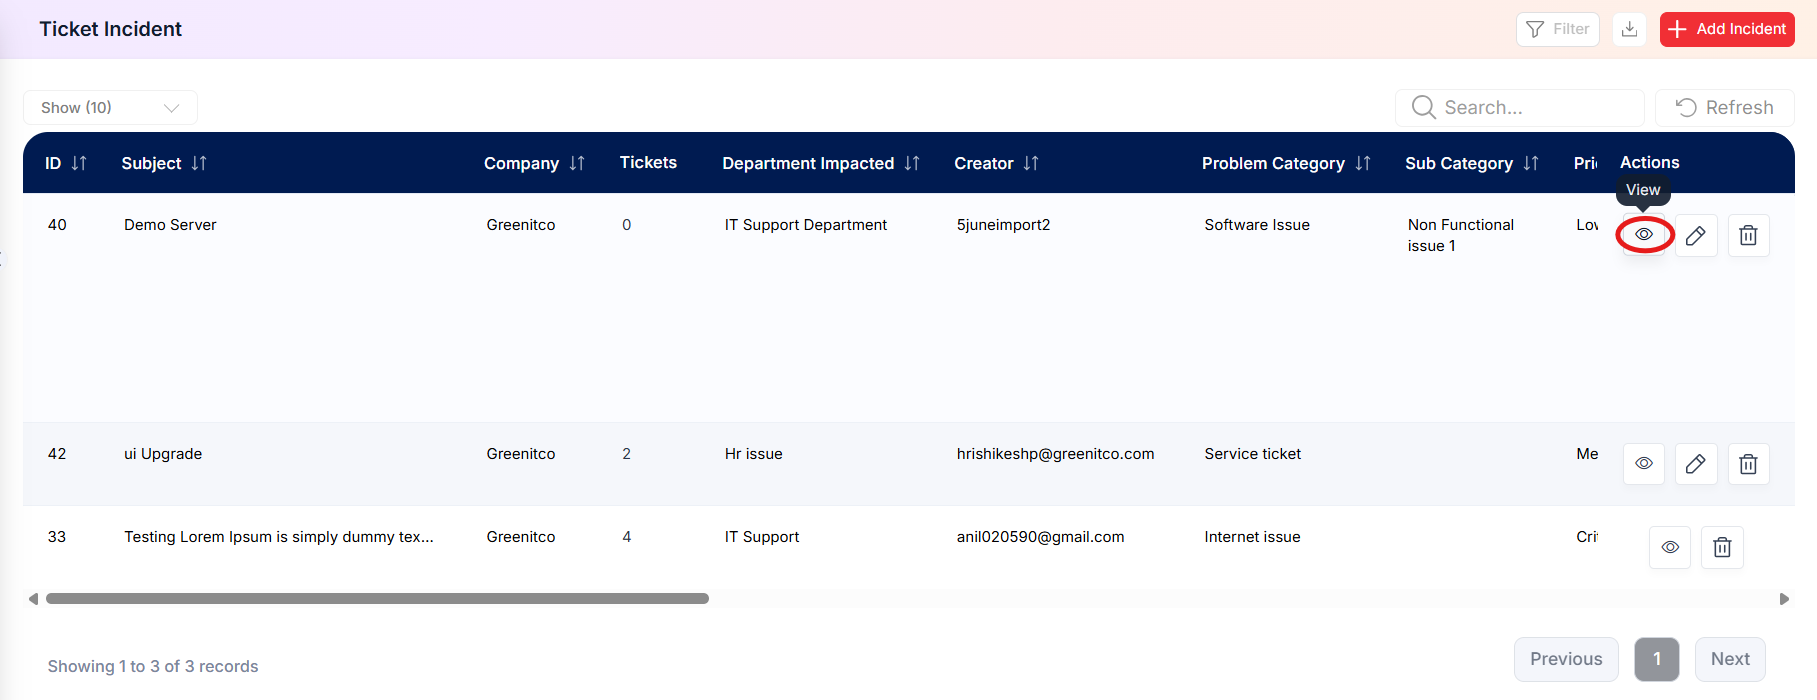
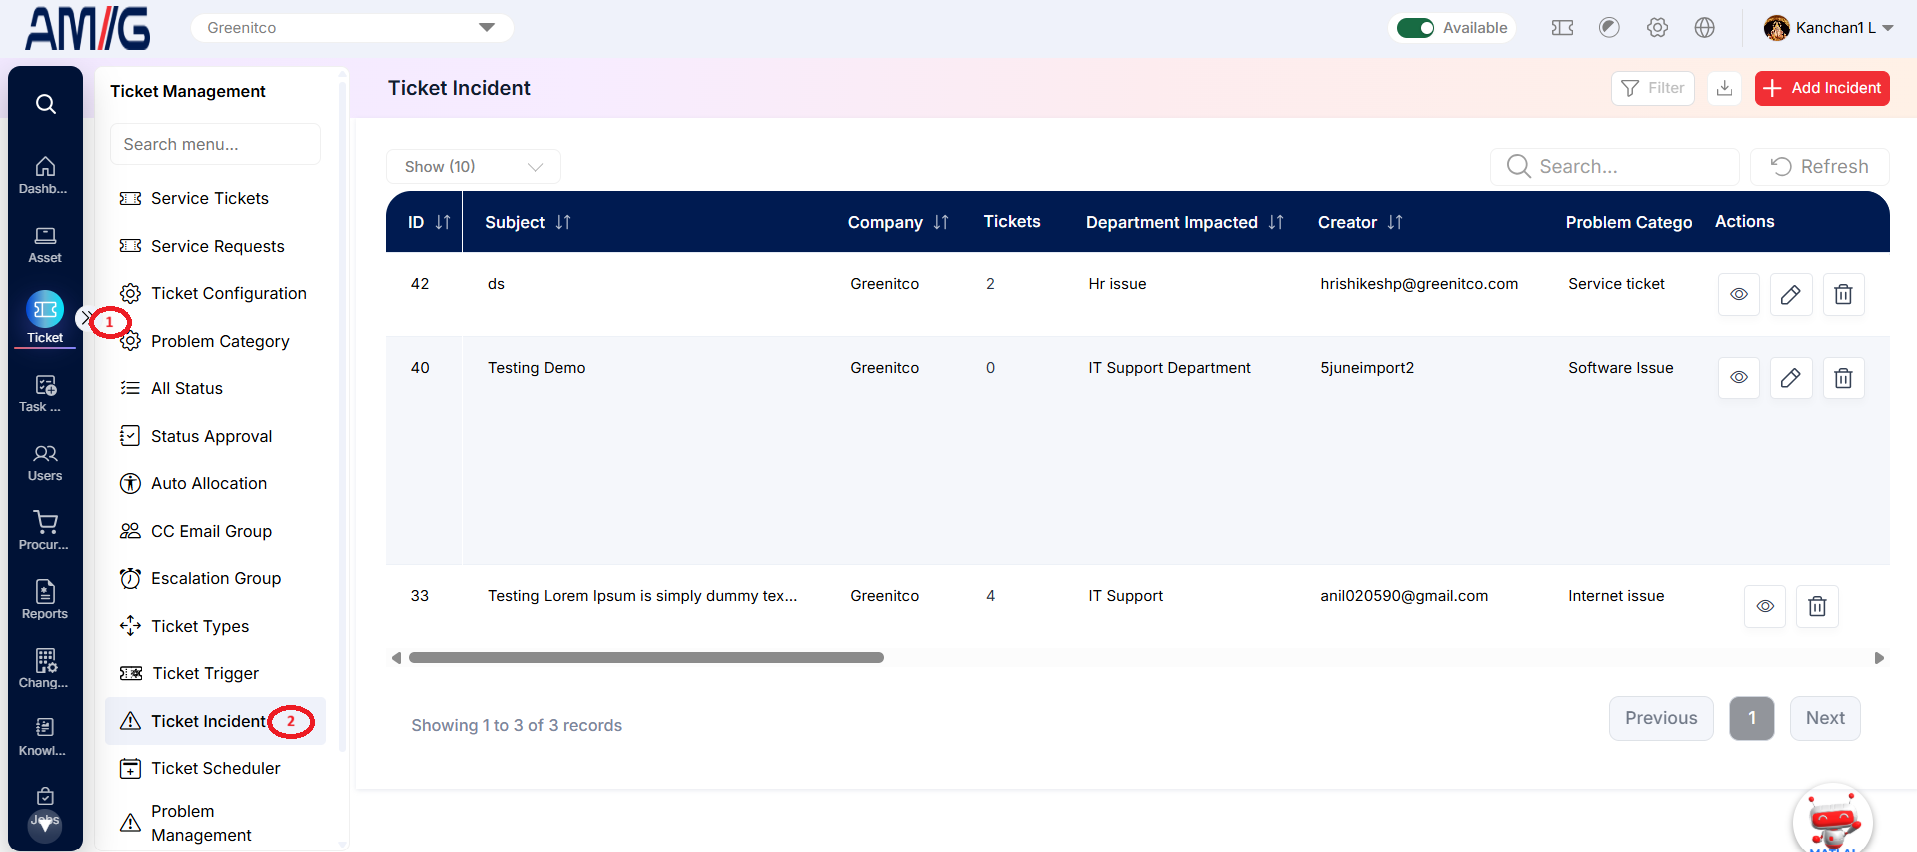 Step 2: To review an incident, click its View (eye) icon.
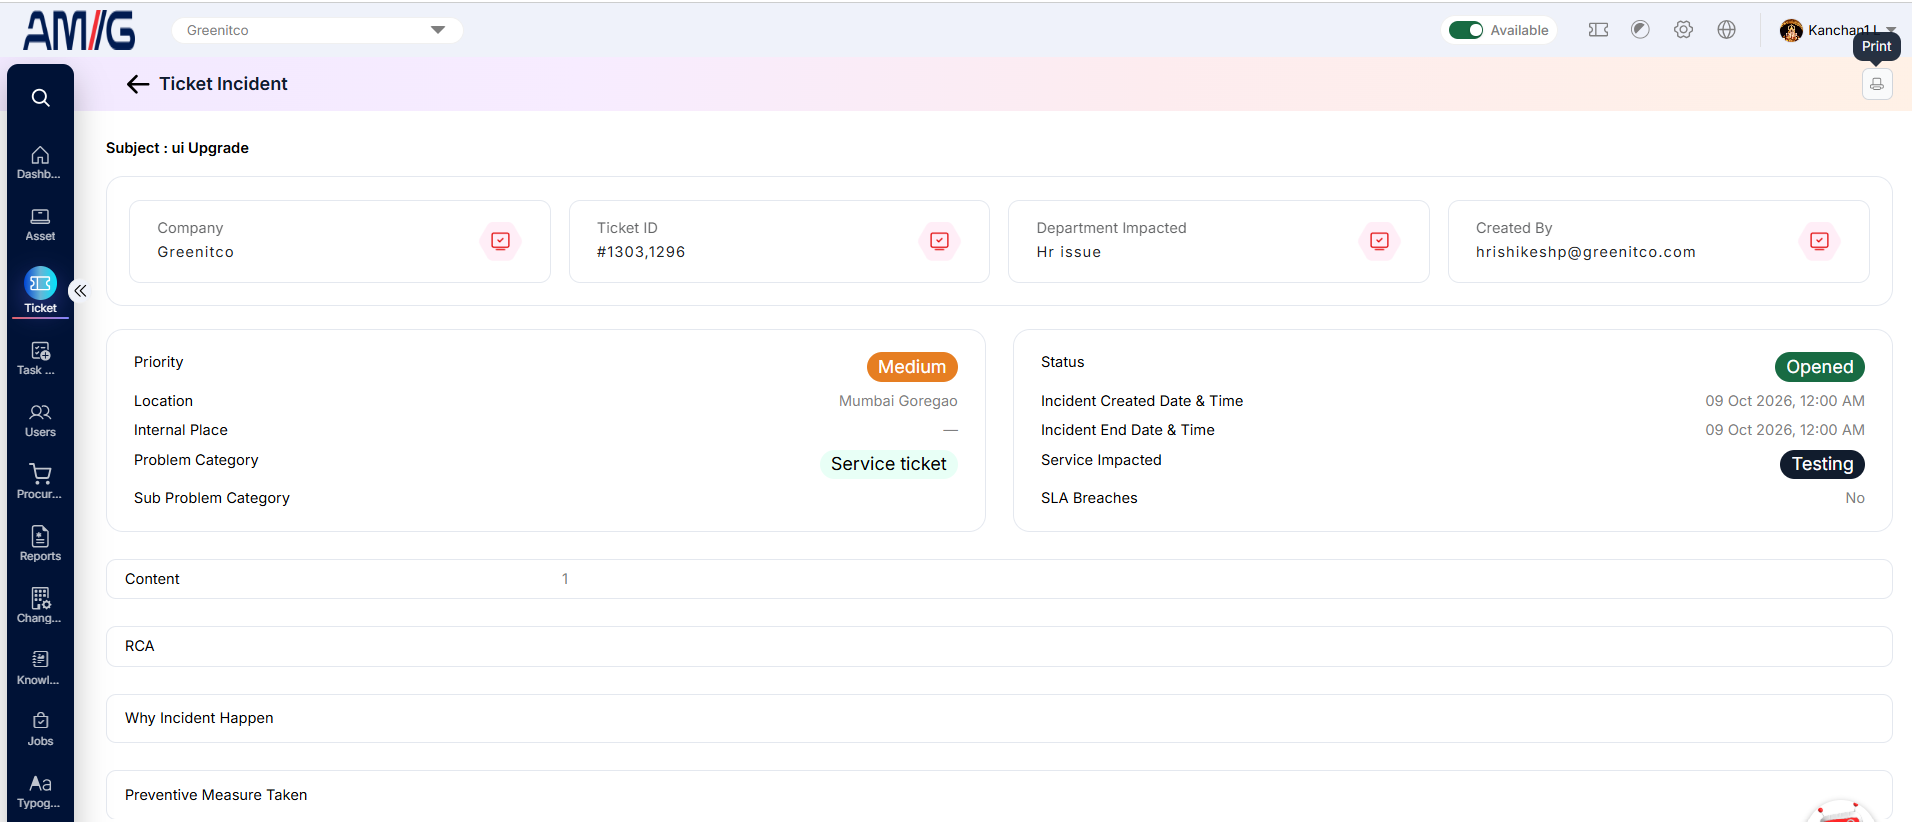
 Step 3: Review the company, linked tickets, affected department, priority, location, category, dates, service impact and SLA-breach information, then the Content, RCA, Why Incident Happened and Preventive Measure Taken sections.
 Step 4: Use the print control to print the incident details if required.
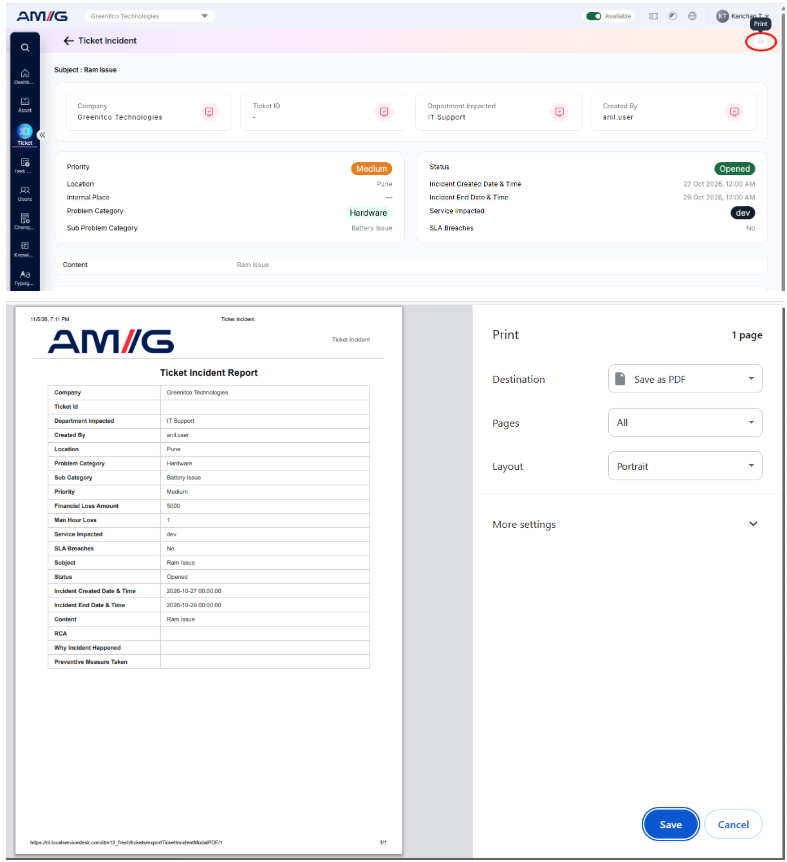
Table 2.3.1: Ticket Incident list columns
| Column | Description |
|---|---|
| ID / Subject | Unique identifier and short title of the incident. |
| Company | Company associated with the incident. |
| Tickets | Tickets linked to the incident. |
| Department Impacted | Department affected by the incident. |
| Creator | User who reported or created the incident. |
| Problem Category / Sub Category | Classification of the incident. |
| Priority | Priority assigned to the incident. |
| Financial Loss Amount / Man Hour Loss | Recorded financial impact and work-hour loss. |
| Actions | View, edit and delete controls. |
Filtering incidents
Step 1: Click Filter.
Step 2: Select criteria such as RCA Status, Status, Priority, Department, Problem Category, Sub Category, Creator or SLA Breached.
Step 3: Click Apply Filter, or Clear to reset.
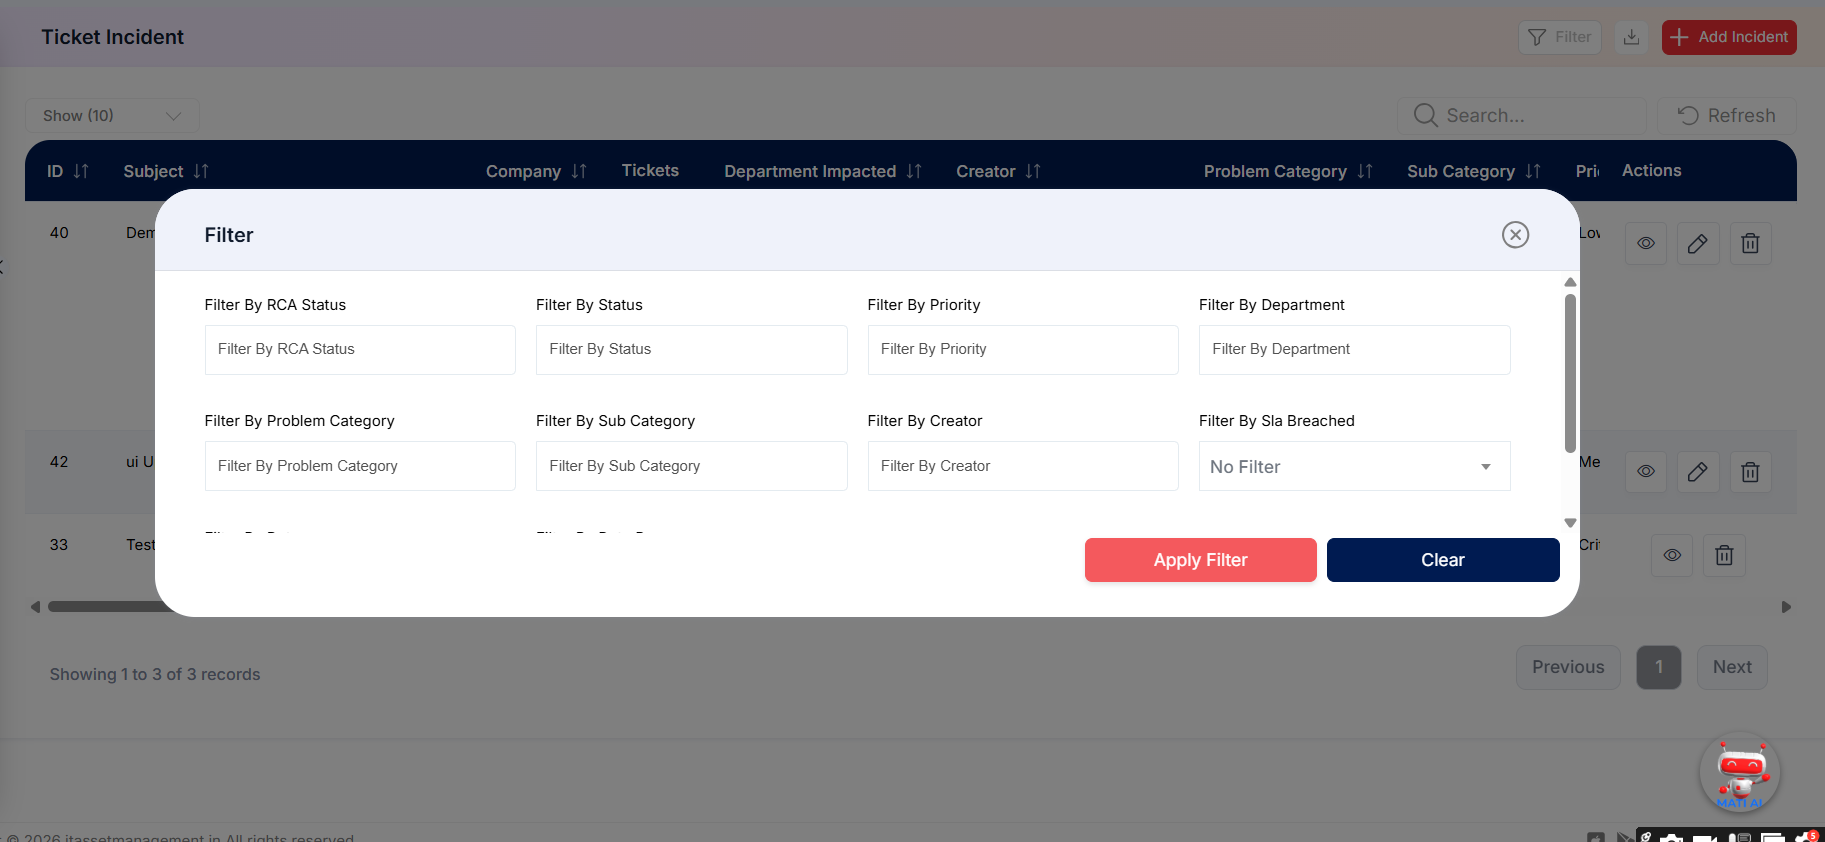
Figure 2.3.2: Ticket Incident filter options