

Introduction
The Report Email Triggers feature allows administrators to configure automated email delivery of selected reports to designated users. It eliminates the need for users to log in to the AMG portal and manually access reports, ensuring that relevant report information is delivered directly to their email inboxes.
Administrators can configure daily email report triggers by specifying the recipient, report name, and relevant department. This provides control over which report is shared with which user and ensures that report distribution is aligned with the recipient's department-level access.
Once configured and enabled, the email trigger automatically sends the selected report to the designated recipients every day in the morning, according to the system-configured schedule.
This feature helps administrators:
Automate report distribution: Schedule daily delivery of selected reports without manual intervention.
Control report recipients: Specify the users who should receive the reports.
Manage department-wise reporting: Select the relevant departments for which report information should be shared.
Maintain access-based distribution: Ensure report delivery is aligned with the recipient's department access.
Improve reporting visibility: Keep management and relevant users informed through regular email updates.
Overall, Report Email Triggers simplify routine report sharing, reduce manual effort, and ensure that users receive relevant operational information on a consistent basis.
Navigation Path: Sidebar > Reports > Service Ticket > Email Trigger
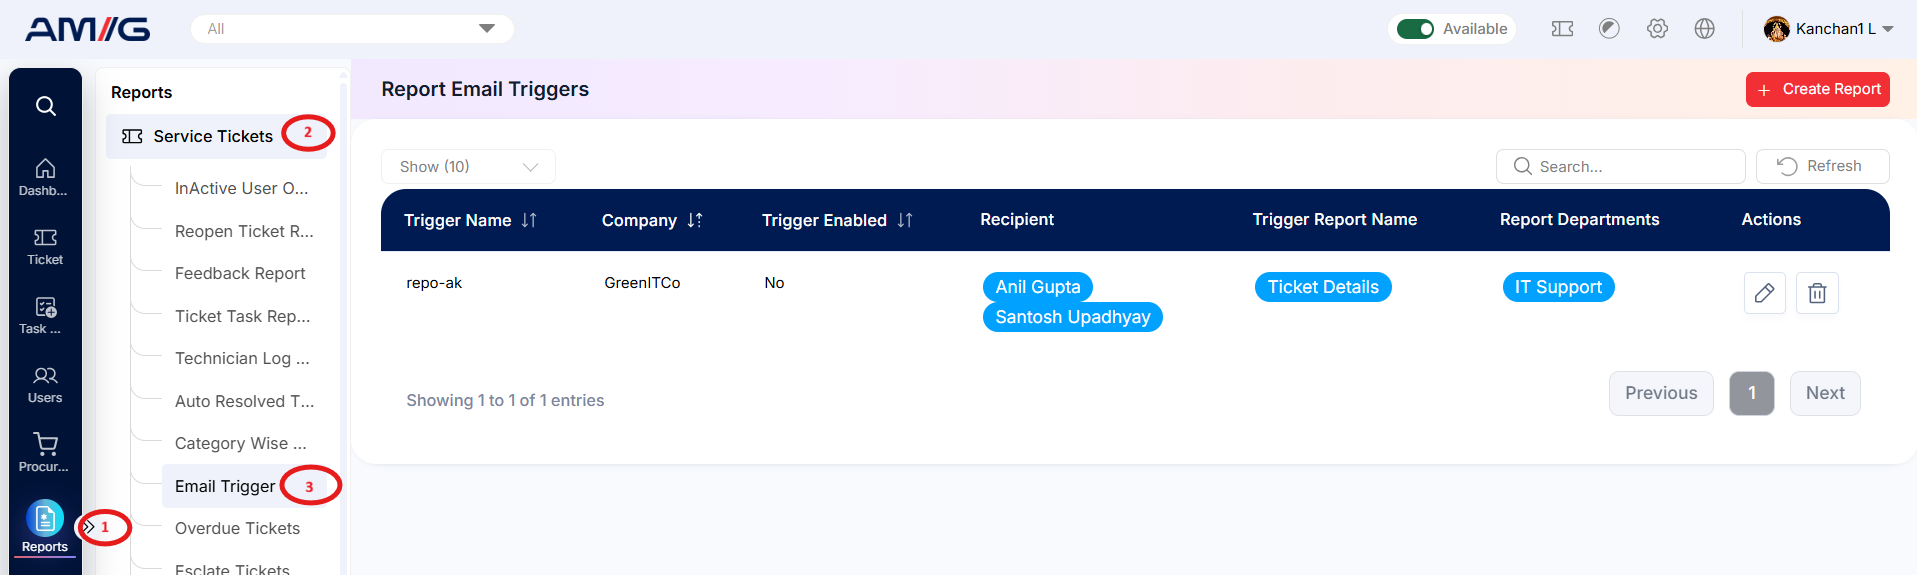
Viewing Email Triggers
The Email Trigger list shows every trigger that has been set up.
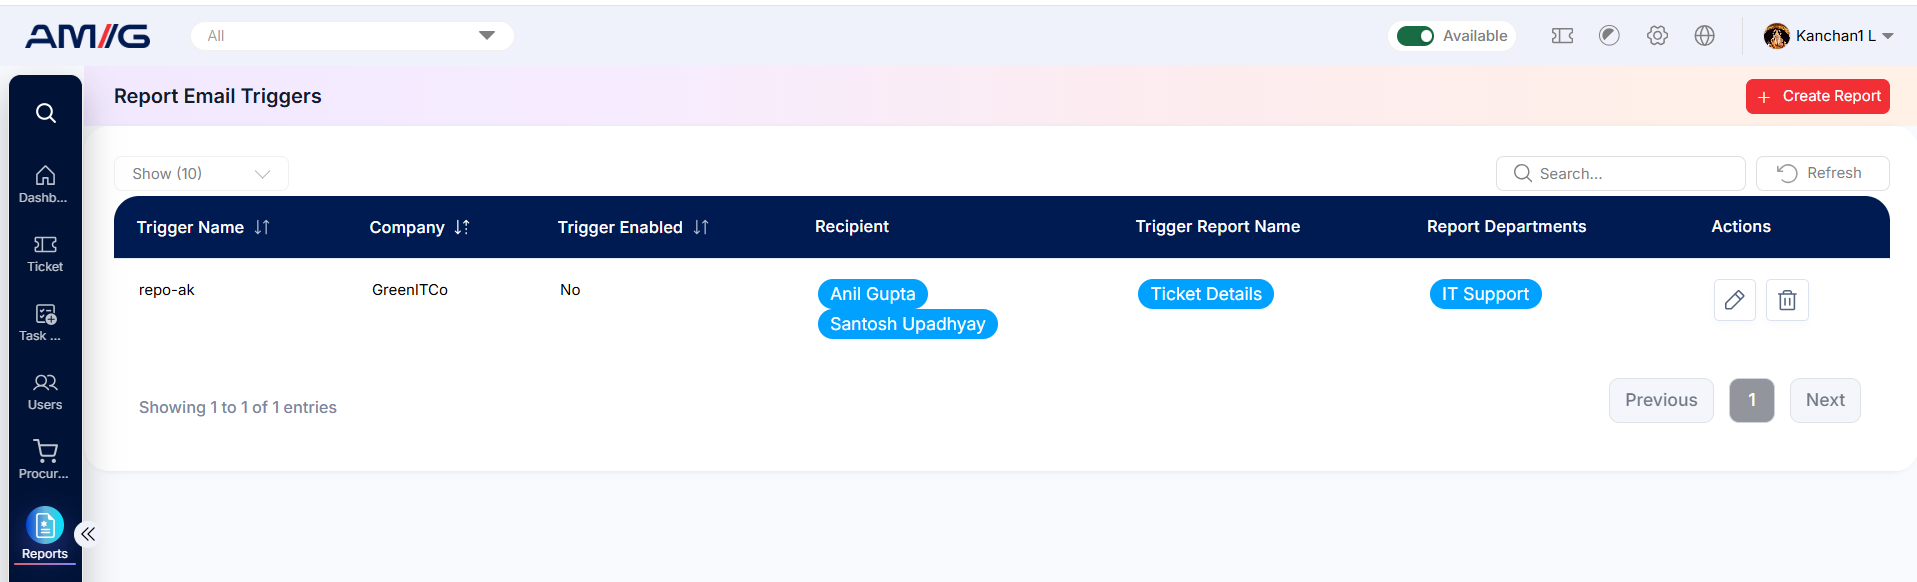
Figure 2.11.1: Report Email Triggers – listing
Table 2.11.1: What each column shows
| Column | What it shows |
|---|---|
| Trigger Name | Displays the name assigned to the email trigger, helping administrators identify the purpose of each configured report trigger. |
| Company | Displays the company associated with the configured email trigger. |
| Trigger Enabled | Indicates whether the email trigger is enabled or disabled. An enabled trigger is configured for automated report delivery. |
| Recipient | Displays the user or email recipient configured to receive the selected report. |
| Trigger Report Name | Displays the name of the report configured for automatic email delivery. |
| Report Departments | Displays the departments selected for the report distribution, defining the department-wise scope of the report. |
| Actions | Provides the available actions for managing the configured email trigger, such as modifying or managing its settings. |
There is no filter panel on this screen. Click the Trigger Name, Company or Trigger Enabled column header to sort the list.
Creating an Email Trigger
Step 1: Go to Sidebar > Reports > Service Ticket > Email Trigger.
Step 2: Click Create Report. The Add Email Report Trigger form opens.
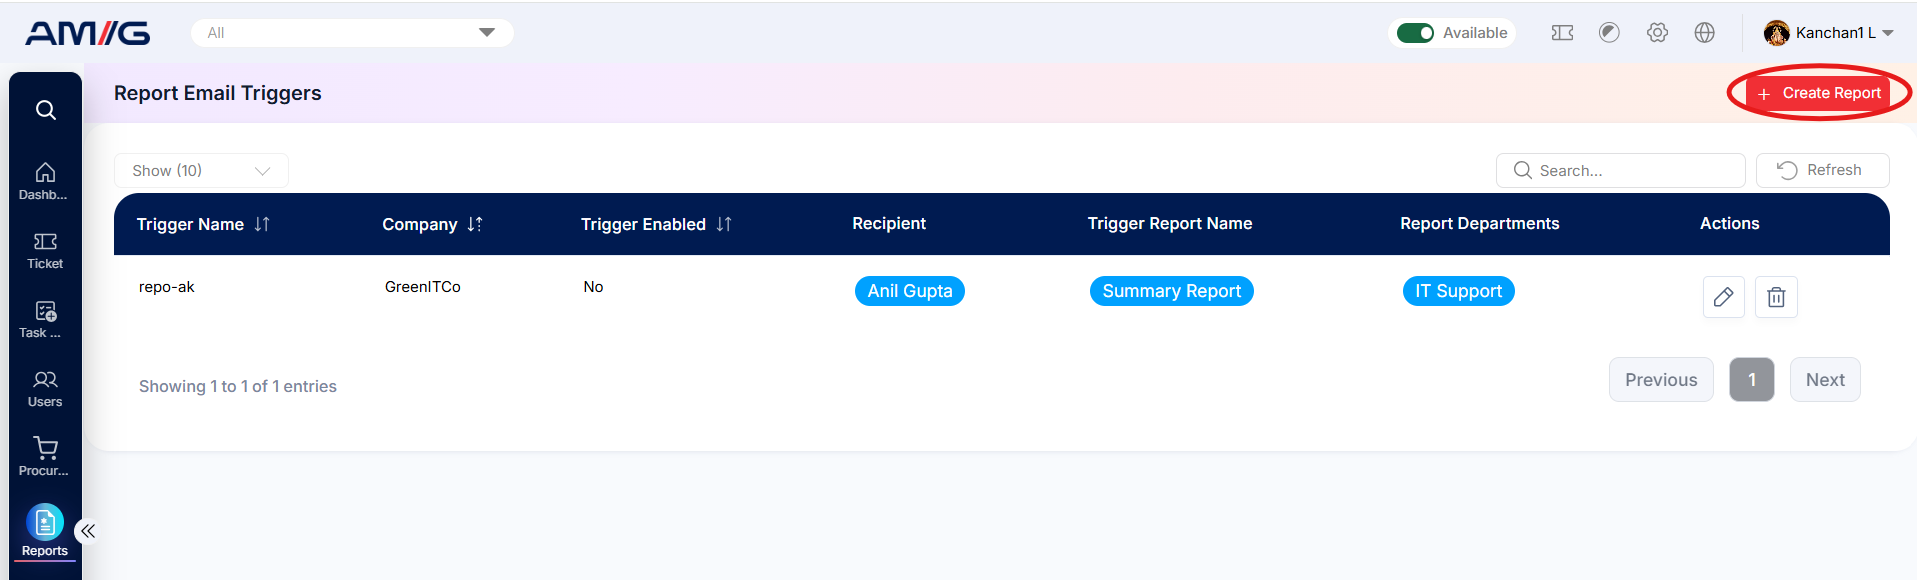 Step 3: Select the Company.
Step 4: Enter the Trigger Name and Trigger Description.
Step 5: Select one or more Recipients.
Step 6: Select the Trigger Report Name.
Step 7: Select the Department, if needed.
Step 8: Set Trigger Enabled to Yes or No.
Step 9: Click Create Report to save the trigger.
Table 2.11.2: Add Email Report Trigger fields
| Field | Required? | What to enter |
|---|---|---|
| Company | Yes | The company the trigger belongs to. |
| Trigger Name | Yes | A name for the trigger. |
| Trigger Description | Yes | A short description of what the trigger sends. |
| Recipient | Yes | One or more users who will receive the report. This are list of users listed through Sidebar > User > All User |
| Trigger Report Name | Yes | The report to send. Summary : Provides an overall summary of ticket-related information and activities. Ticket Detail : Provides detailed information about individual tickets. Department wise : Provides a department-wise breakdown of ticket information. Prioirty wise : Provides a priority-wise summary of tickets, helping users review ticket distribution based on priority levels. Source wise : Provides a breakdown of tickets based on their creation source or channel. Sla breached Ticket : Provides information about tickets that have breached their applicable Service Level Agreement (SLA). Status vs Date ticket : Provides a date-wise view of ticket distribution across different ticket statuses. Assigned Ticket agening : Provides an ageing summary of assigned tickets, helping users identify tickets that have remained pending with handlers for extended periods. |
| Department | No | The department to report on, if needed. It will send respective department ticket only if selected. It comes from configured Header > Config > Department where ticket is enabled from Sidebar > Ticket > Ticket Configuration |
| Trigger Enabled | Yes | Yes to turn the trigger on, No to turn it off. If off triggrer will not be executed. |
Note: Fields marked with a red asterisk (*) are required. You cannot save the trigger until they are filled in.
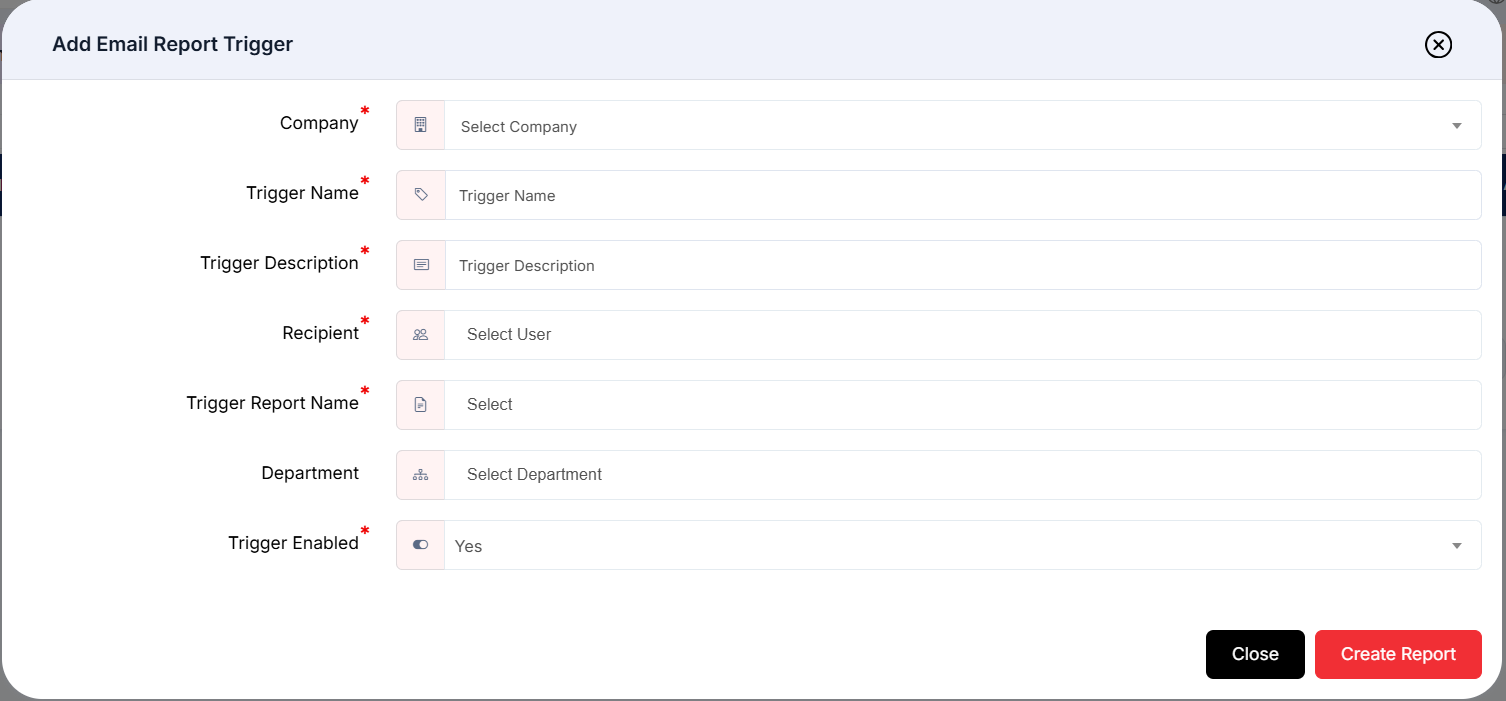
Figure 2.11.2: Add Email Report Trigger – form
Edit an Email Trigger
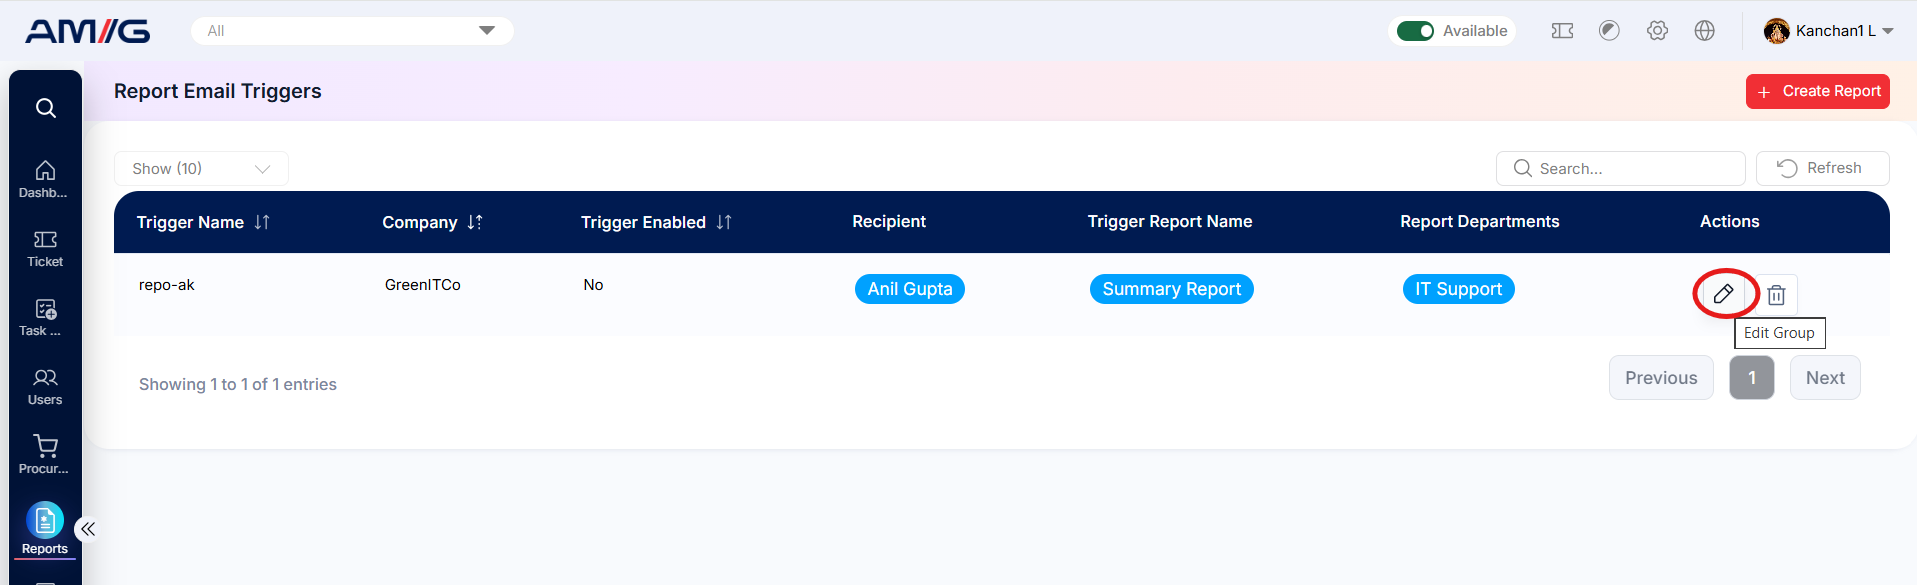
Step 1: Click the Pencil (Edit) icon against the required trigger.
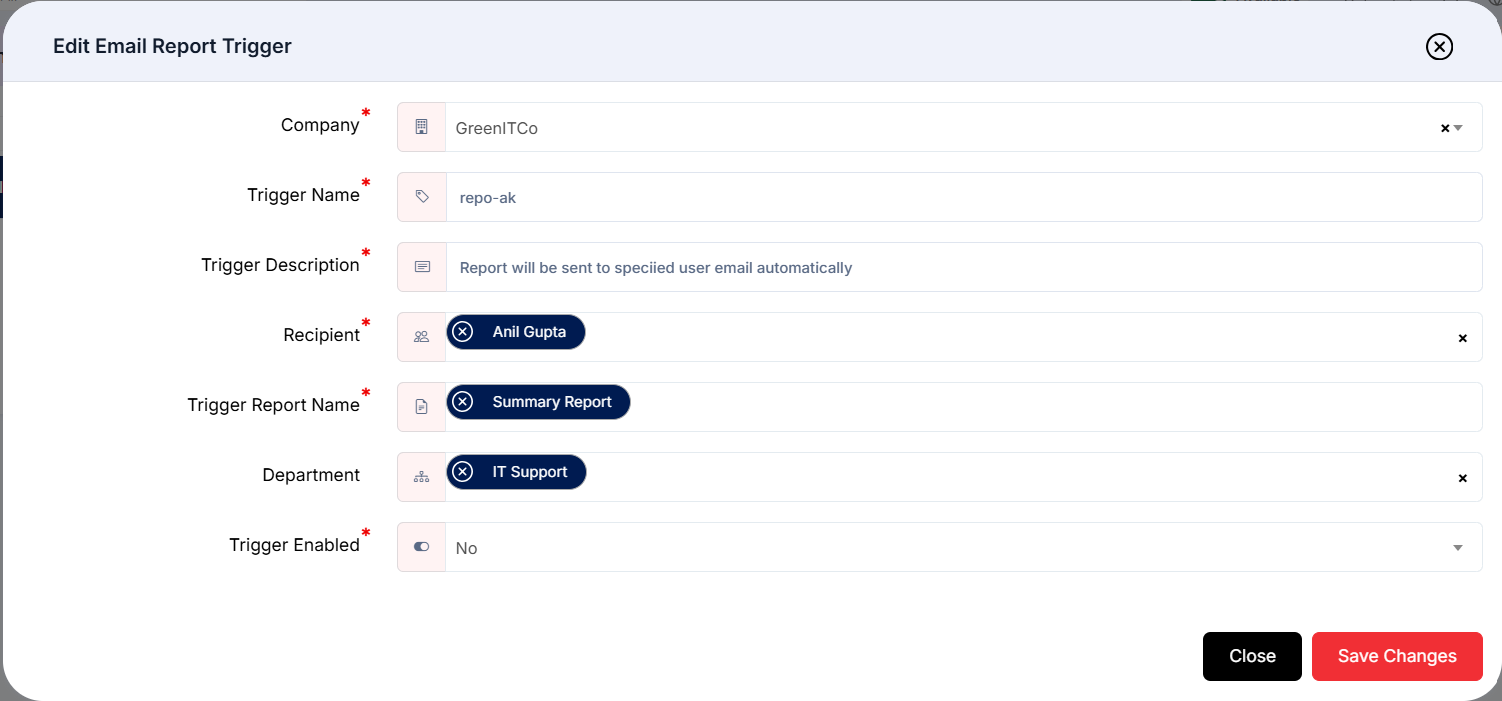
 Step 2: Update the details in the pop-up window.
Step 3: Click Save to apply changes or Cancel to discard them.
Delete an Email Trigger
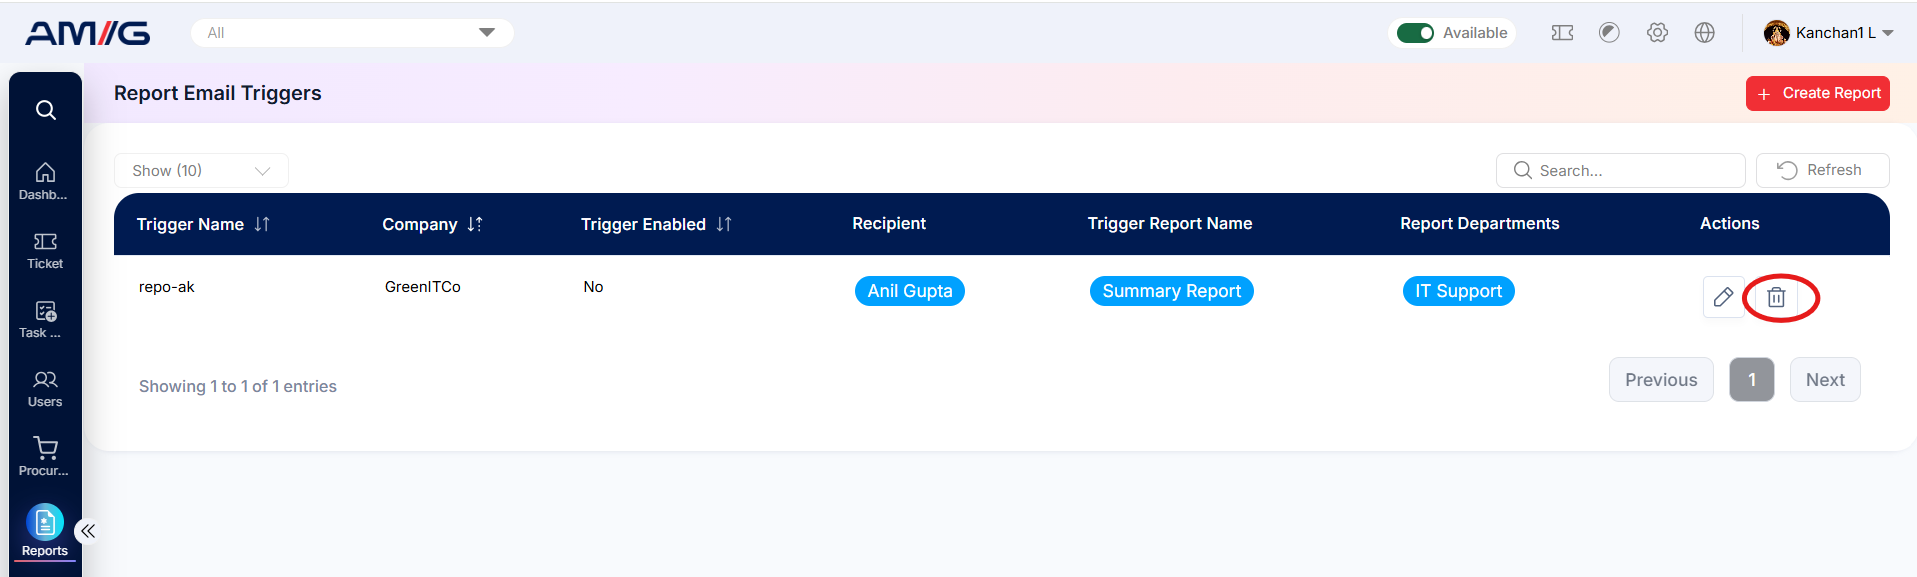
Step 1: Click the Trash (Delete) icon against the required trigger.
 Step 2: Confirm the deletion in the confirmation pop-up.
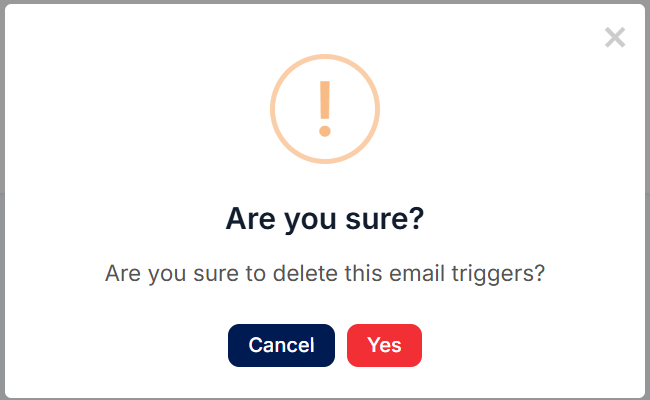 Step 3: Click OK to delete or Cancel to discard the action.