
The Users List toolbar provides additional actions for managing user accounts. Some actions can be applied to selected users. Select the relevant user checkboxes before using a bulk action.
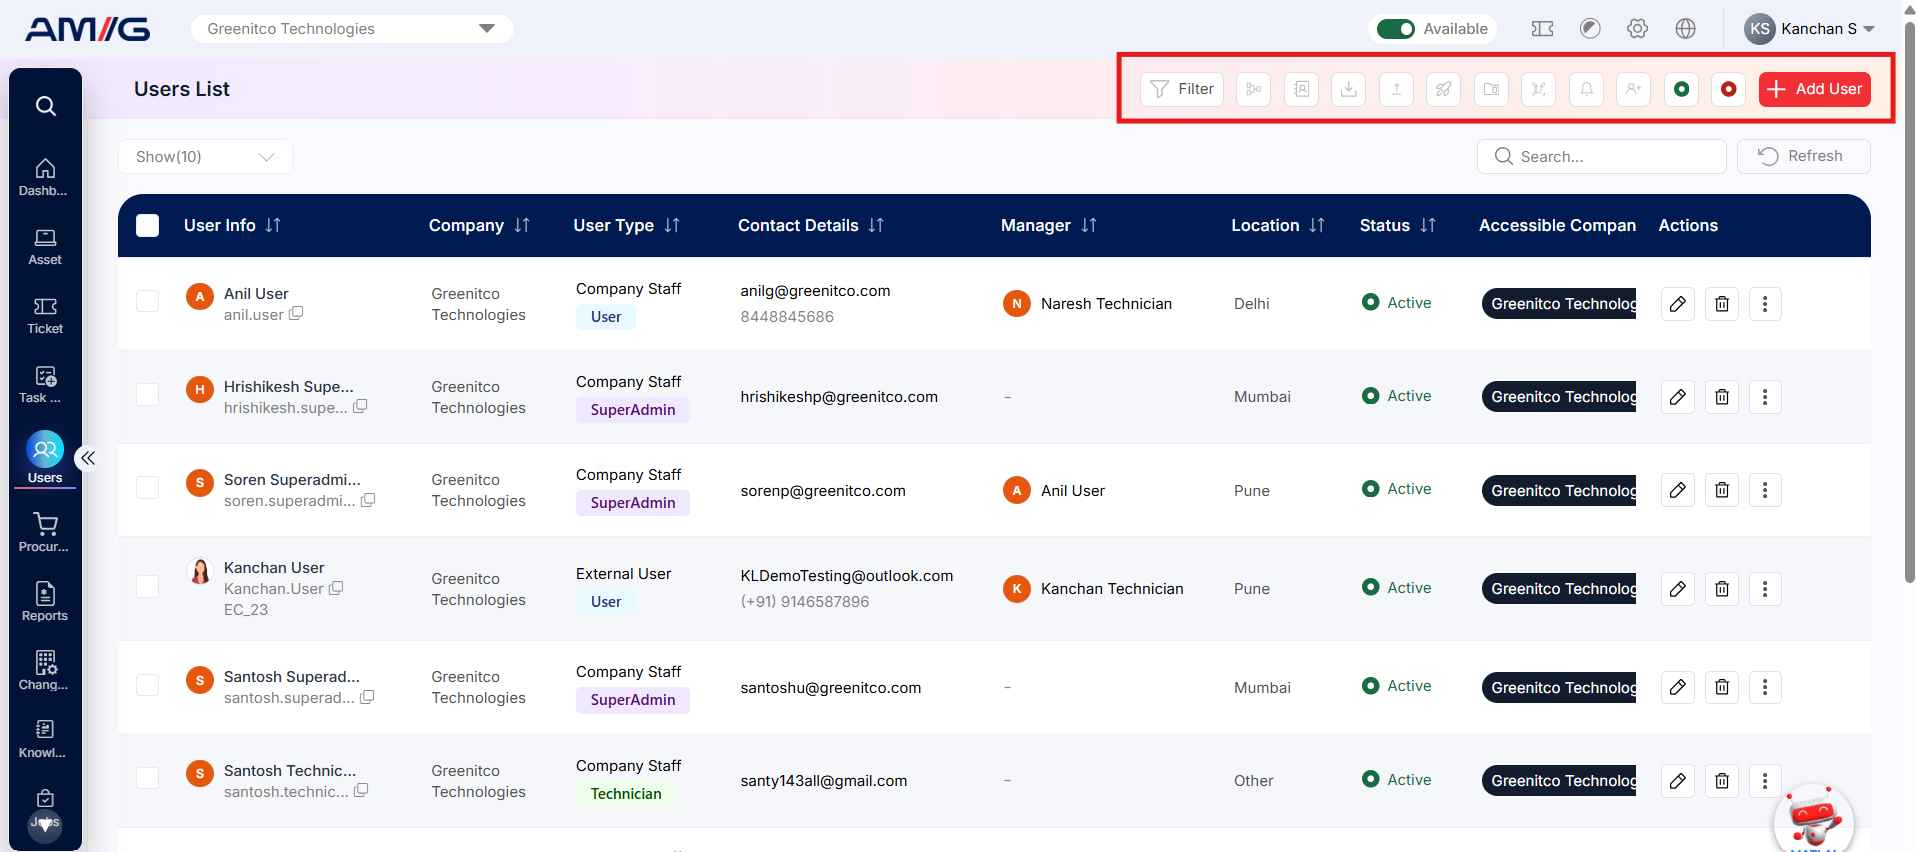
Figure: Users List toolbar and available actions
| Action | What it does |
|---|---|
| Filter | Opens the filter options to narrow the Users List. |
| Bulk Update | Opens the User Bulk Update screen, where administrators can download the Excel template, complete user updates and upload the completed XLSX file. |
| Merge Users | Opens the merge process for combining selected duplicate user records. A comment is required before starting the merge. |
| Print Label | Opens the Print window. Select the available label format (Barcode/one column/two column vertica column), then click Save to proceed. |
| Download | Downloads user-list data, subject to the permissions assigned to the administrator. |
| Upload / Import | Opens the relevant user upload or import workflow. |
| Notification | Opens the announcement form to send a message to selected users. |
| Set Active / Set Inactive | The green and red status controls are used to apply the corresponding active or inactive status to selected users. |
| Add User | Opens the form to create a new user. |
Updating Users in Bulk
Use User Bulk Update when several existing user records need to be updated through an Excel file.
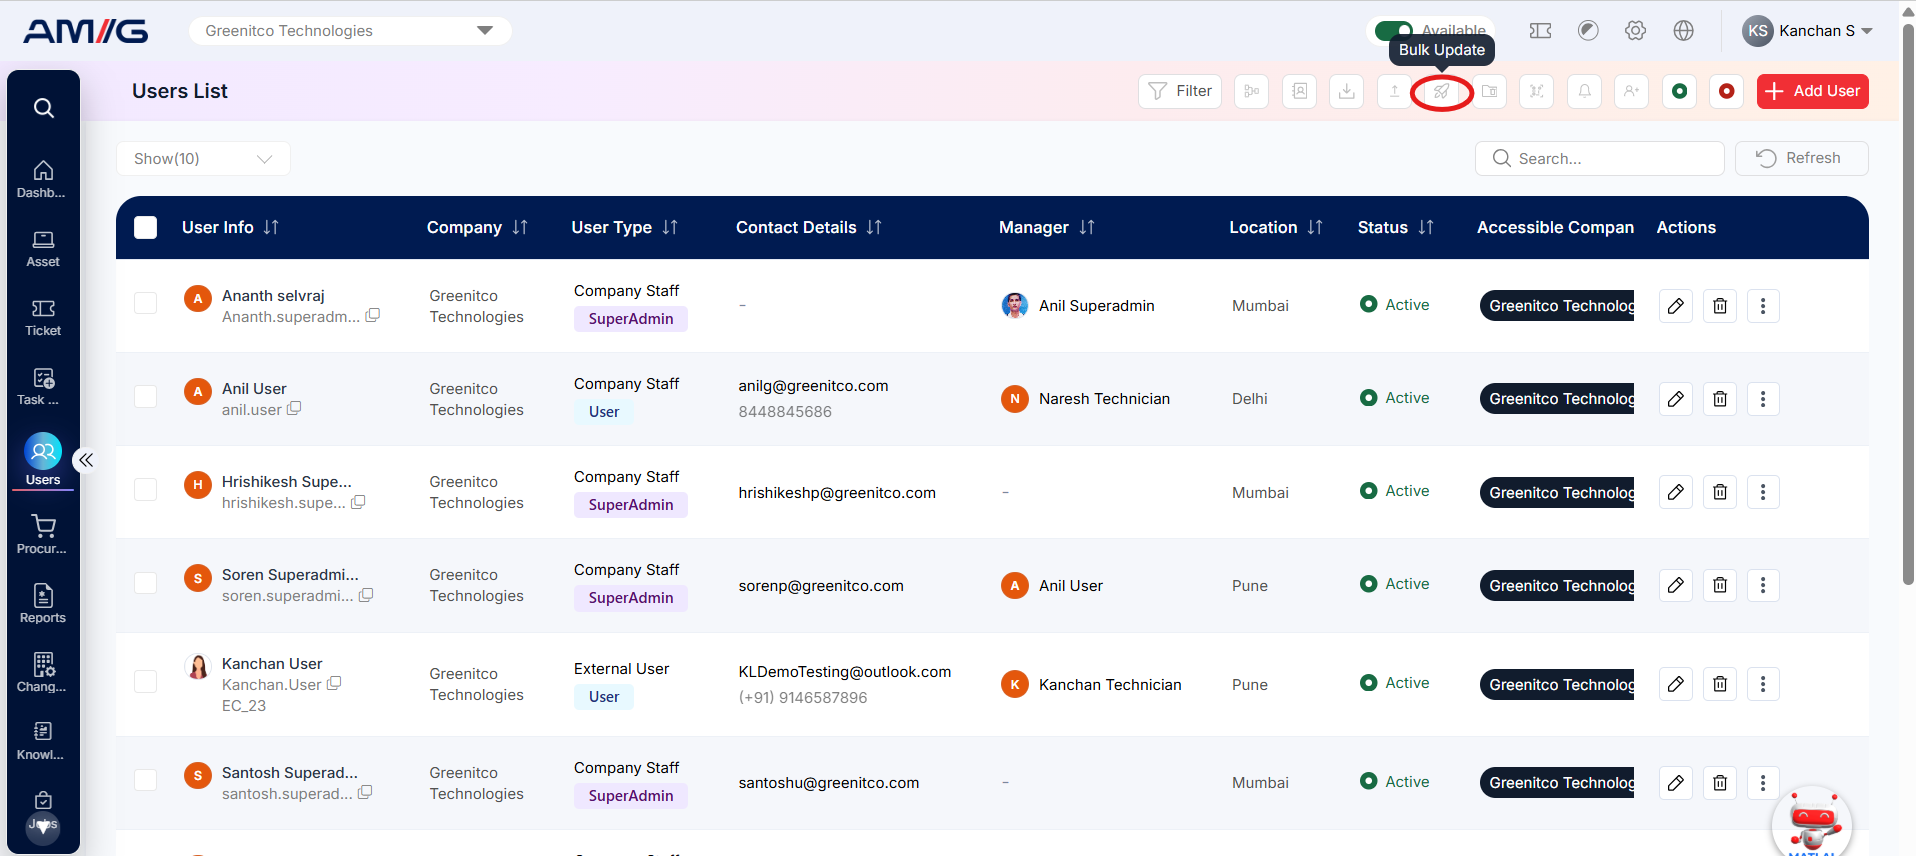
Step 1: On the Users List, select the Bulk Update action in the toolbar.
 Step 2: Click Download User Bulk Update Template and save the Excel file.
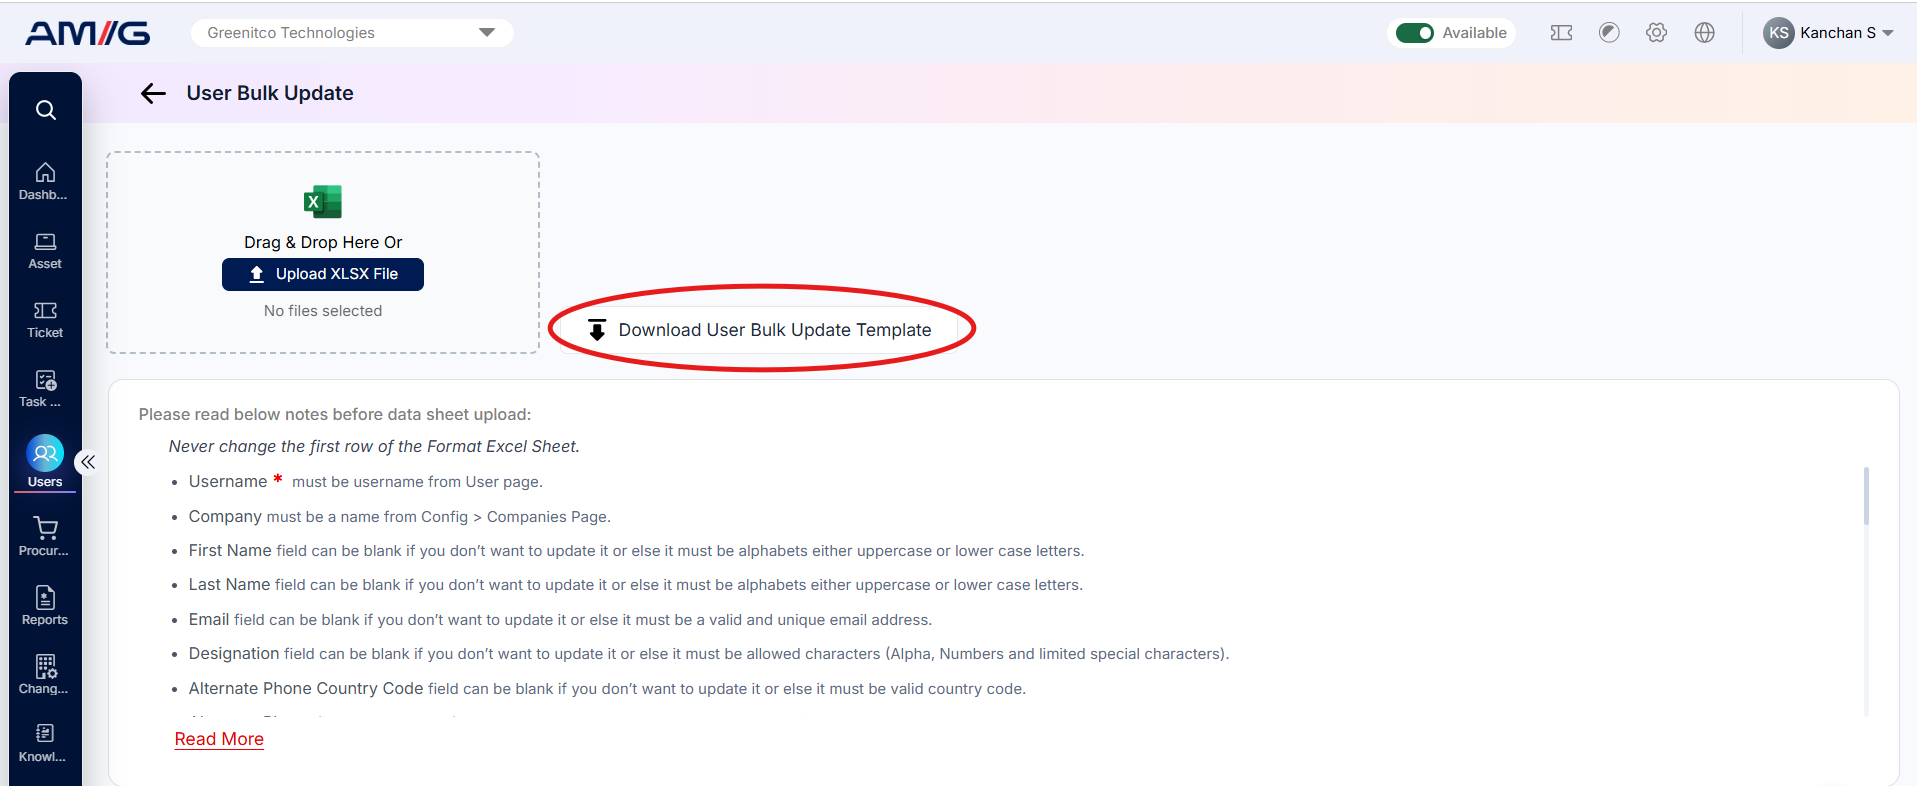 Step 3: Update the required user information in the template. Keep the first row unchanged because it contains the column headings.
Step 4: Drag and drop the completed file into the upload area, or click Upload XLSX File.
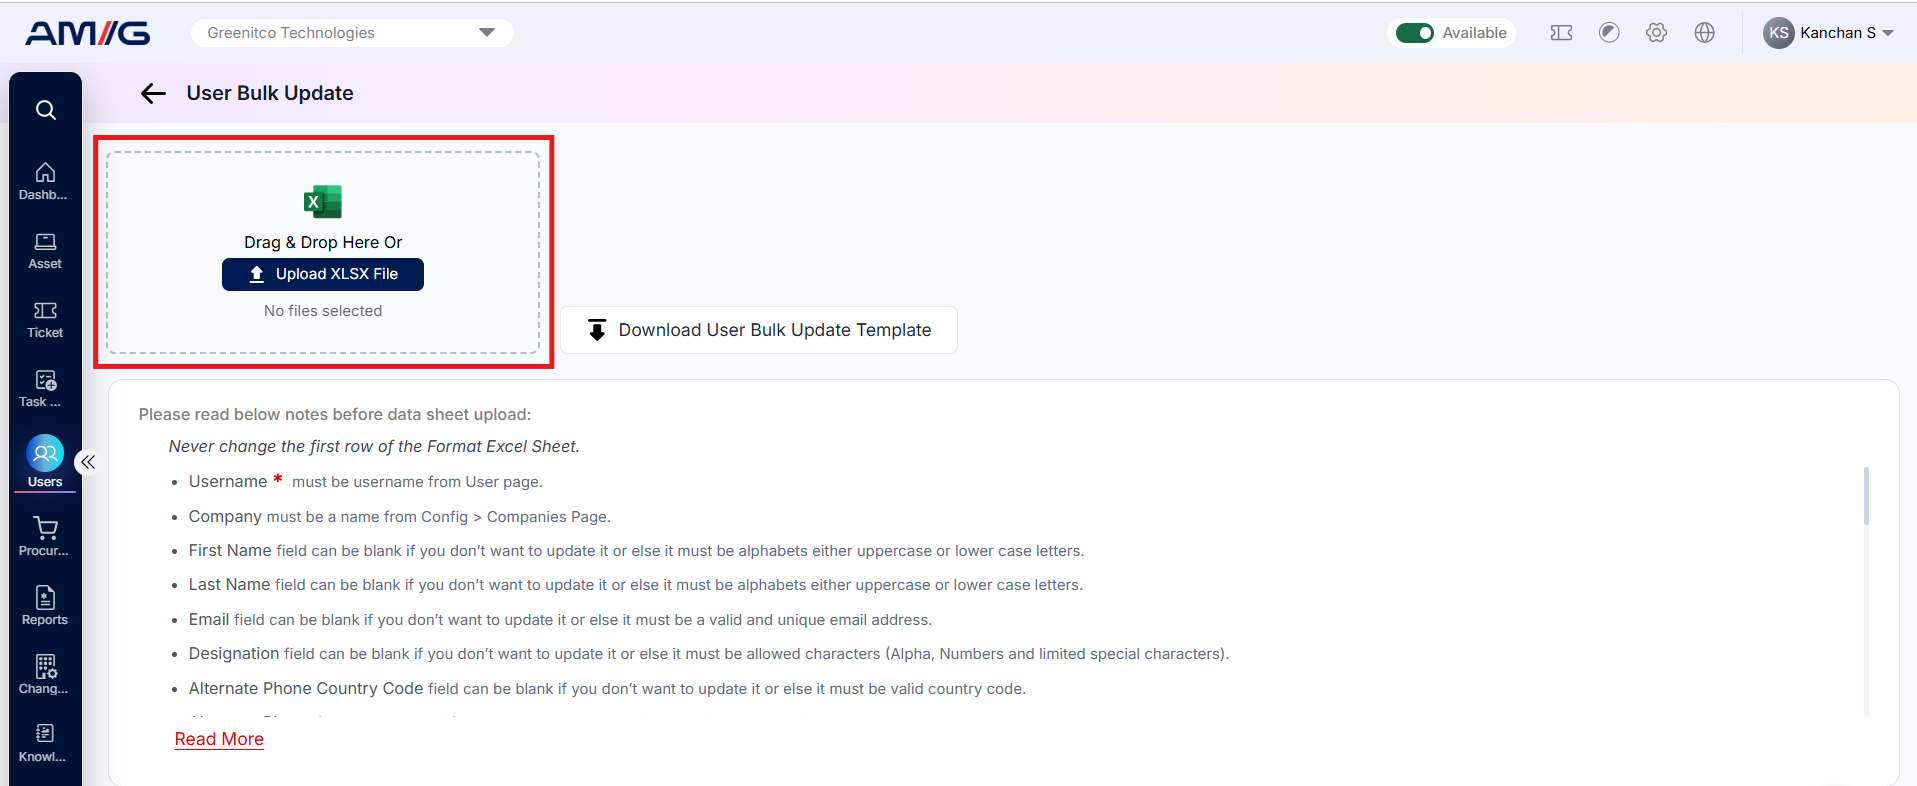 Step 5: Follow the on-screen instructions to complete the update.
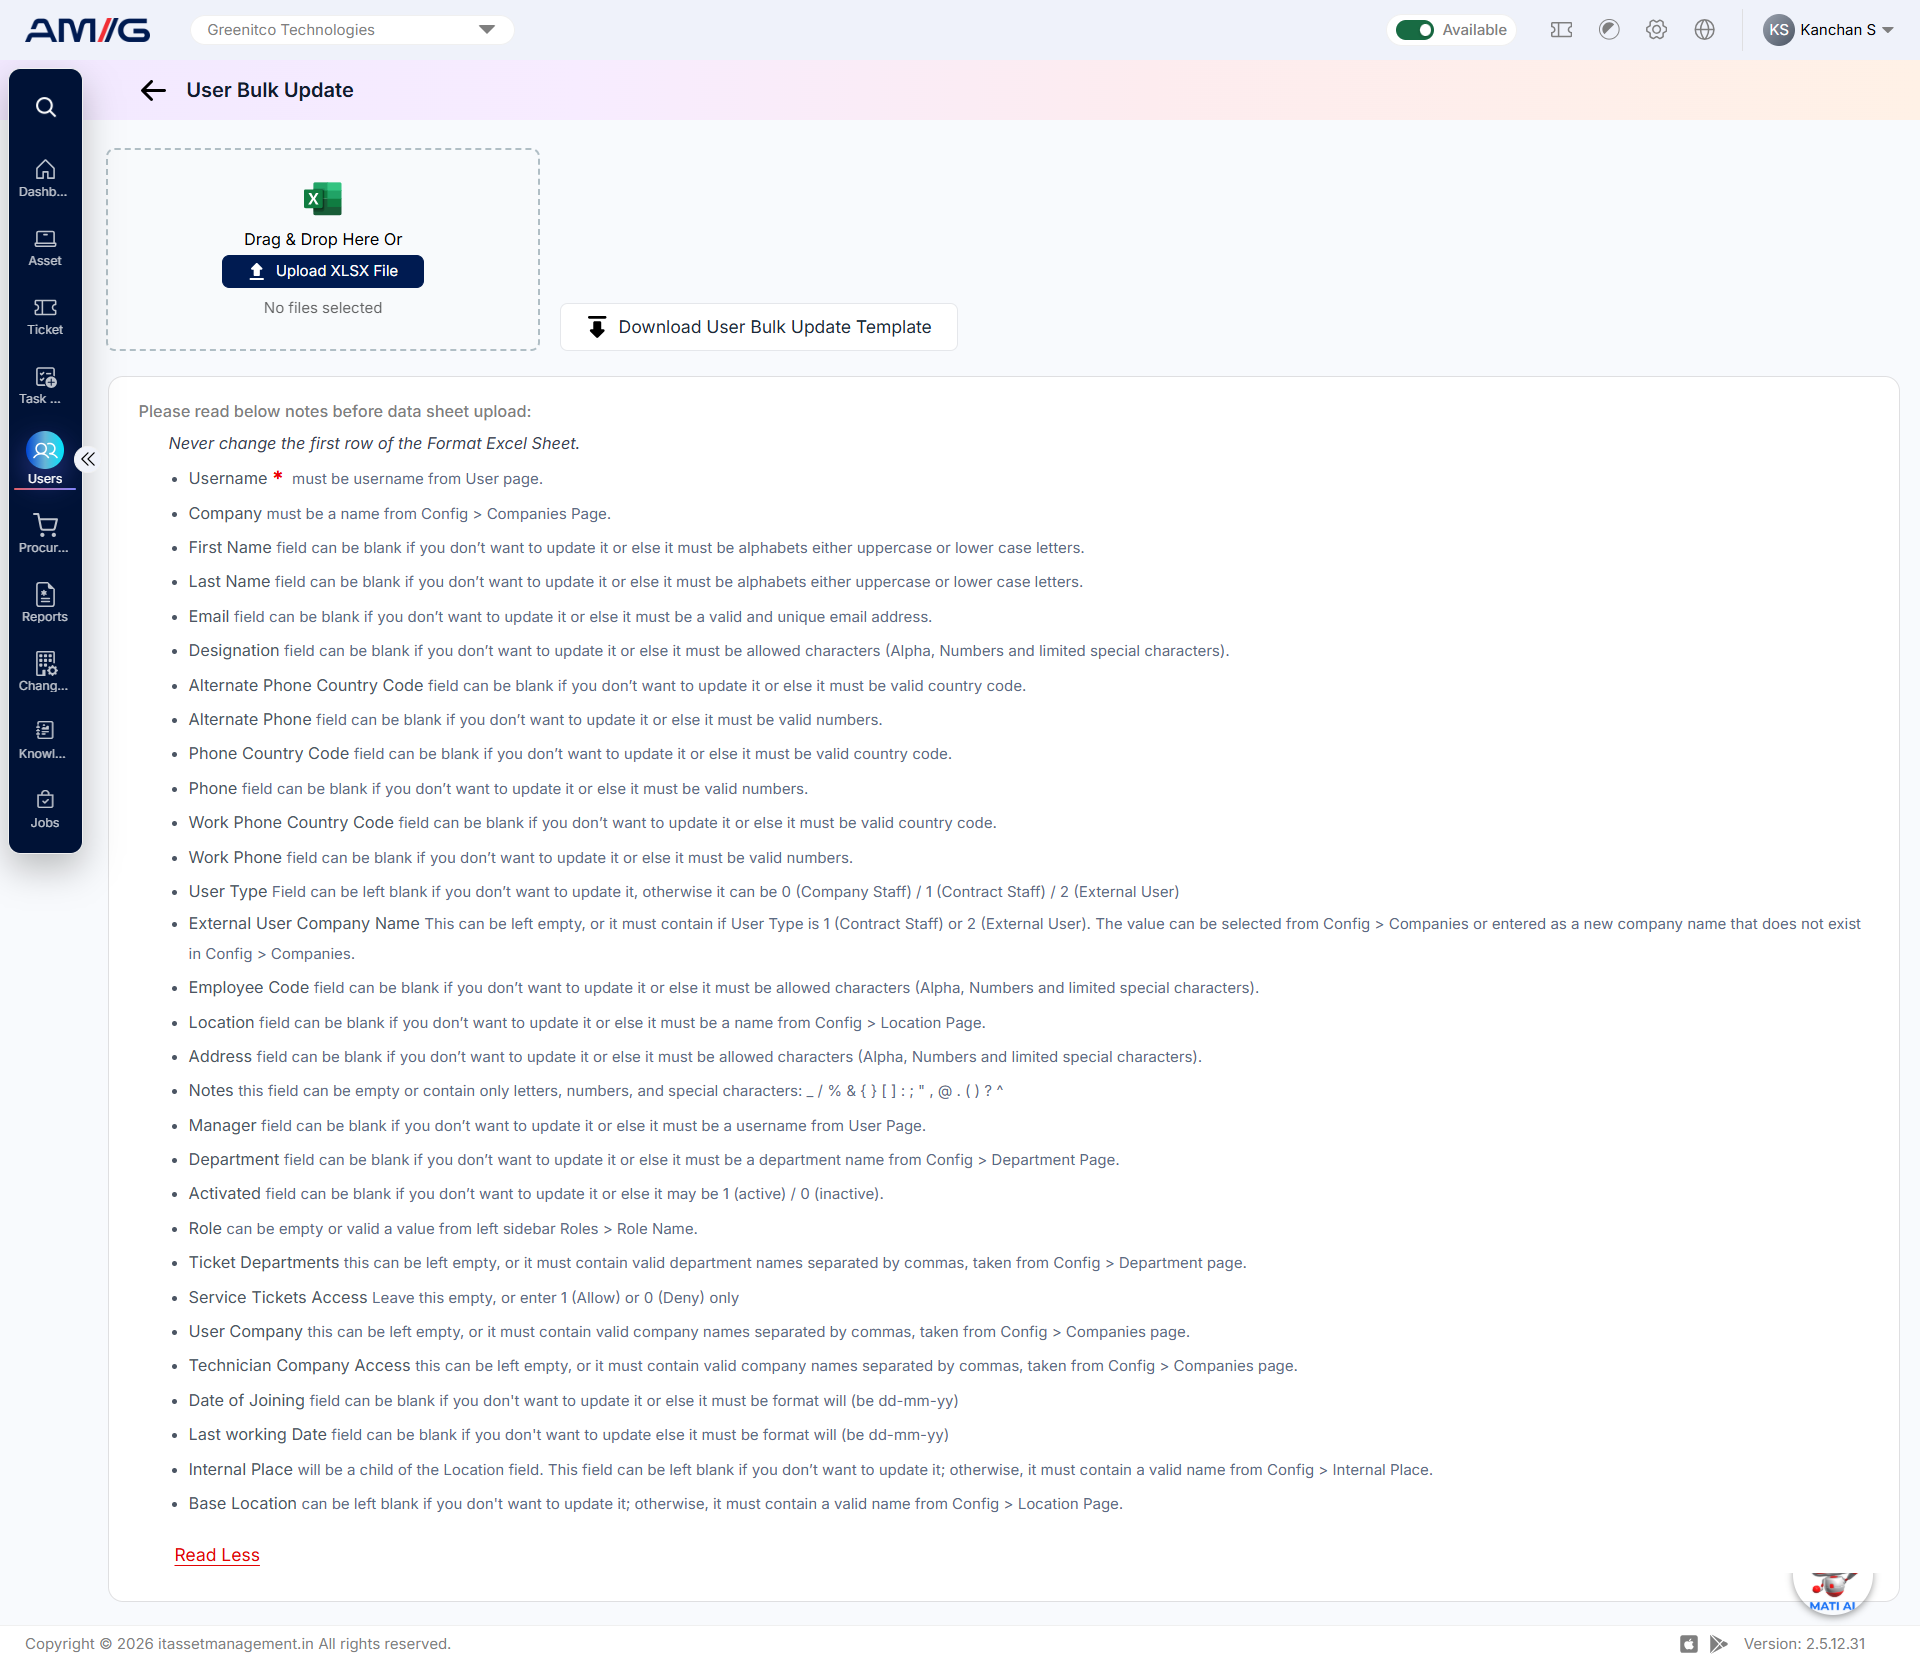
Figure: User Bulk Update screen
Important: The template displays field-specific validation rules. For example, Username must match a username in the Users page, Company and Department values must match configured records, and Activated must be 1 (Active) or 0 (Inactive). Review all instructions displayed on the screen before uploading.
Merging Users
Use Merge Users to combine duplicate user records. Select the user records to be merged and open the Merge Users action.
Step 1: Select the relevant user records using the checkboxes in the Users List.
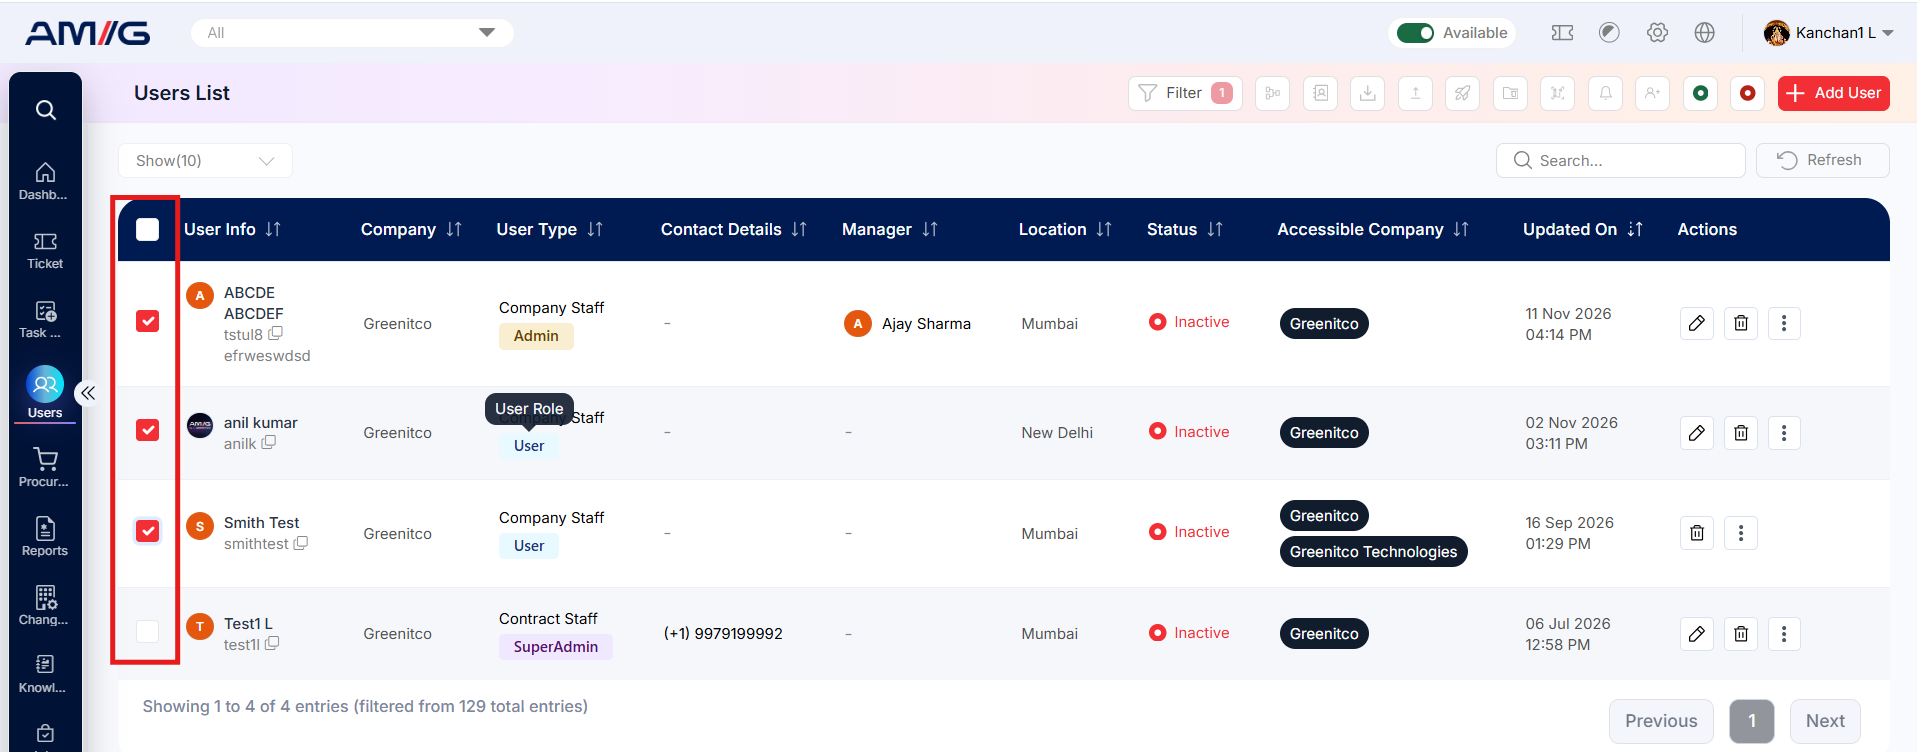 Step 2: Click the Merge Users action.
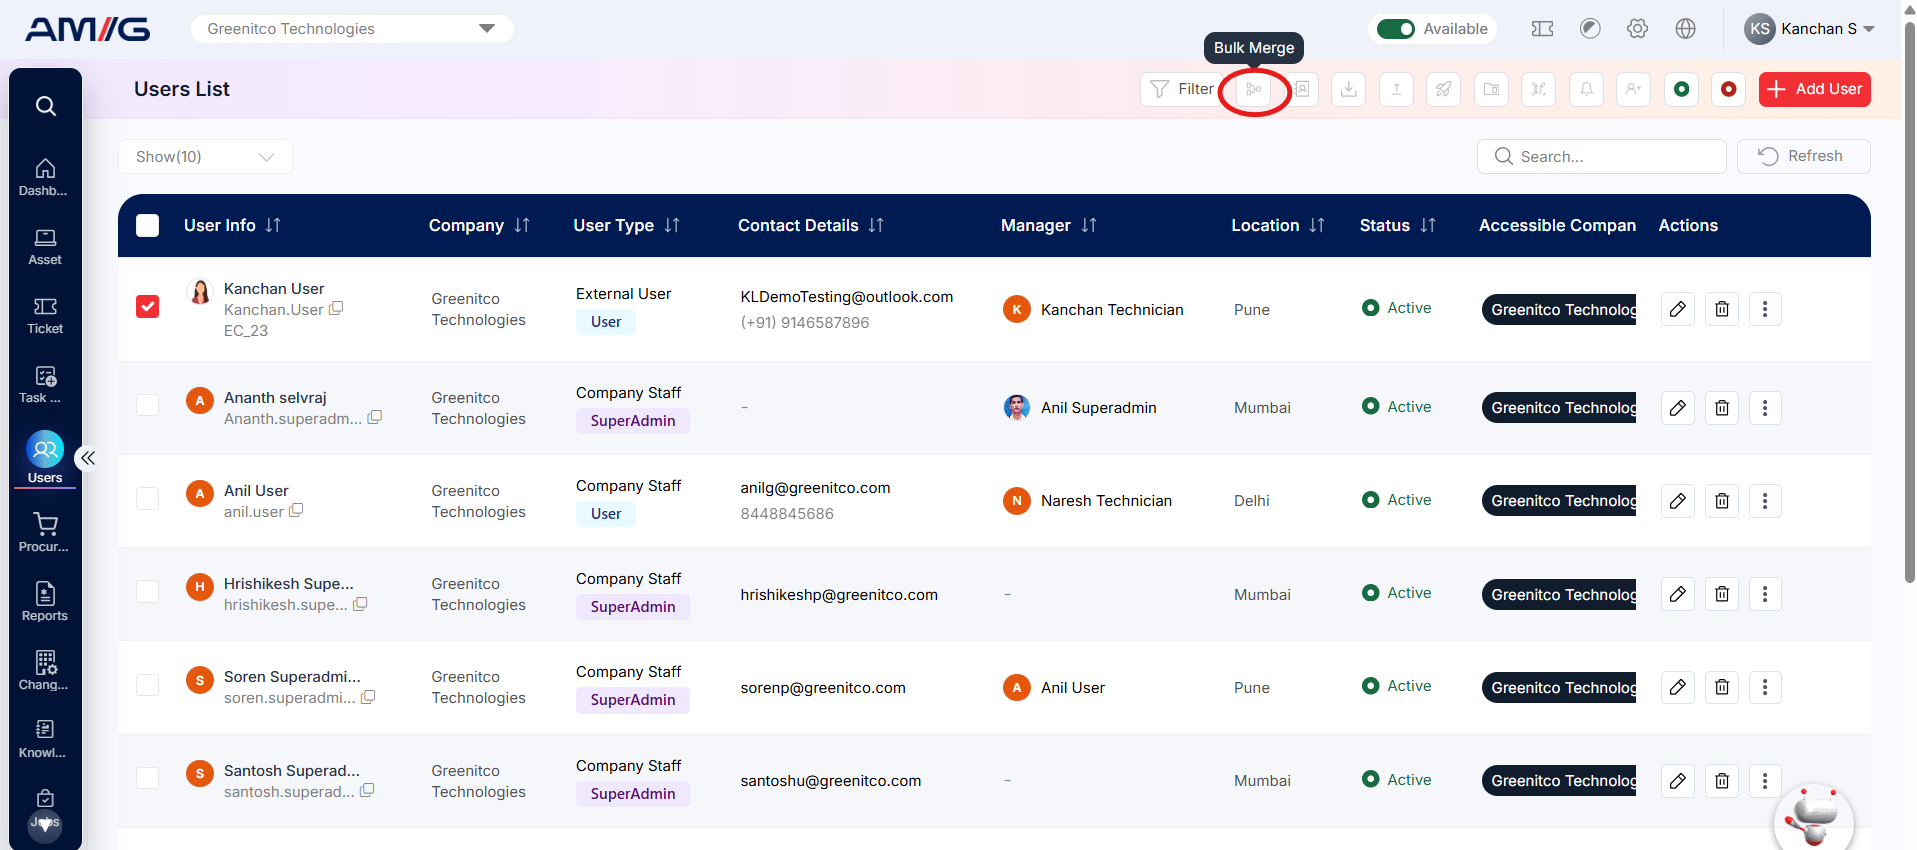 Step 3: Enter a comment explaining the reason for the merge. The Comments field is mandatory.
Step 4: Click Start Merge to proceed. Use Clear List if you need to clear the selected records before starting.
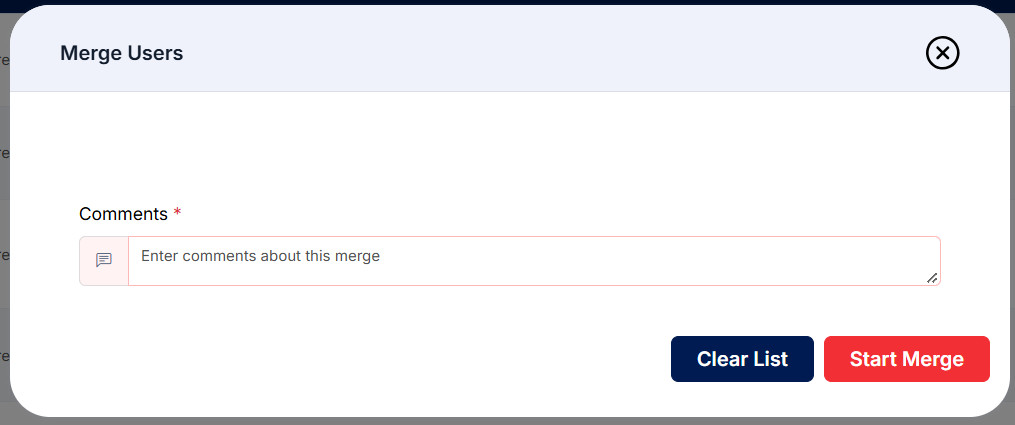
Figure: Merge Users window
Important: Verify the selected user records before starting the merge. The supplied screen confirms that a comment is required; the exact record-retention behaviour is not shown in the provided material.
Printing User Labels
The Print action allows an administrator to select a label output option for a user.
Step 1: Select the relevant user record and click the Print action.
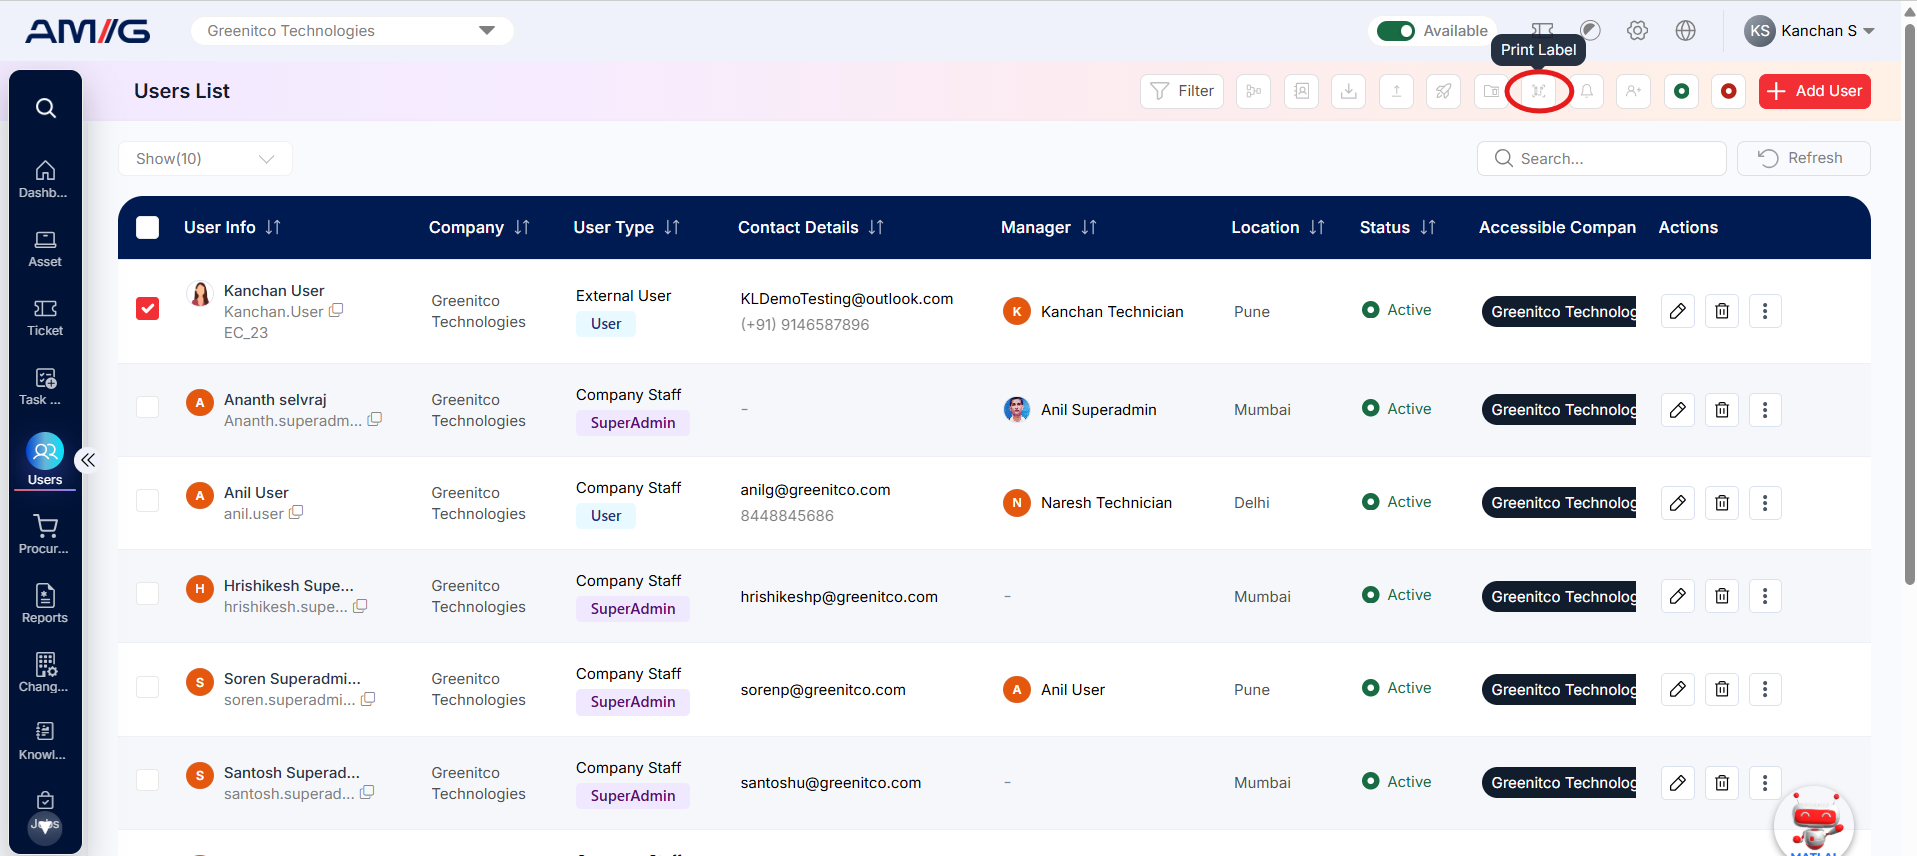 Step 2: In the Print window, choose the required option from the Select Option list. The supplied screen shows Barcode.
Step 3: Click Save to proceed, or Close to exit without saving.
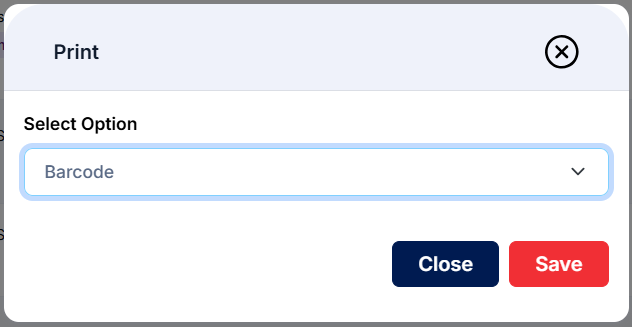
Figure: Print options window
Activating and Deactivating Users
The Users List toolbar includes separate green and red status controls for applying Active and Inactive status to selected users.
Step 1: Select the user or users using the checkboxes in the list.
Step 2: Use the green control to set the selected user accounts to Active, or the red control to set them to Inactive.
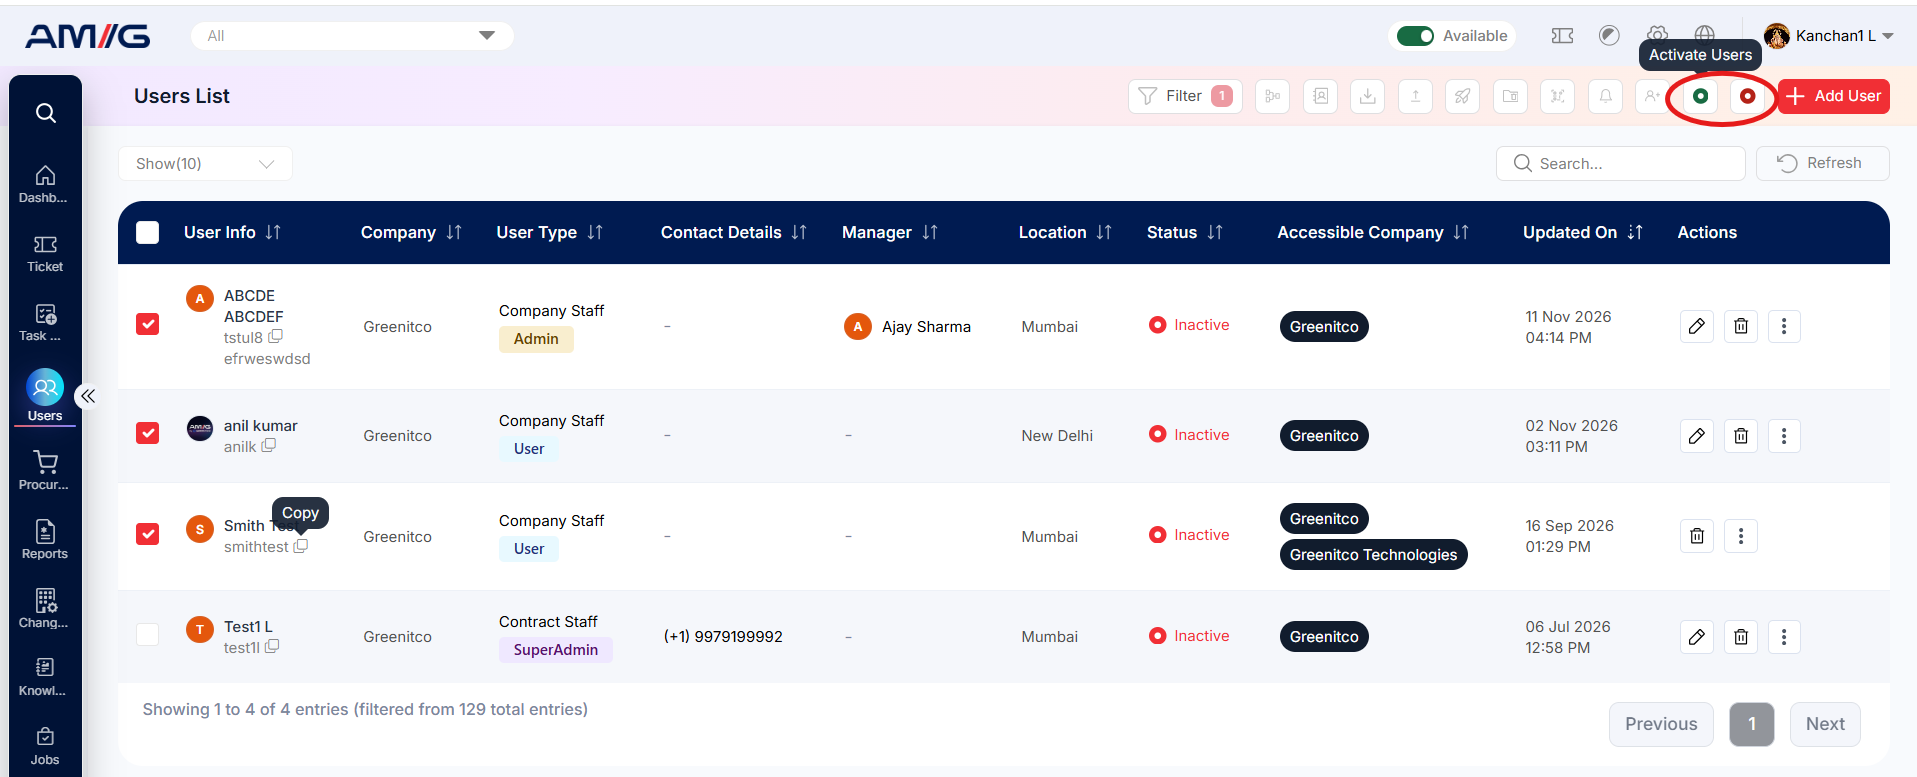 Step 3: Review the updated Status column to confirm the displayed status.
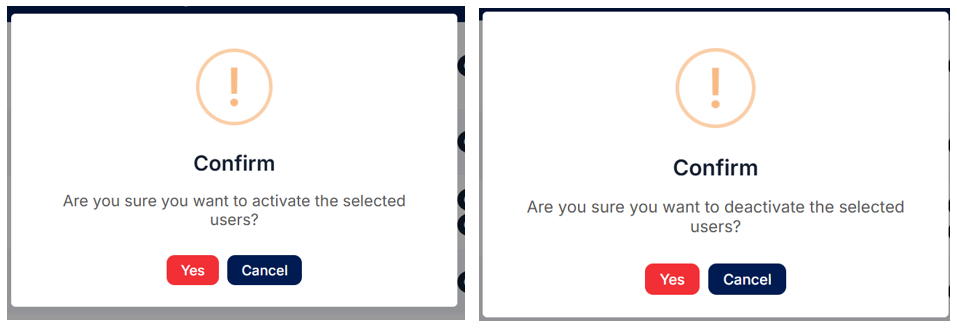
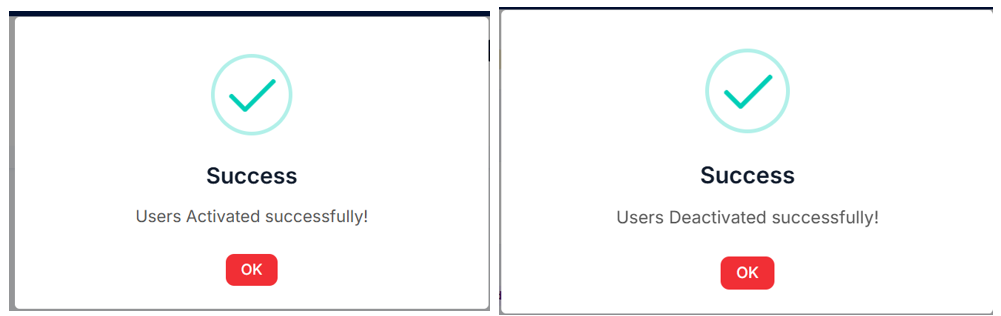
Note: An Active user can log in to AMG. An Inactive user is blocked from logging in.
Users Log
The Users Log tab records the login and logout activities of users in the system. It helps administrators track user login sessions, monitor account activity and identify when a user logged in or logged out, along with the date and time of the activity and the user who performed it.

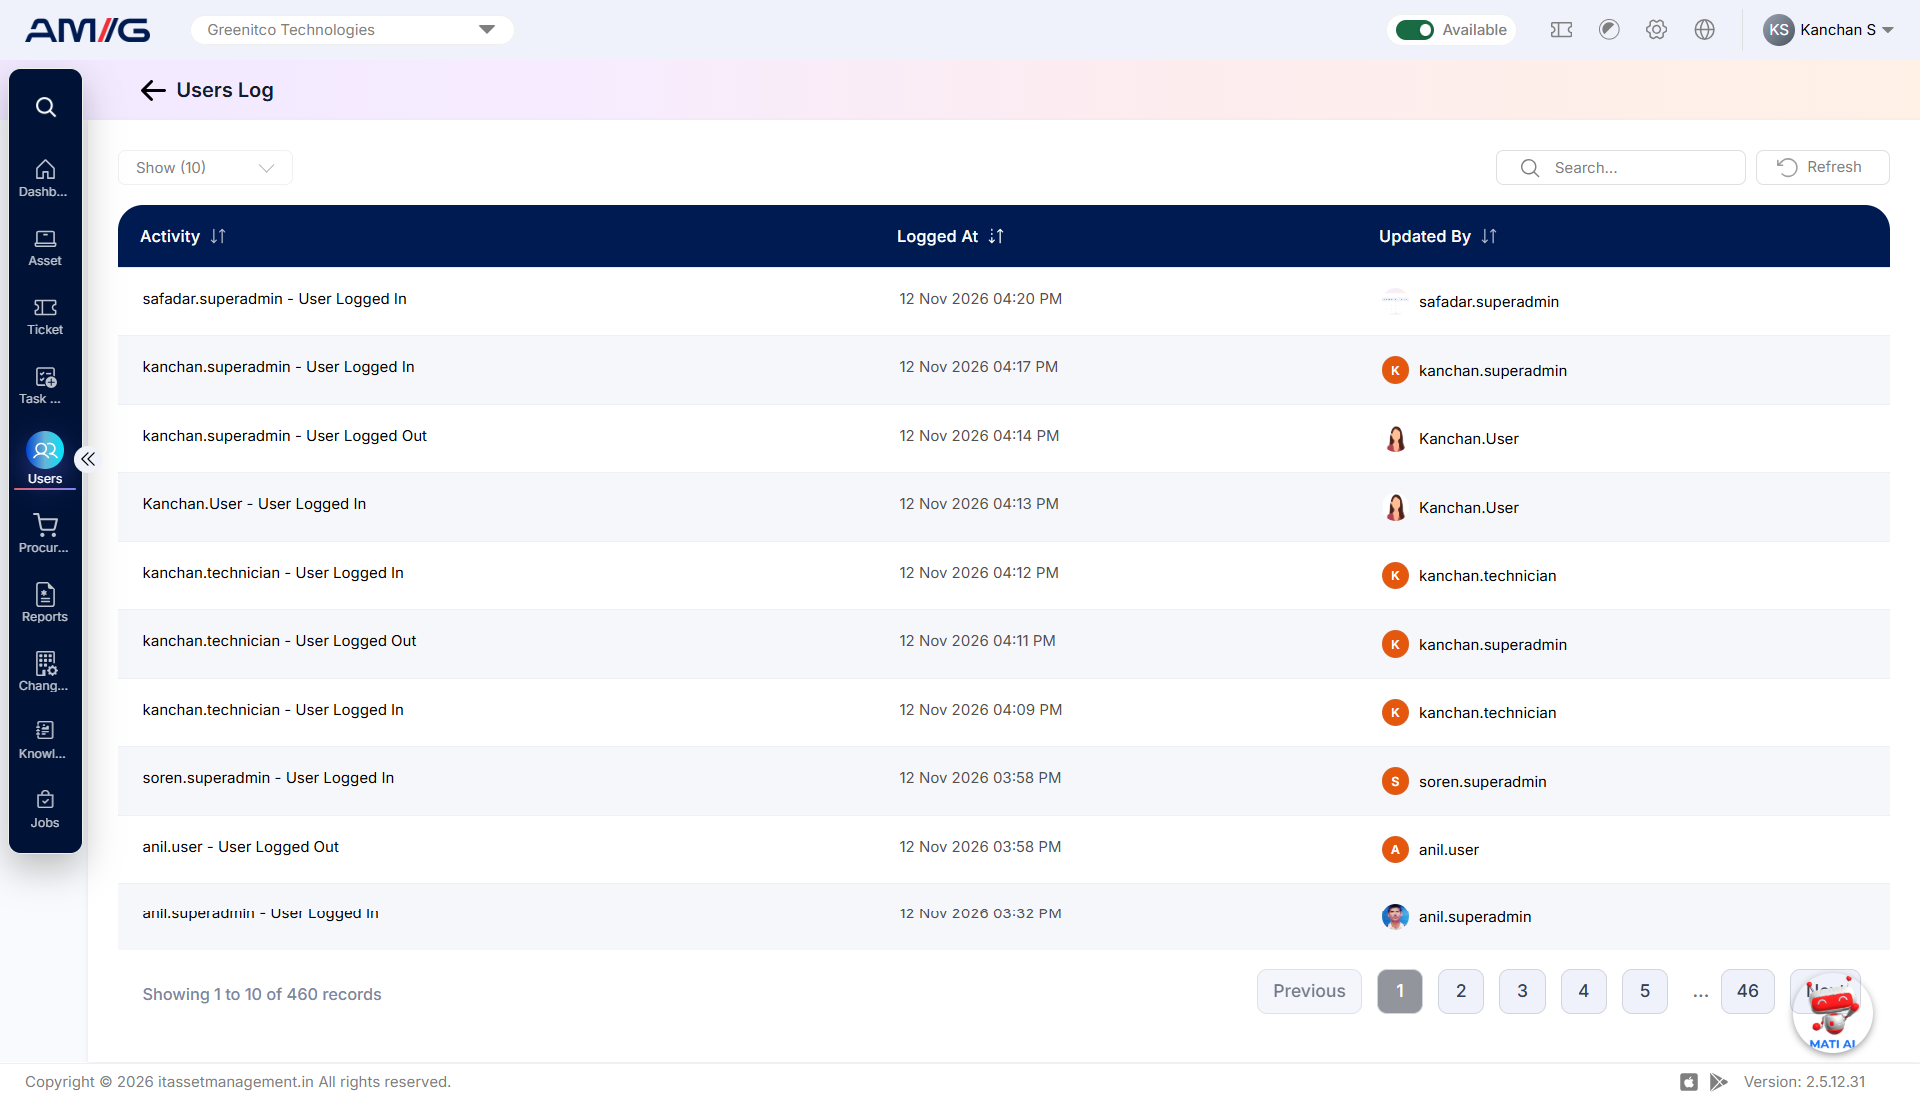 Figure: Users Details – Users Log Details
Table: Columns on the Users Log tab
| Column | What it shows |
|---|---|
| Activity | The activity performed by the user, such as User Logged In or User Logged Out. |
| Logged At | The date and time when the activity was recorded. |
| Updated By | The username of the user associated with the activity. |
Use Search to find a specific user activity and Refresh to reload the Users Log. Use Show entries and the pagination controls to navigate through multiple records.
Note: The Users Log helps administrators maintain a record of users' login and logout activities for monitoring and tracking purposes.
Restore Deleted Users
The Restore Deleted Users feature allows to restore previously deleted users. The system uses soft delete functionality, which means deleted user records are not permanently removed and can be restored when required.
Step 1: Click the Show Deleted Users icon to view the list of deleted users.
 Step 2: The deleted users list will be displayed. To restore a deleted user, click the Restore icon (↶) under the Actions column.
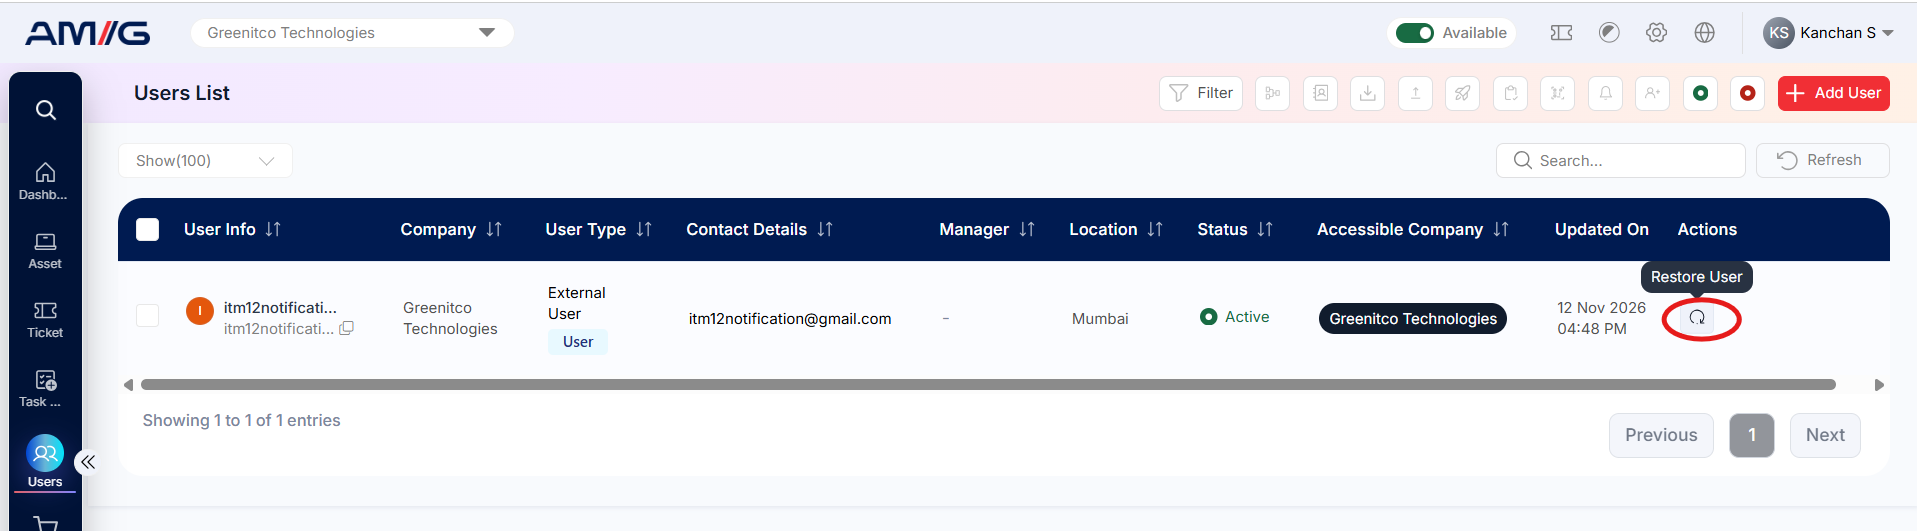 Step 3: To return to the active users list, click the Show Non Deleted Users icon.
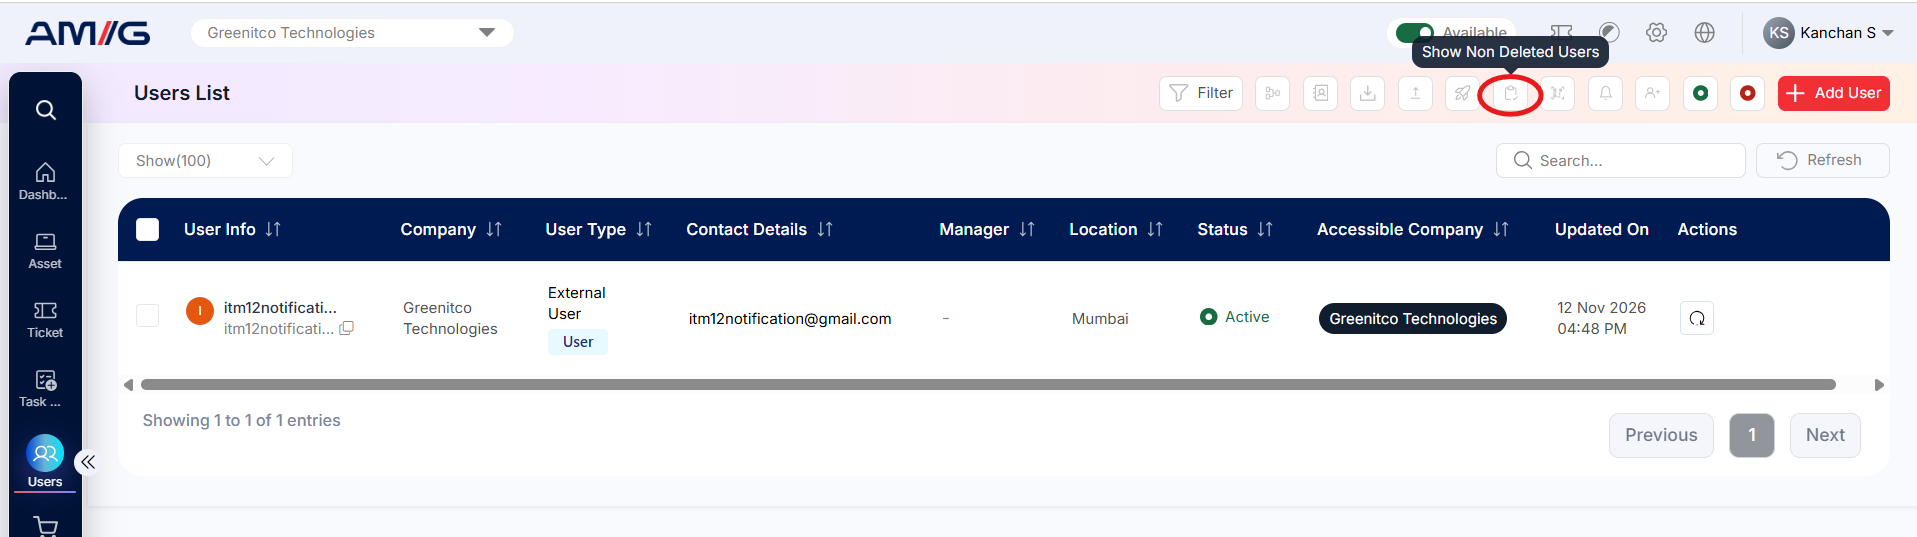
Note: Soft-deleted users can be restored using the Restore option.
Bulk Notification
The Bulk Notification feature allows to send announcements or notifications to multiple users at the same time. Administrators can select one or more users and create an announcement by entering the required details.
Step 1: Select the user or multiple users using the checkboxes in the user listing.
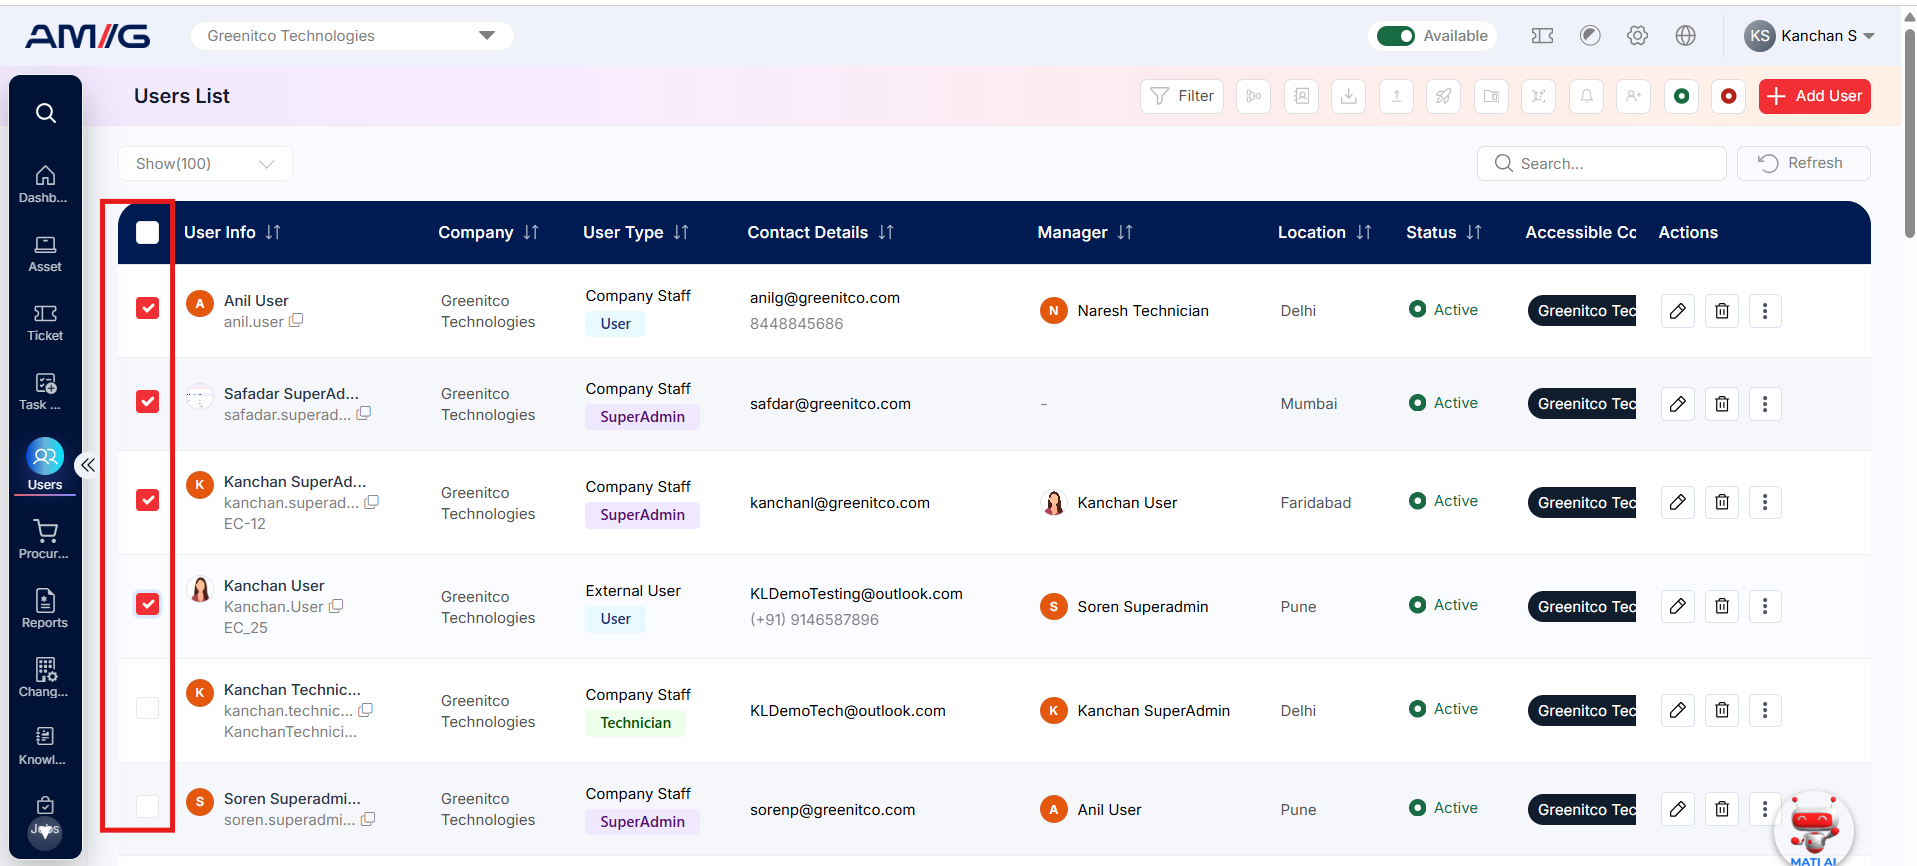 Step 2: Click the Notification icon to send an announcement to the selected users.
 Step 3: The Add Announcement form will open. Enter the required details:
| Field | Description |
|---|---|
| Title | Enter the title of the announcement. |
| Announcement | Enter the announcement message or notification content. |
| Start Date | Select the date from which the announcement should be displayed. |
| End Date | Select the date until which the announcement should be displayed. |
| Users | Displays the selected users who will receive the announcement. |
| Status | Select the announcement status. |
Step 4: After entering all the required details, click Save to create and send the announcement to the selected users. The announcement will then be displayed in the top header notification section.
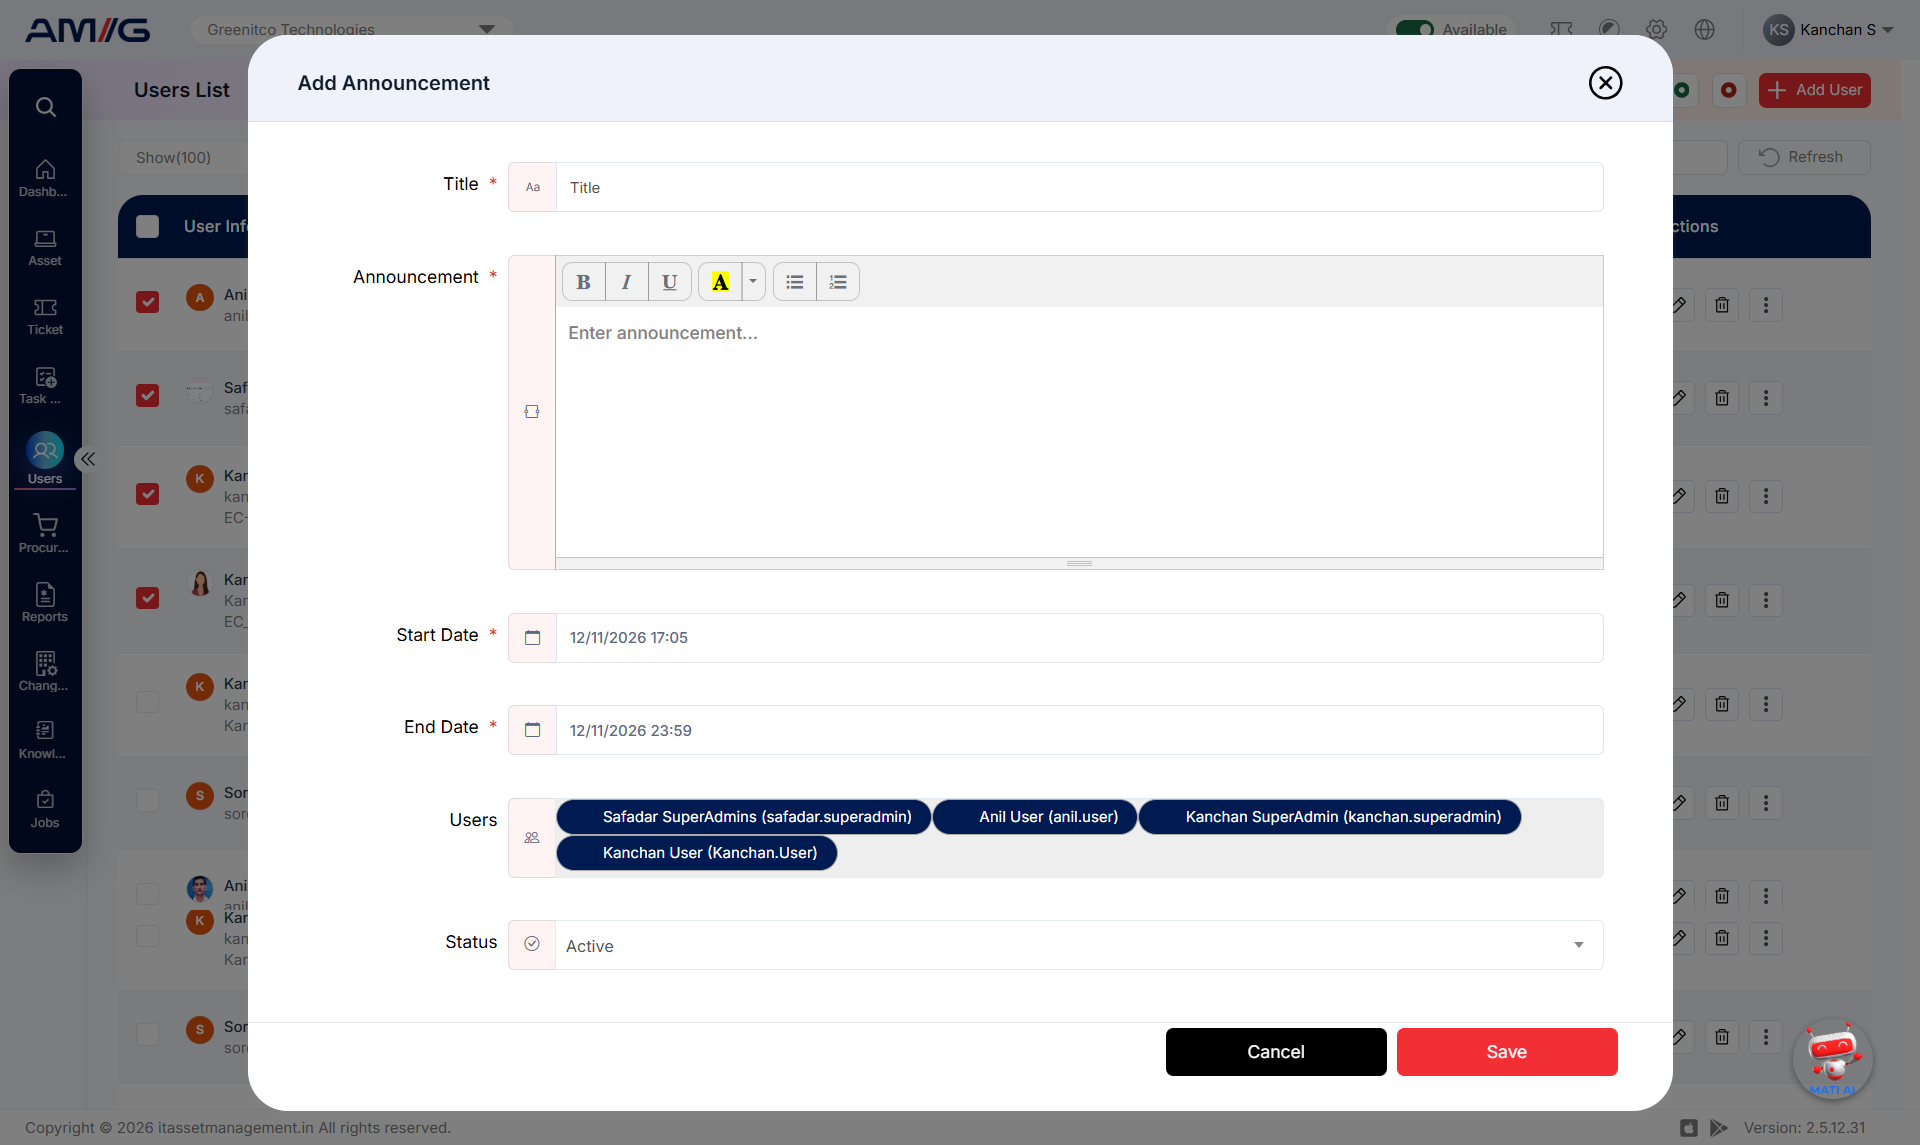

Note: Changed your mind? Click the black Close button or the X in the top right corner. Nothing will be saved.
Download Users
The Download Users feature allows administrators to download the user list in Excel format. Administrators can download all users or download users based on applied filters.
Step 1: Click the Download Excel icon to download the user list in Excel format.
Step 2: If you want to download users based on specific criteria, apply the required filters to the user listing and then click the Download Excel icon.
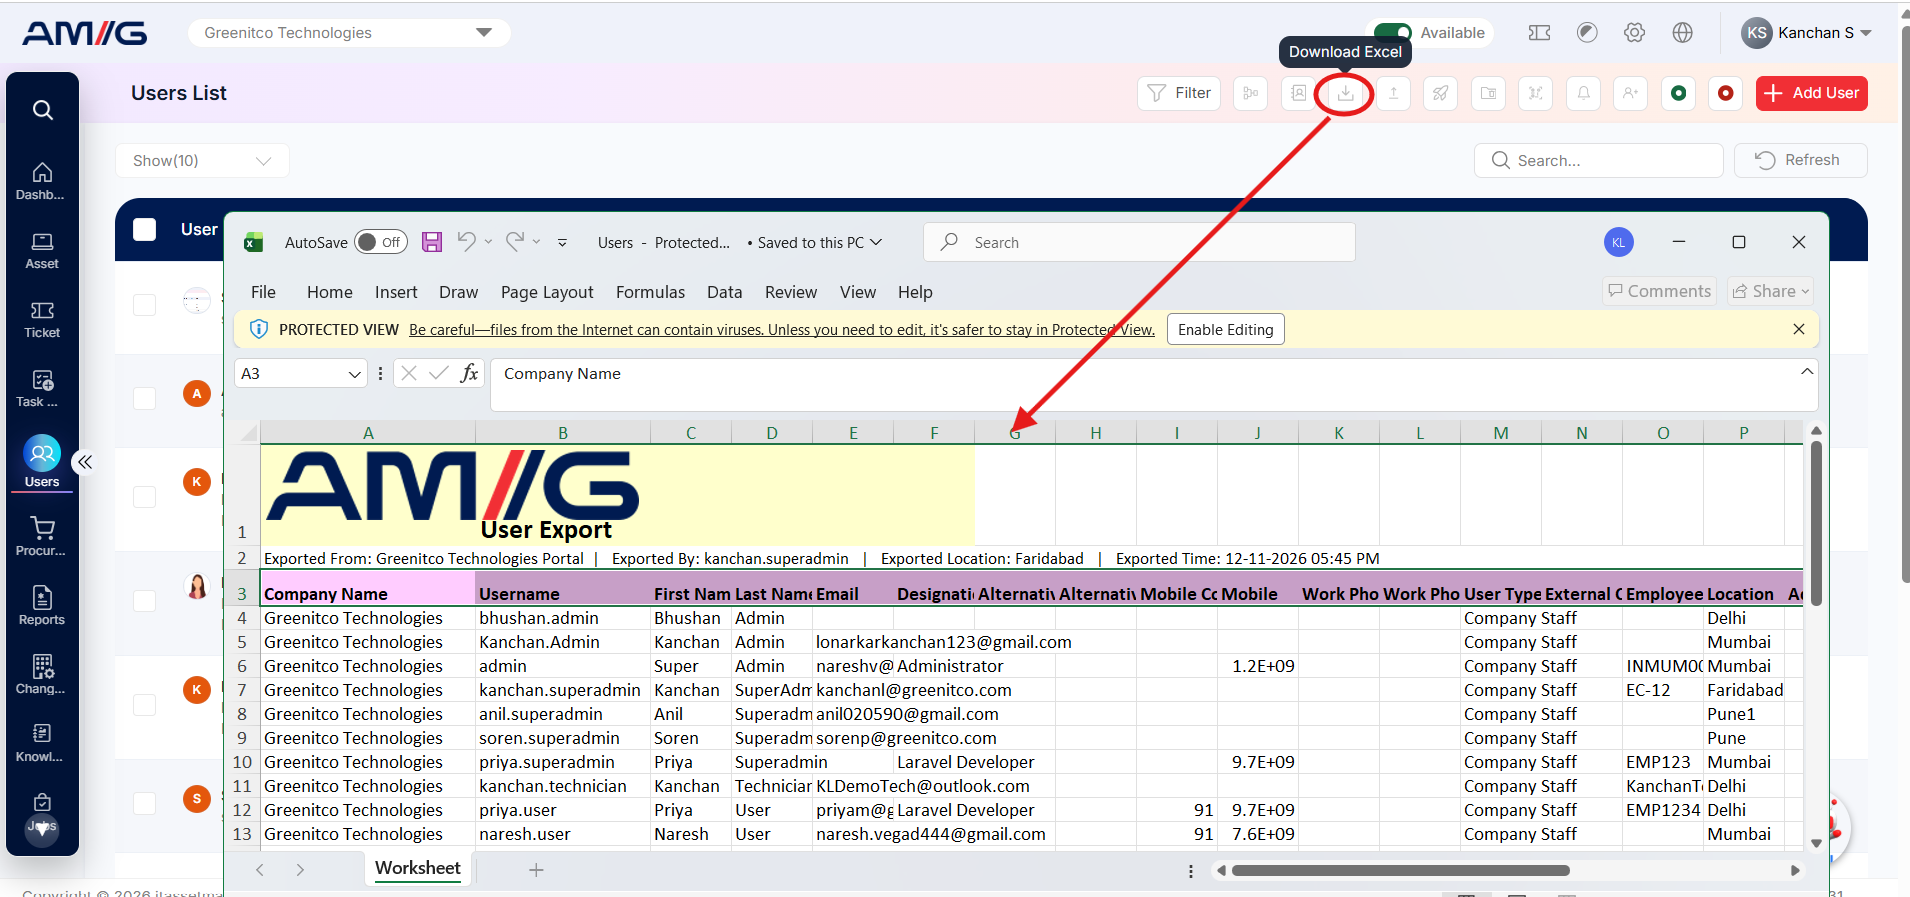
Note: The downloaded Excel file will contain only the users matching the applied filters.
Log Out a Particular User
The Log Out feature allows administrators to remotely log out a user who is currently logged in to the portal without requiring access to that user's account.
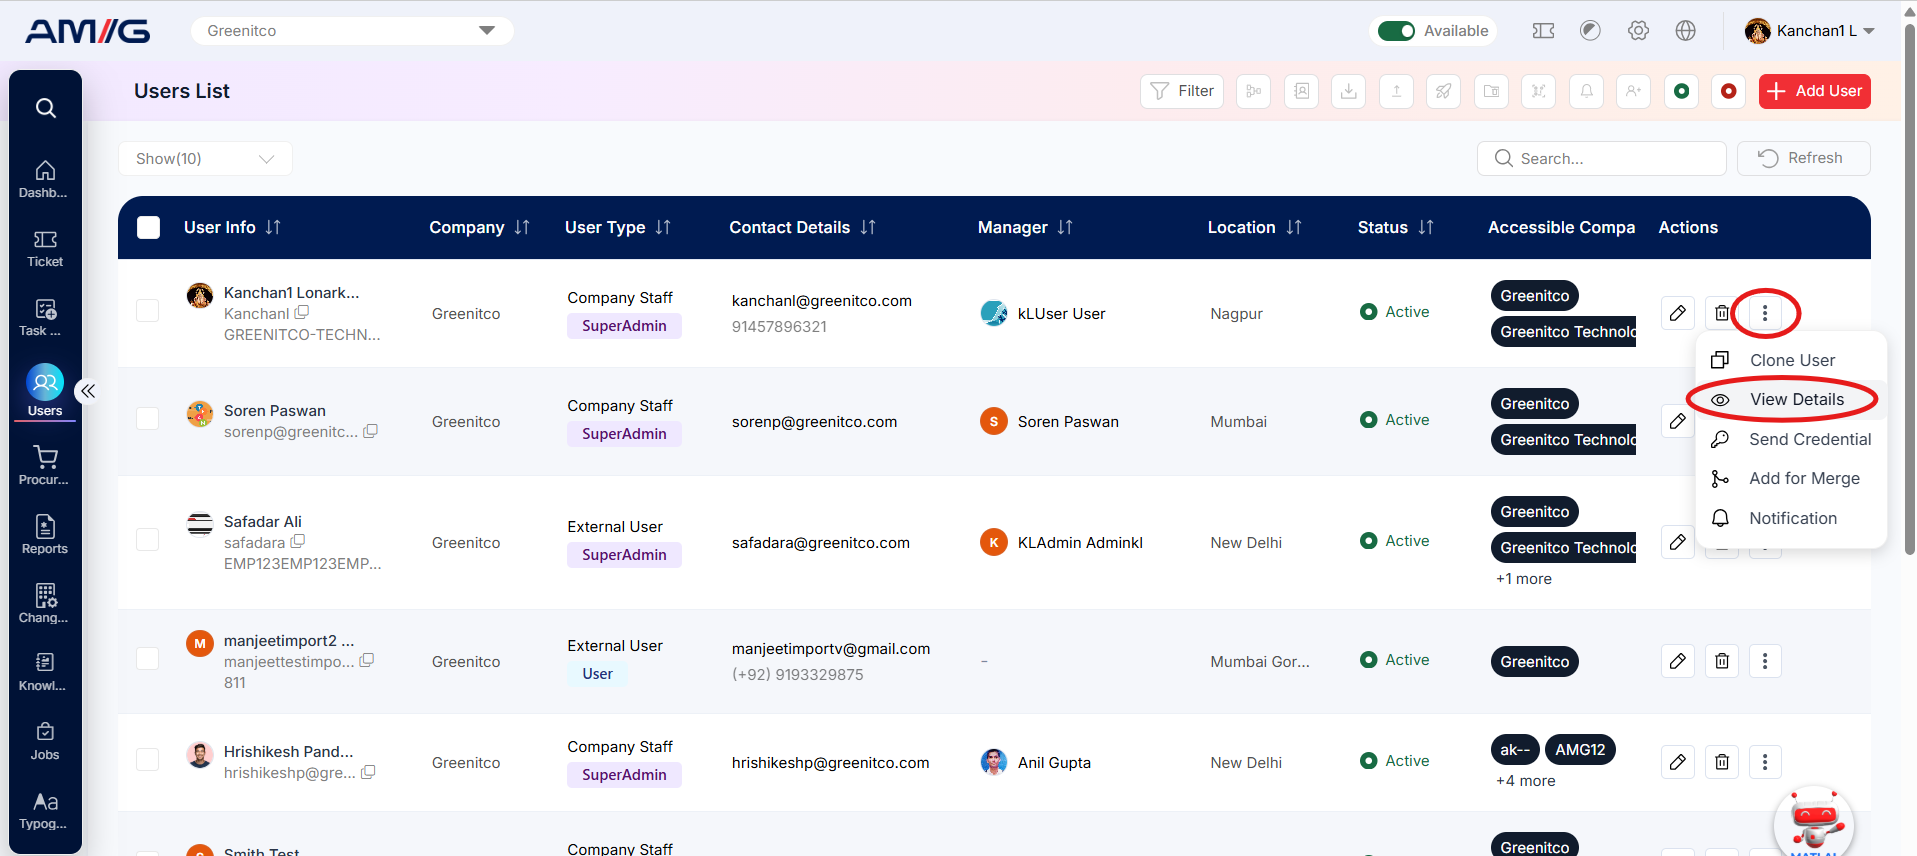
Step 1: Find the required user in the Users List.
Step 2: Open the three-dot menu (⋮) and click View Details. The User Details page will open on the Overview tab.
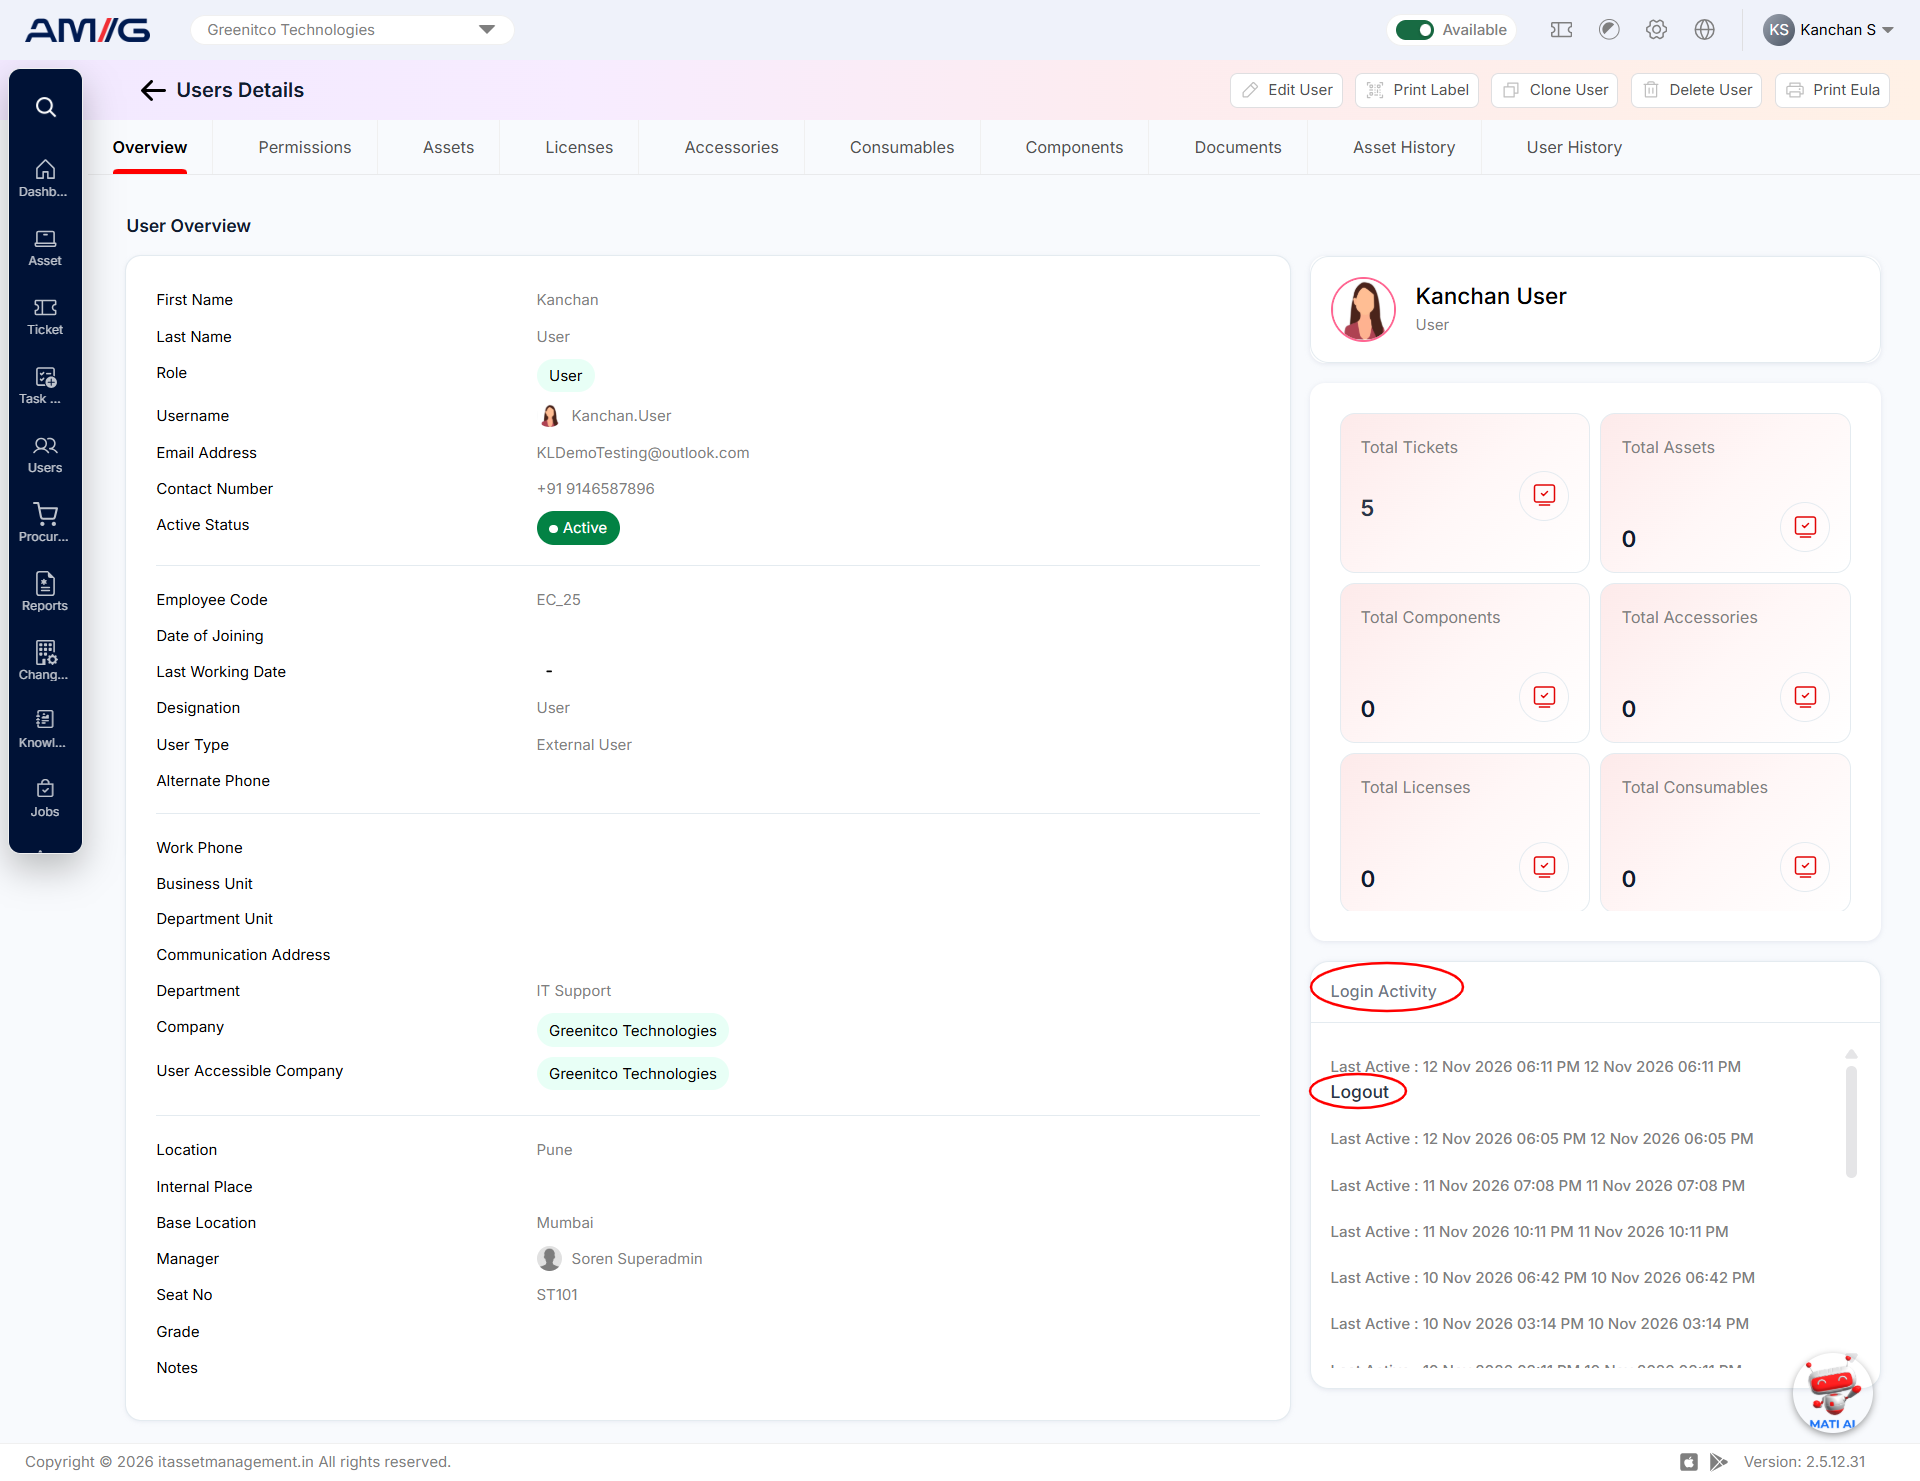
Step 3: Navigate to the Login Activity section at the bottom-right corner of the Overview page.
Step 4: Click the Logout link for the user you want to log out.
 Step 5: A confirmation message will appear.
- Click Yes to confirm and log out the user.
- Click Cancel to cancel the logout action.
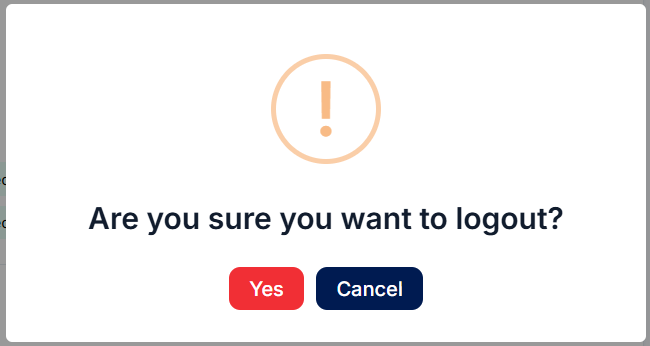 Step 6: If you click Yes, the selected user will be logged out of the portal, and a success message will be displayed.