

The User Details page brings together everything AMG holds about one user: their profile, what they are allowed to do, their documents, the assets they have handled and a record of every change made to their account. Use it to check a user’s set-up before you change anything, or to review what has happened on the account.
Step 1: Find the user in the Users List.
Step 2: Open the three-dot menu (⋮) and click View Details. The page opens on the Overview tab.
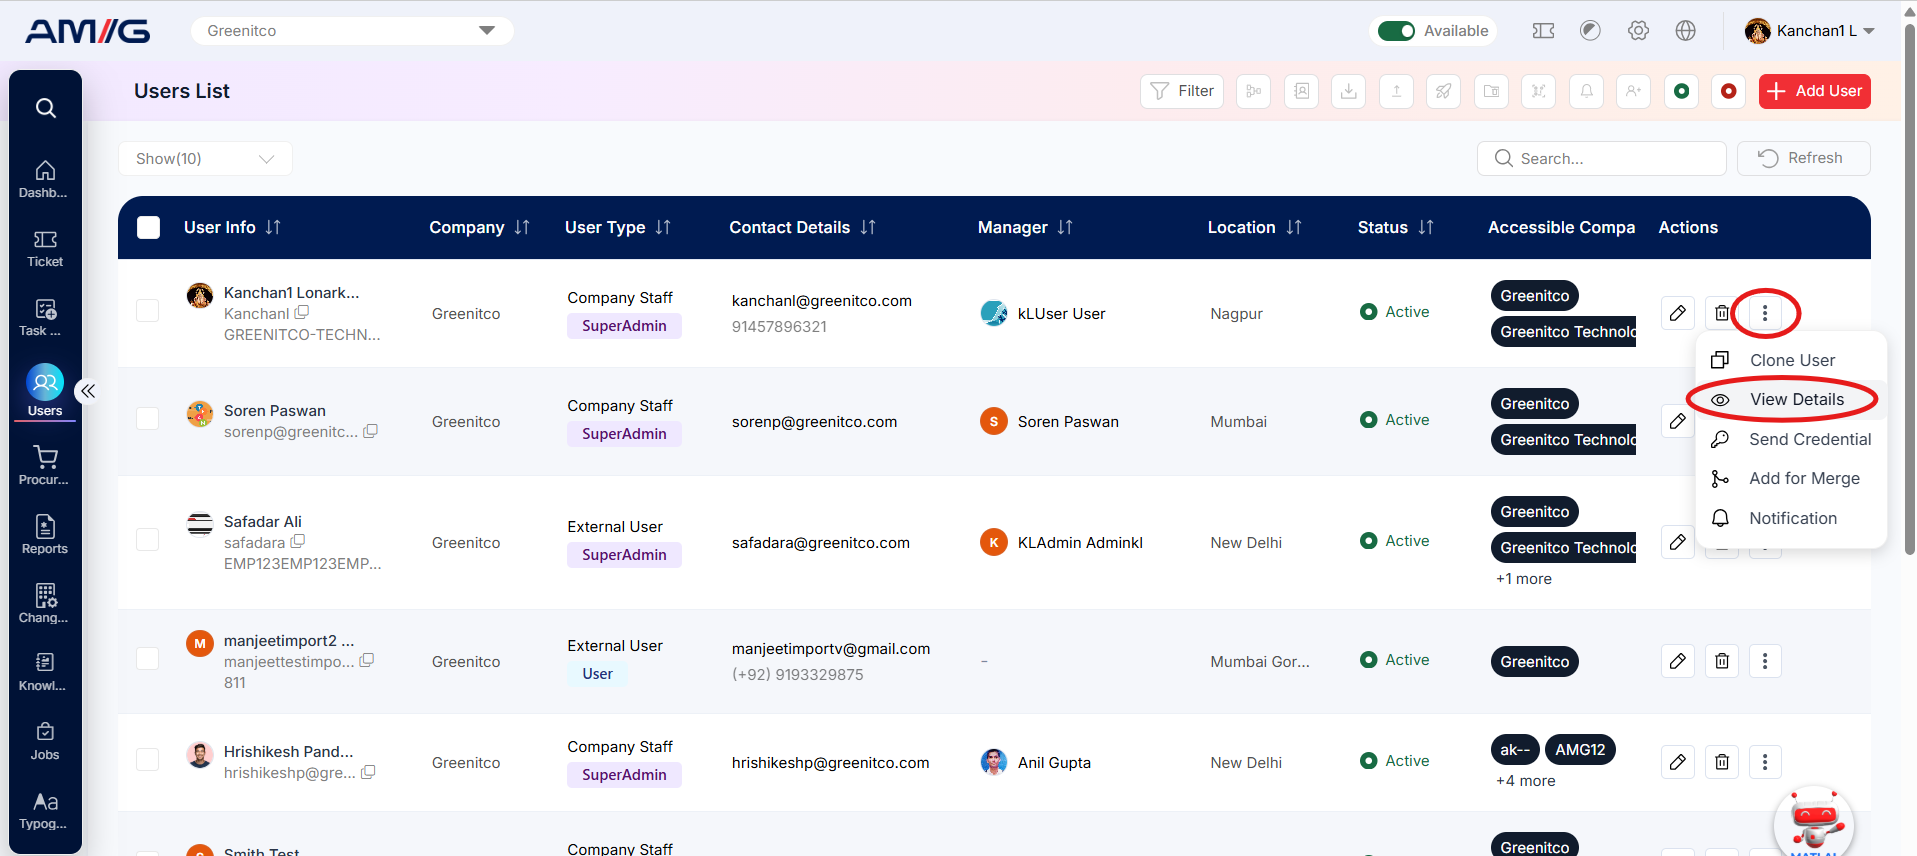
Table: Tabs on the User Details page
| Tab | What it shows |
|---|---|
| Overview | The user’s profile, account, employment, organisation and location details, with their ticket count and recent login activity. |
| Permissions | The permissions assigned to the user, module by module. Permissions can be changed and saved here. |
| Documents | Documents attached to the user record, including documents uploaded by the user. |
| Asset History | A summary of asset transactions involving the user and who carried them out. |
| User History | An audit log of every change made to the user record. |
Overview
The Overview tab is the user’s profile at a glance. The page also shows:
- the user’s profile card;
- the total number of tickets linked to the user;
- Login Activity, which shows recent account activity, including the last active date and time.
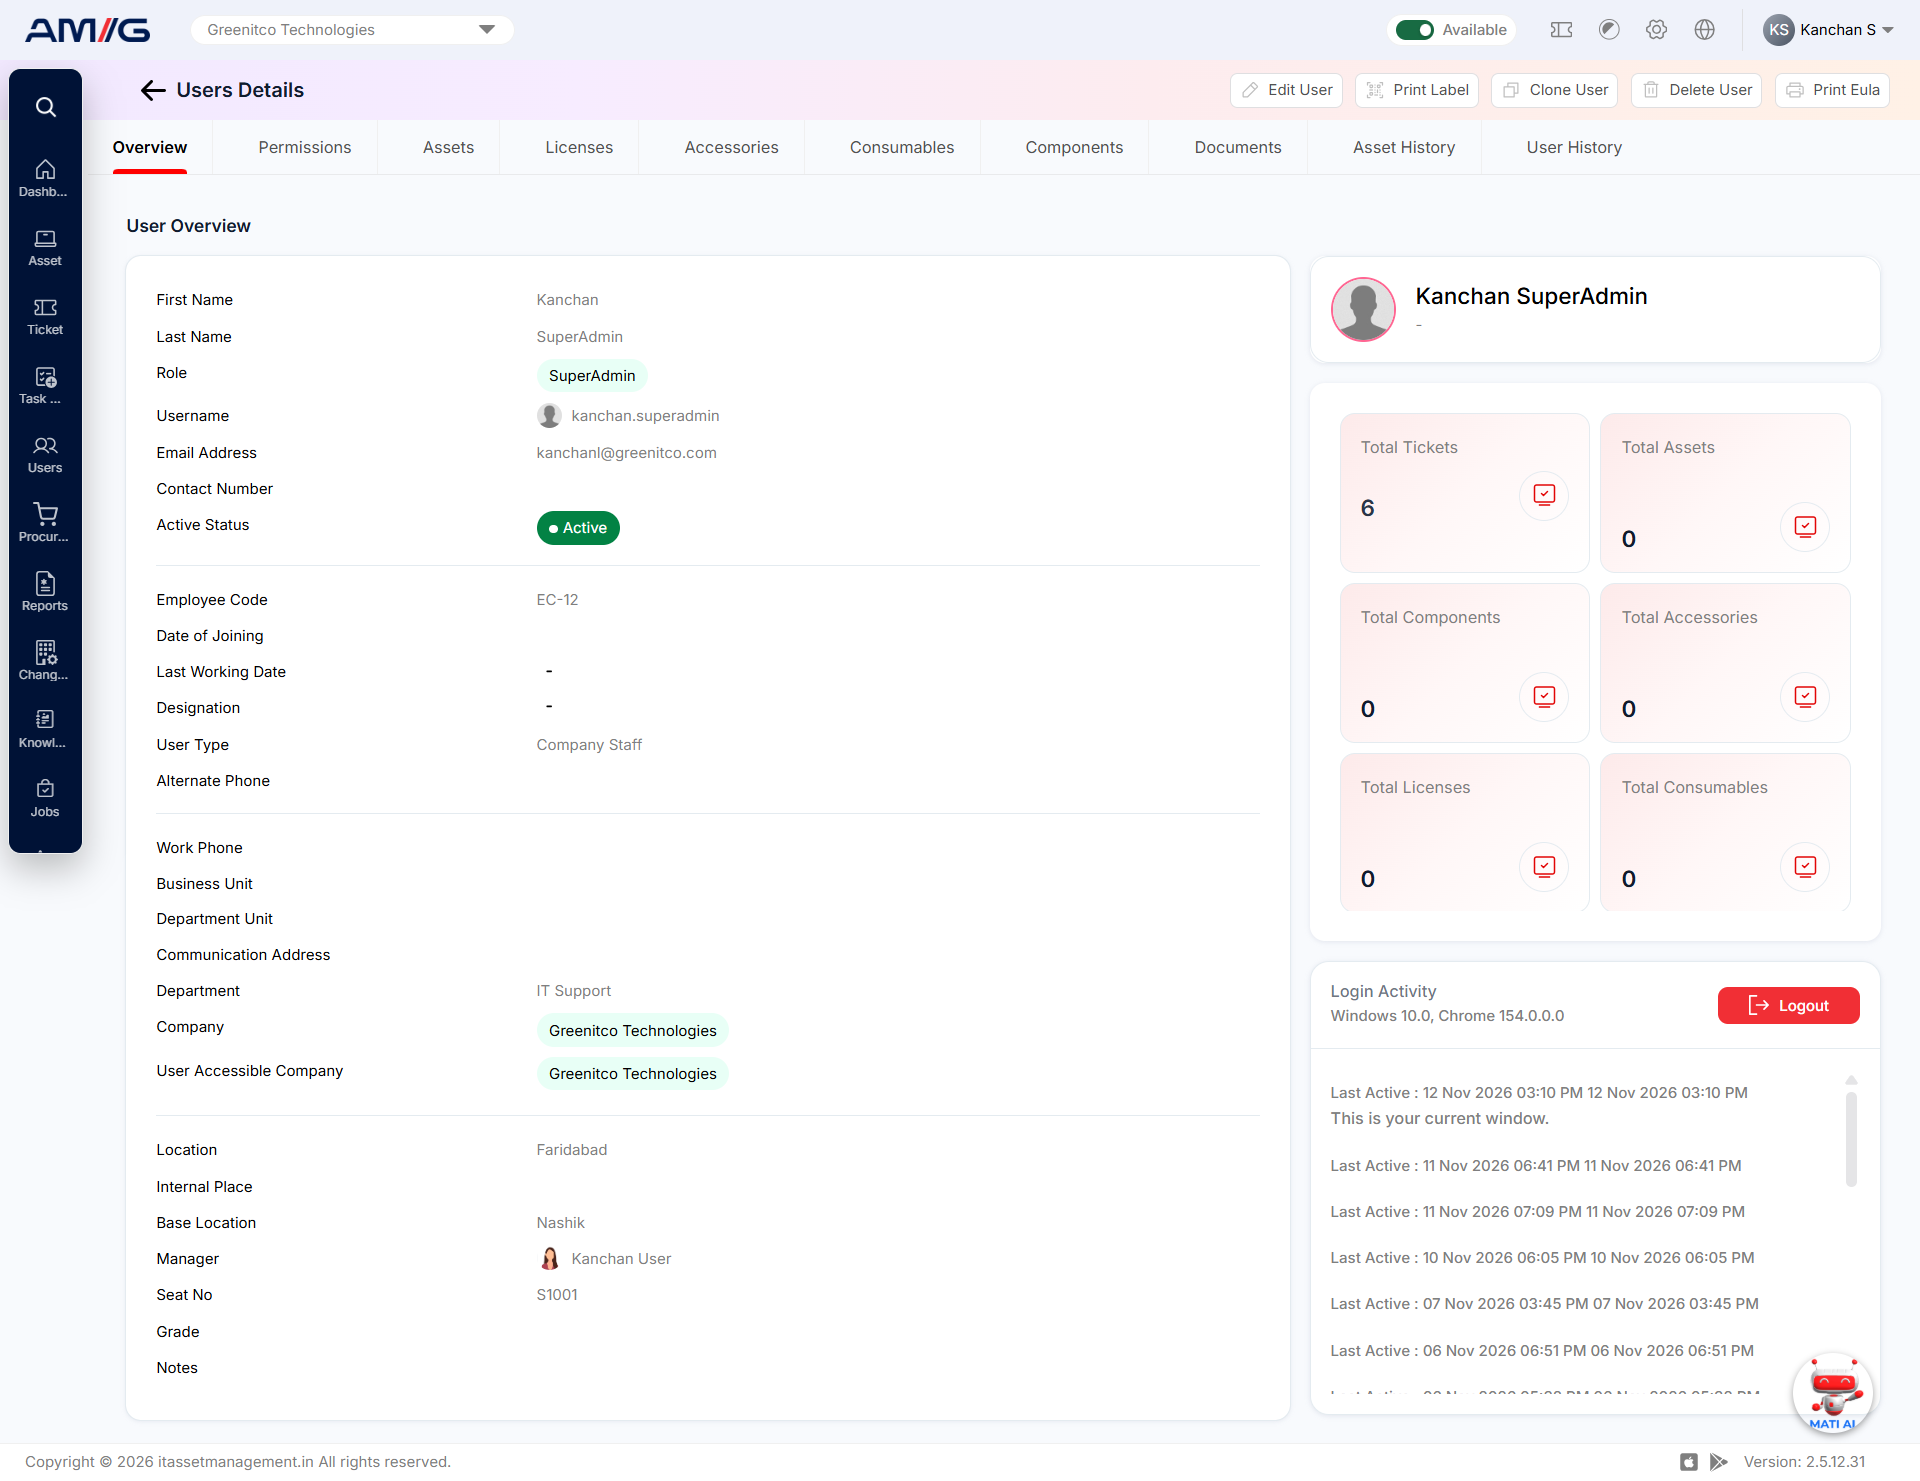
Figure: User Details – Overview tab
Table: Information shown on the Overview tab
| Information group | Details shown |
|---|---|
| Account details | First Name, Last Name, Role, Username, Email Address, Contact Number and Active Status. |
| Employment details | Employee Code, Date of Joining, Last Working Date, Designation, User Type and Alternate Phone. |
| Organisation details | Work Phone, Business Unit, Department Unit, Communication Address, Department, Company and User Accessible Company. |
| Location and reporting | Location, Internal Place, Base Location, Manager, Seat No and Grade. |
| Additional information | Notes. |
Tip: To update any of these details, click Edit User at the top of the page.
Permissions
The Permissions tab shows exactly what this user can do in AMG, arranged by module. You can review and change the user’s access here without opening the full Edit User form.
Step 1: In the panel on the left, click a module (for example, Users). Its permissions appear on the right as checkboxes.
Step 2: Tick the permissions the user should have and untick the ones they should not. Use Select All to tick or clear every permission for that module.
Step 3: Click Save Changes.
Step 4: Repeat steps 1–3 for any other module you need to change.
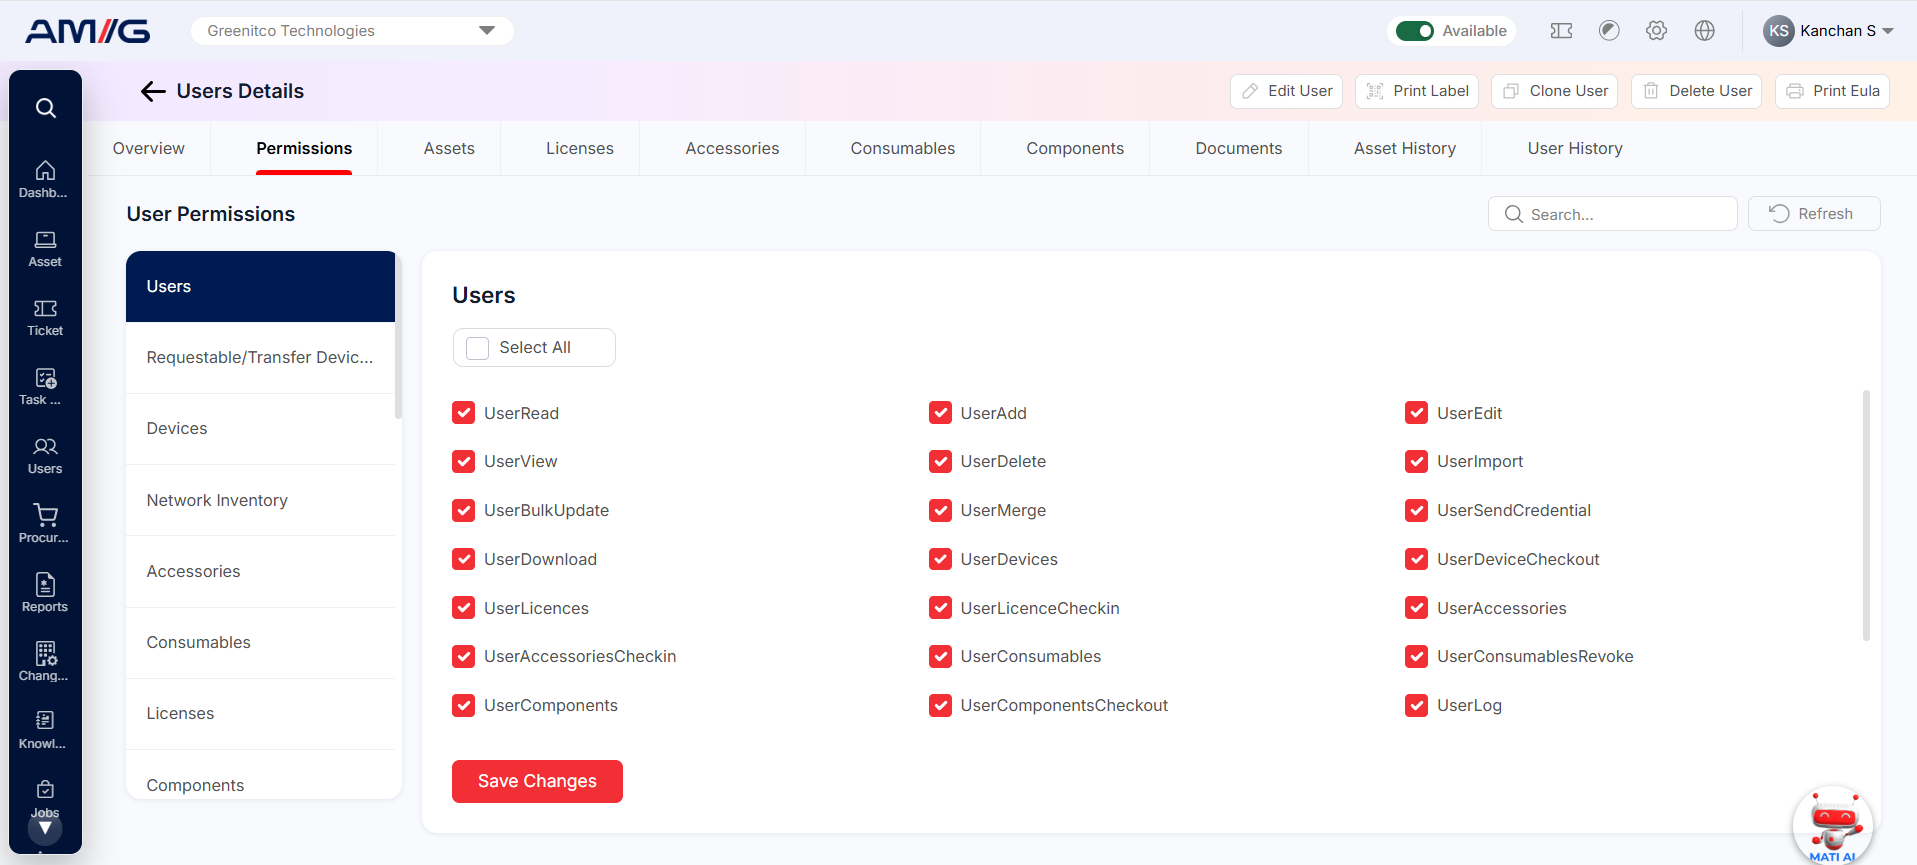
Figure: User Details – Permissions tab
Table: Controls on the Permissions tab
| Control | What it does |
|---|---|
| Module panel | Lists the modules. Click one to show its permissions. |
| Select All | Ticks or clears every permission for the selected module. |
| Search | Finds a permission by name. |
| Refresh | Reloads the permissions shown on screen. |
| Save Changes | Saves the permission settings for the user. |
Note: The modules and permissions you see depend on how your AMG portal is configured and on your own permissions as an administrator. For what each permission name means, see section 1.2.3 Understanding Permission Names.
Documents
The Documents tab keeps all user-related documents in one place. It lists documents added by administrators as well as documents the user has uploaded themselves.
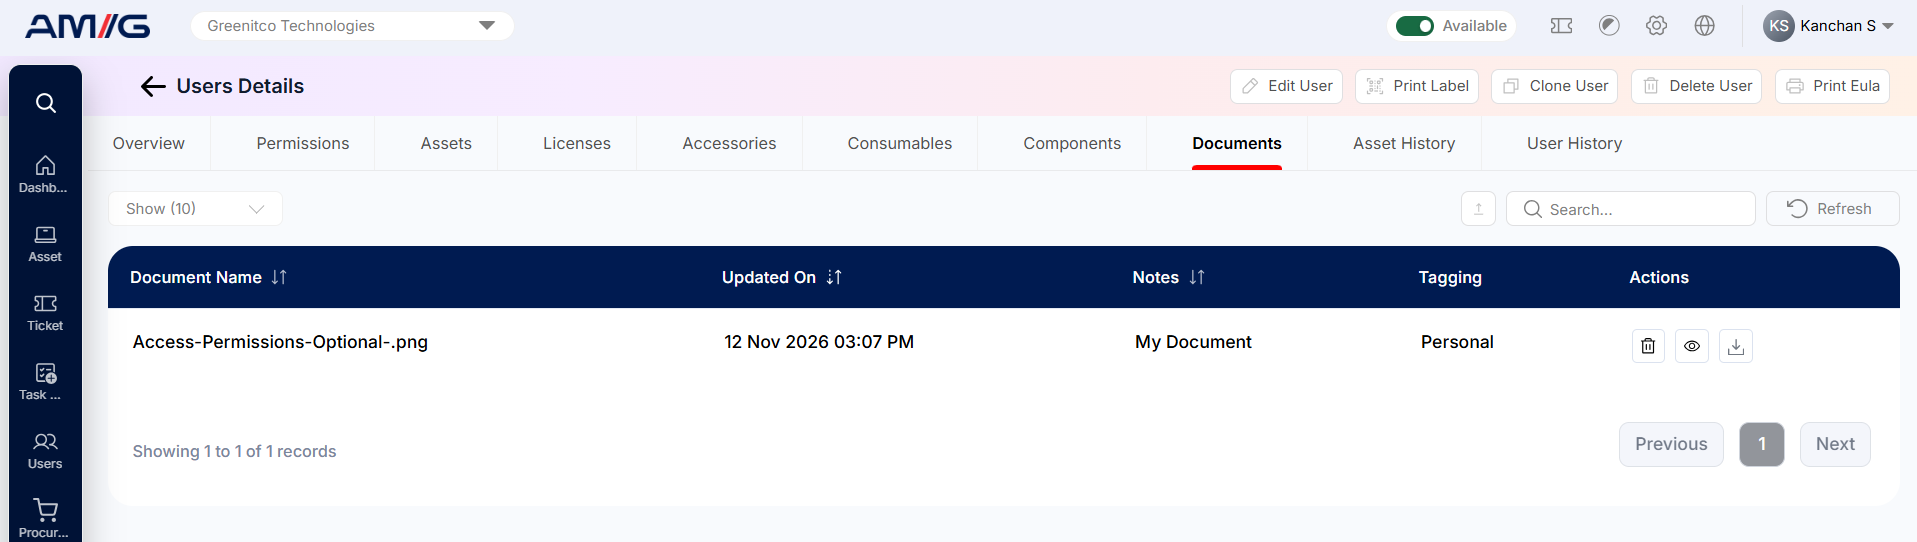
Figure: User Details – Documents tab
Table: Columns and controls on the Documents tab
| Column / control | What it shows or does |
|---|---|
| Document Name | The name of the attached document. |
| Updated On | When the document was last updated. |
| Notes | Any notes recorded against the document. |
| Tagging | Tags applied to the document. |
| Actions | Options for managing the document. |
| Upload | Adds a new document to the user record. |
| Search / Refresh | Finds a document, or reloads the list. |
| Show entries | Sets how many documents appear on each page. |
Note: If no documents are attached to the user, the list shows “No matching records found”.
Asset
The Asset tab displays the details of all assets currently checked out or assigned to the selected user. It helps view which assets have been allocated to the user, along with their asset details, such as Asset Tag, Asset Name, Model Name, Manufacturer, Serial Number, Project Name and Checkout Date.
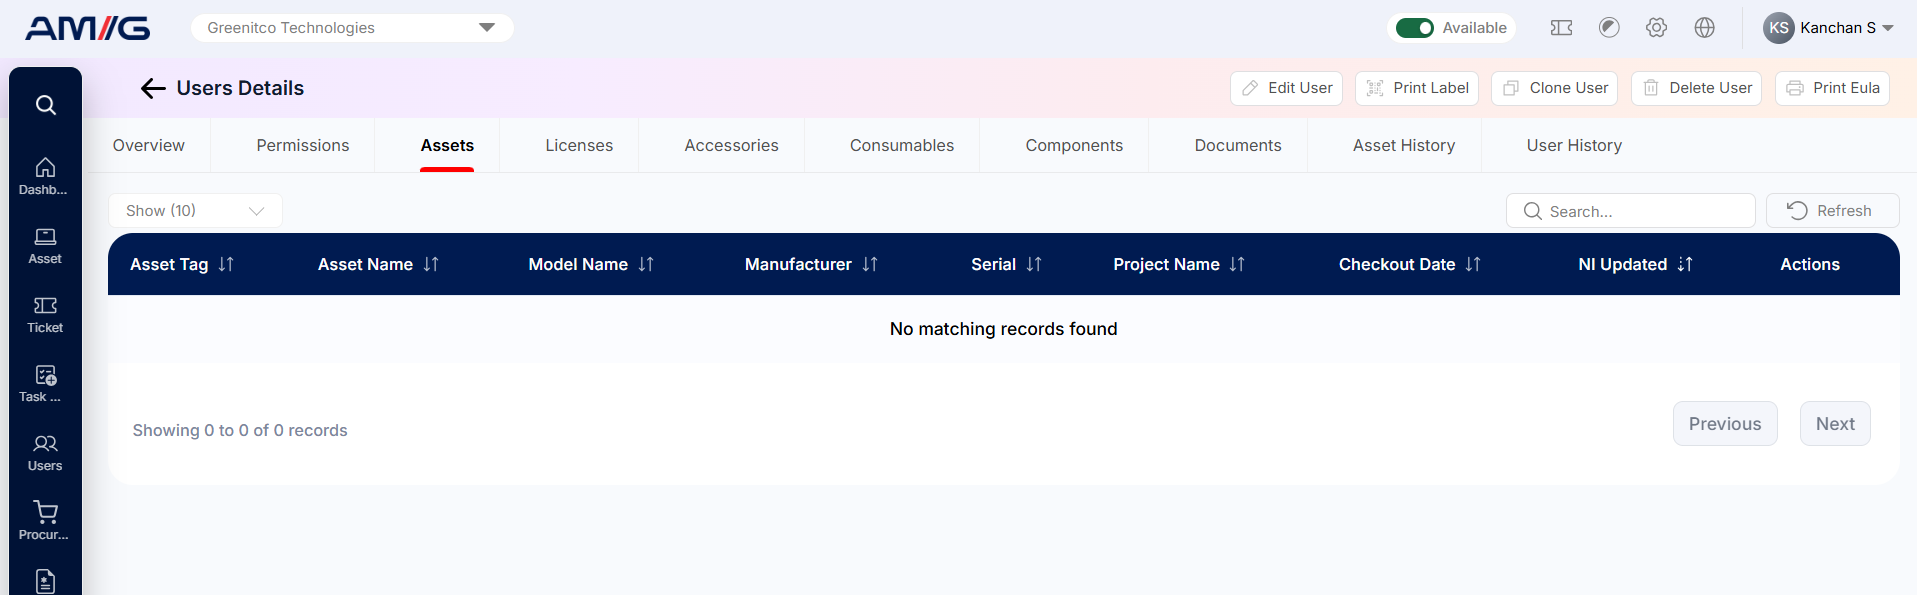
Figure: User Details – Asset tab
Table: Columns on the Asset tab
| Column | What it shows |
|---|---|
| Asset Tag | The unique identification tag of the asset assigned to the user. |
| Asset Name | The name of the asset checked out to the user. |
| Model Name | The model name of the assigned asset. |
| Manufacturer | The manufacturer of the asset. |
| Serial | The serial number of the assigned asset. |
| Project Name | The project associated with the asset. |
| Checkout Date | The date on which the asset was checked out to the user. |
| NI Updated | The date or status of the last update, as displayed in the system. |
| Actions | Available actions for the asset record. |
Use Search to find a specific asset and Refresh to reload the asset list. Use Show entries and the pagination controls to navigate through multiple records.
Note: Only assets checked out or assigned to the selected user are displayed in this tab.
License
The License tab displays the details of all software licenses currently checked out or assigned to the selected user. It helps track which licenses have been allocated to the user, along with their License Name, Serial Number and Checkout Via details.
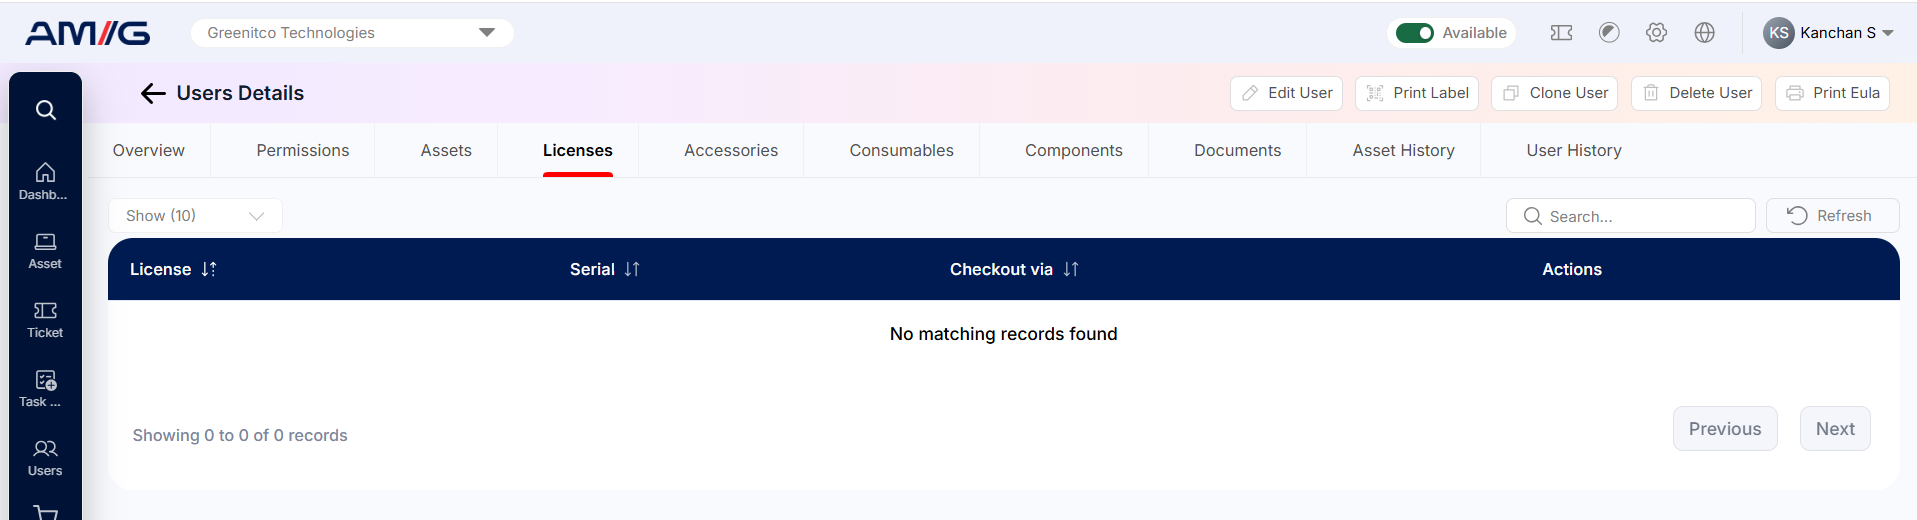
Figure: User Details – License tab
Table: Columns on the License tab
| Column | What it shows |
|---|---|
| License | The name of the software license assigned to the user. |
| Serial | The serial number associated with the assigned license. |
| Checkout via | The method or source through which the license was checked out to the user. |
| Actions | Available actions for the license record. |
Use Search to find a specific license and Refresh to reload the license list. Use Show entries and the pagination controls to navigate through multiple records.
Note: Only licenses checked out or assigned to the selected user are displayed in this tab.
Accessories
The Accessories tab displays the details of all accessories currently checked out or assigned to the selected user. It helps track which accessories have been allocated to the user, along with their Name, Expected CheckIn Date and Notes.
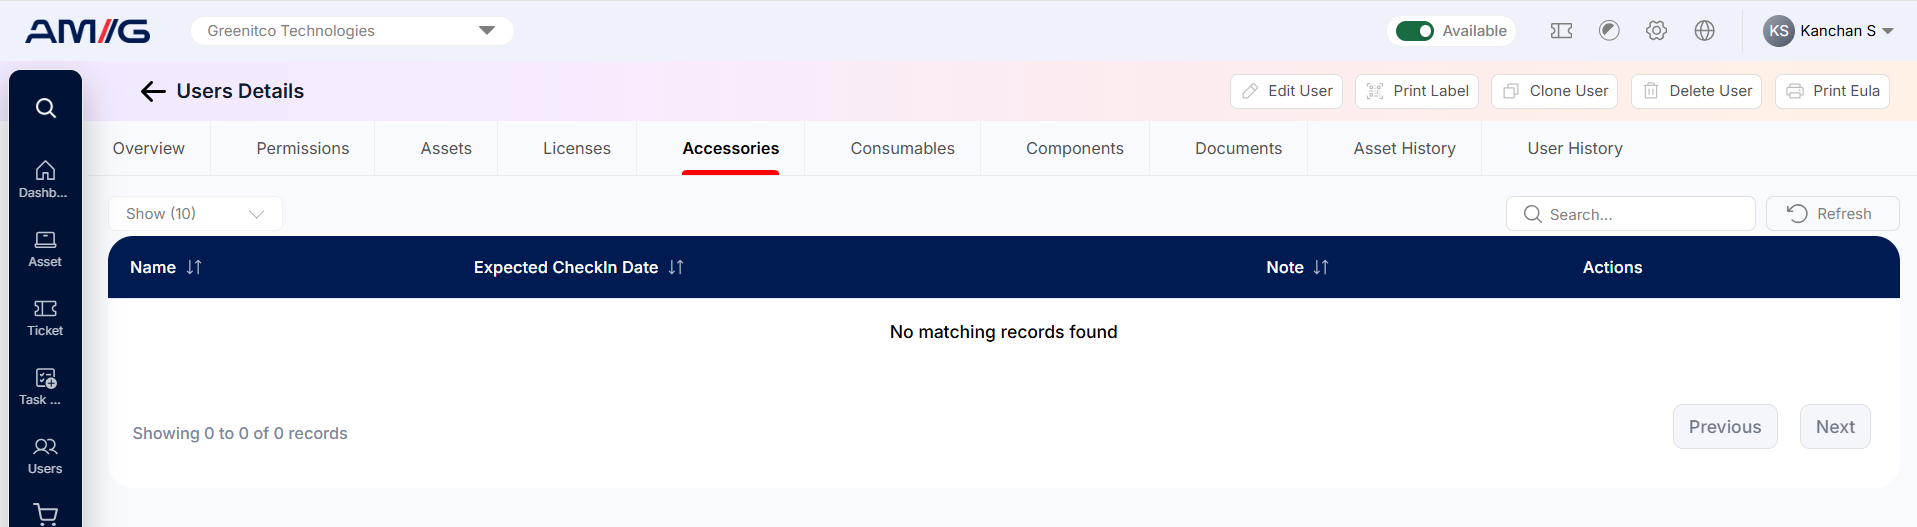 Figure: User Details – Accessories tab
Table: Columns on the Accessories tab
| Column | What it shows |
|---|---|
| Name | The name of the accessory assigned to the user. |
| Expected CheckIn Date | The expected date on which the accessory should be returned. |
| Note | Any additional notes recorded for the accessory checkout. |
| Actions | Available actions for the accessory record. |
Use Search to find a specific accessory and Refresh to reload the accessory list. Use Show entries and the pagination controls to navigate through multiple records.
Note: Only accessories checked out or assigned to the selected user are displayed in this tab.
Consumables
The Consumables tab displays the details of all consumables issued or assigned to the selected user. It helps track which consumables have been provided to the user, along with their Name and Updated At details.
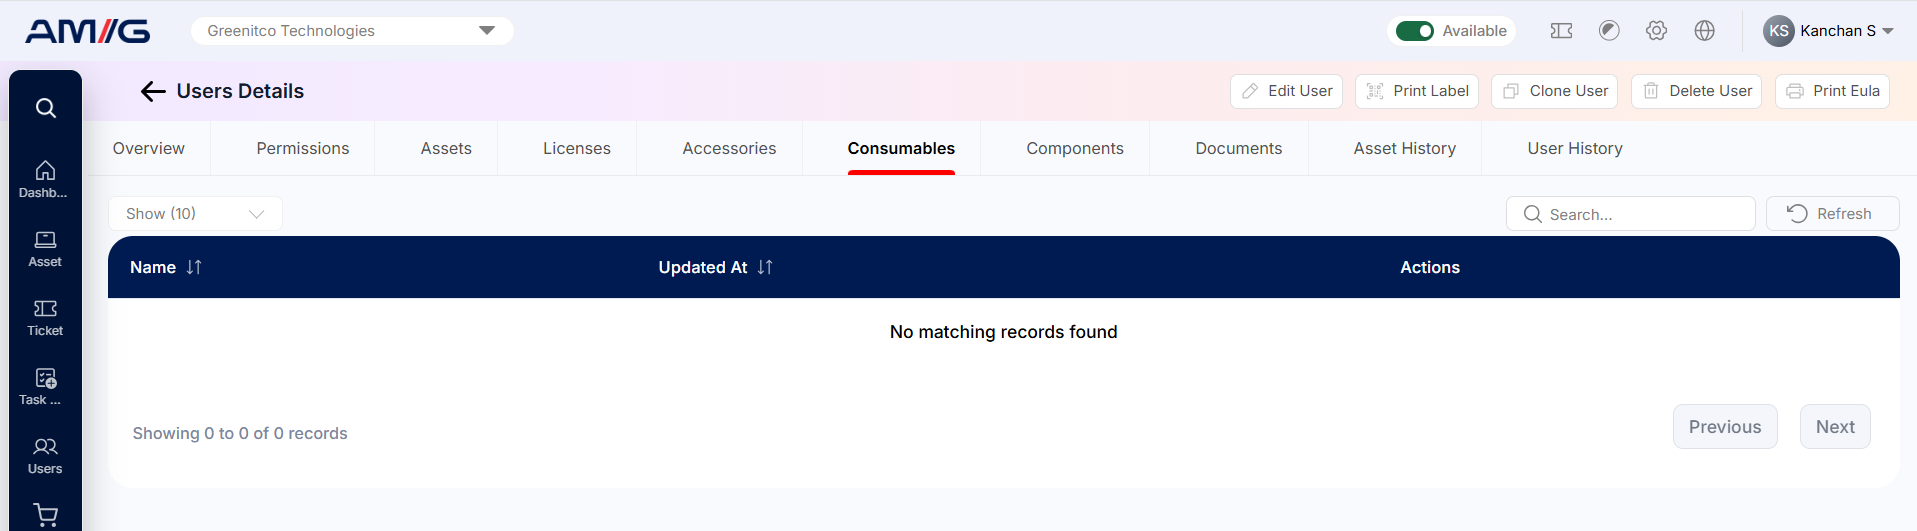 Figure: User Details – Consumables tab
Table: Columns on the Consumables tab
| Column | What it shows |
|---|---|
| Name | The name of the consumable issued to the user. |
| Updated At | The date and time when the consumable record was last updated. |
| Actions | Available actions for the consumable record. |
Use Search to find a specific consumable and Refresh to reload the consumables list. Use Show entries and the pagination controls to navigate through multiple records.
Note: Only consumables issued or assigned to the selected user are displayed in this tab.
Components
The Components tab displays the details of all components currently checked out or assigned to the selected user. It helps administrators track which components have been allocated to the user, along with their Name and Expected Check In Date.
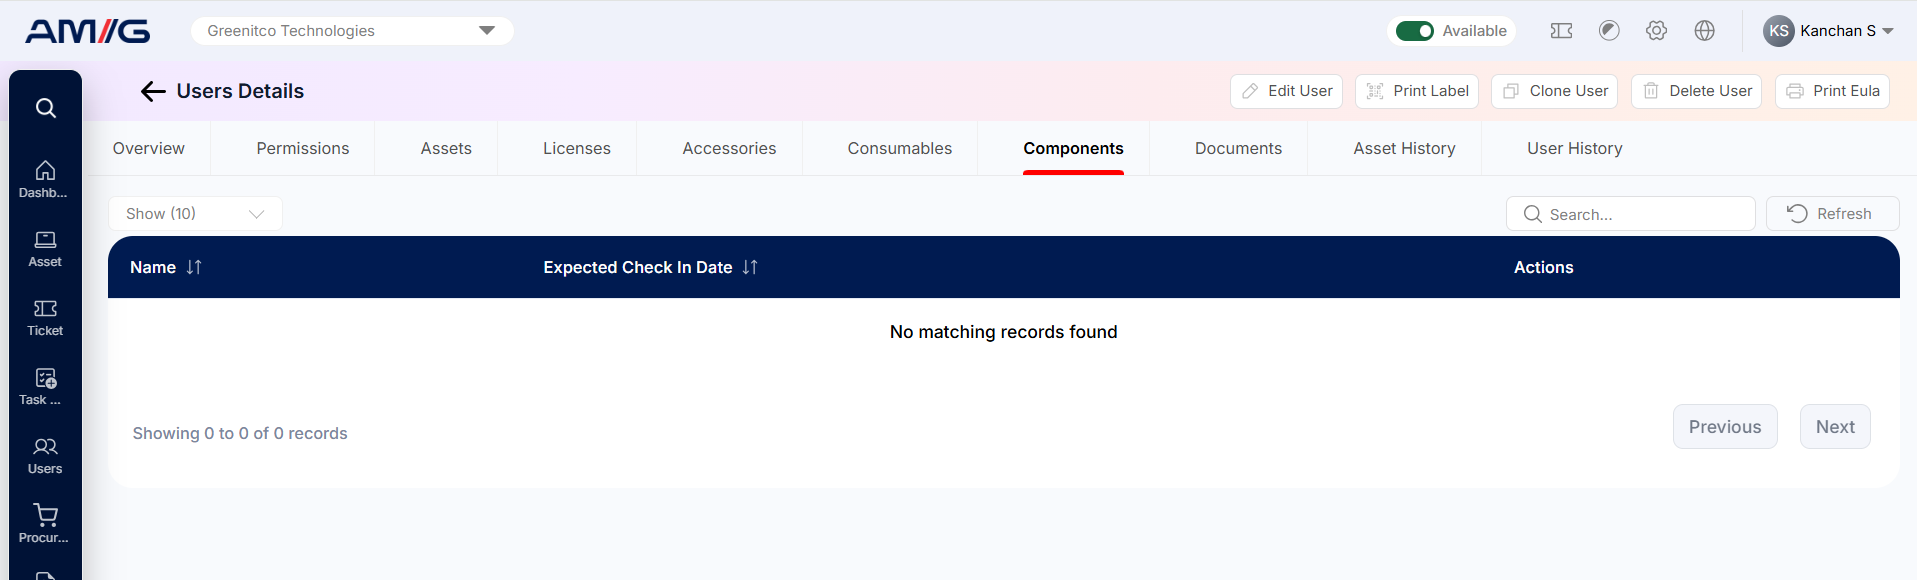 Figure: User Details – Components tab
Table: Columns on the Components tab
| Column | What it shows |
|---|---|
| Name | The name of the component assigned to the user. |
| Expected Check In Date | The expected date on which the component should be returned. |
| Actions | Available actions for the component record. |
Use Search to find a specific component and Refresh to reload the components list. Use Show entries and the pagination controls to navigate through multiple records.
Note: Only components checked out or assigned to the selected user are displayed in this tab.
Asset History
The Asset History tab is a summary of every asset transaction involving the user. Use it to trace which assets, accessories, consumables, licenses and components have been associated with the user over time, and which administrator carried out each transaction.
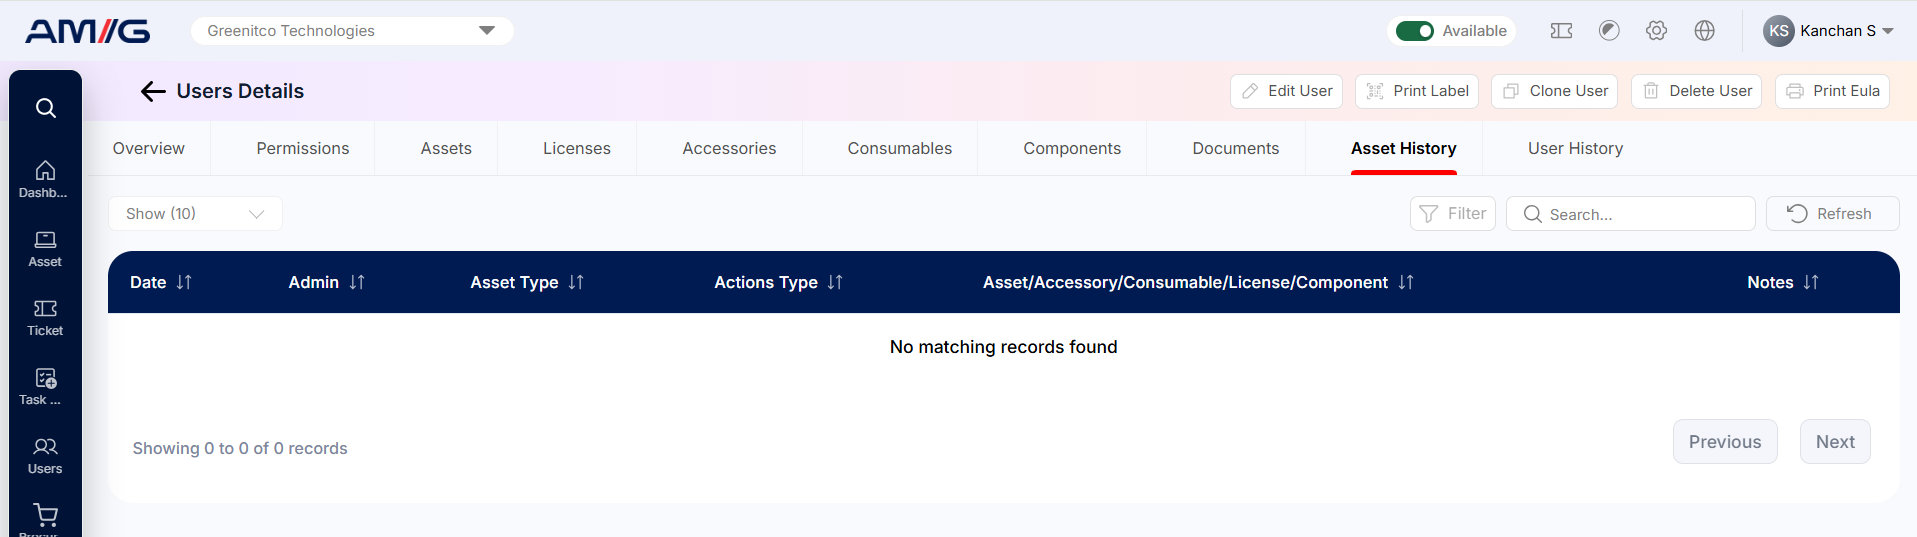
Figure: User Details – Asset History tab
Table: Columns on the Asset History tab
| Column | What it shows |
|---|---|
| Date | When the transaction took place. |
| Admin | The administrator who performed the transaction. |
| Asset Type | The kind of item involved: Asset, Accessory, Consumable, License or Component. |
| Action Type | The type of transaction that was performed. |
| Asset / Accessory / Consumable / License / Component | The specific item involved in the transaction. |
| Notes | Any notes recorded with the transaction. |
Use Filter to narrow the history, Search to find a specific record and Refresh to reload the list. When there are many records, use Show entries and the page numbers to move through them.
Tip: Before a user leaves the organisation, check this tab together with Print EULA to confirm which items are still assigned to them.
User History (Log)
The User History tab is the audit log for the user record. Every change made to the account is recorded here, with who made it and when.
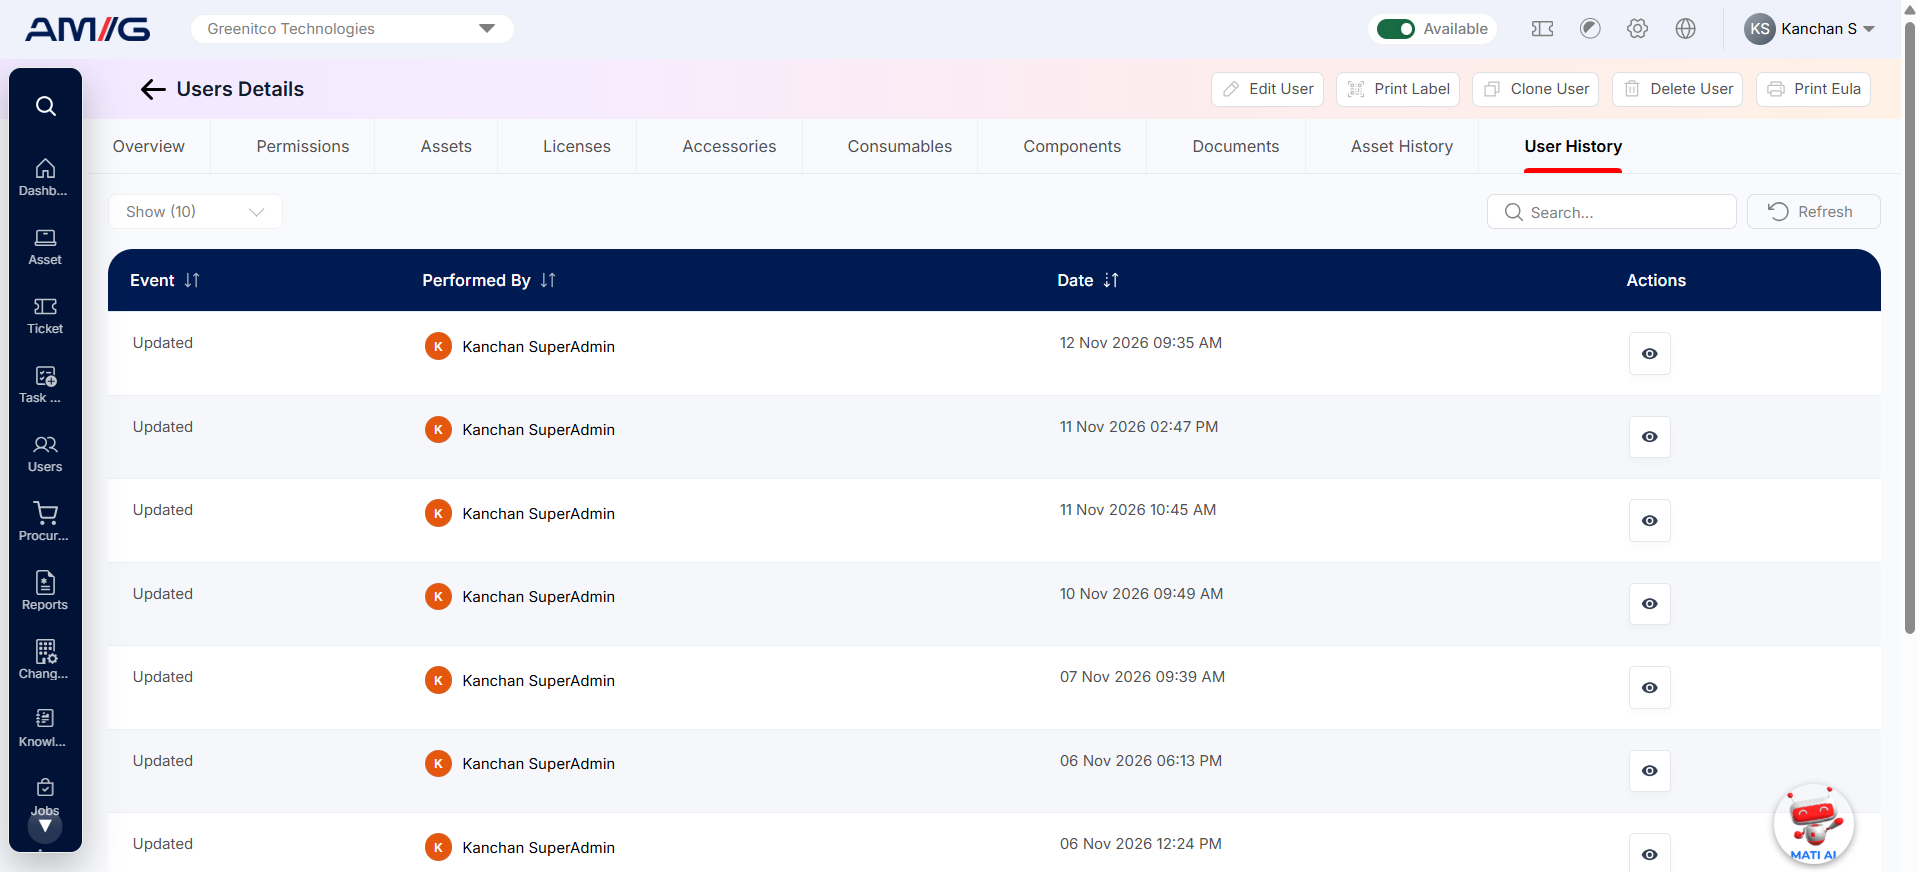
Figure: User Details – User History tab
Table: Columns on the User History tab
| Column | What it shows |
|---|---|
| Event | The change that was made to the user record. |
| Performed By | The person who made the change. |
| Date | When the change was made. |
| Actions | The view (eye) icon, which opens the full details of the entry. |
To see the details of a change:
Step 1: Find the entry in the list. Use Search if the history is long.
Step 2: Click the view (eye) icon in the Actions column.
Use Refresh to reload the log, and Show entries and the page numbers to move through longer histories.
Actions on the User Details Page
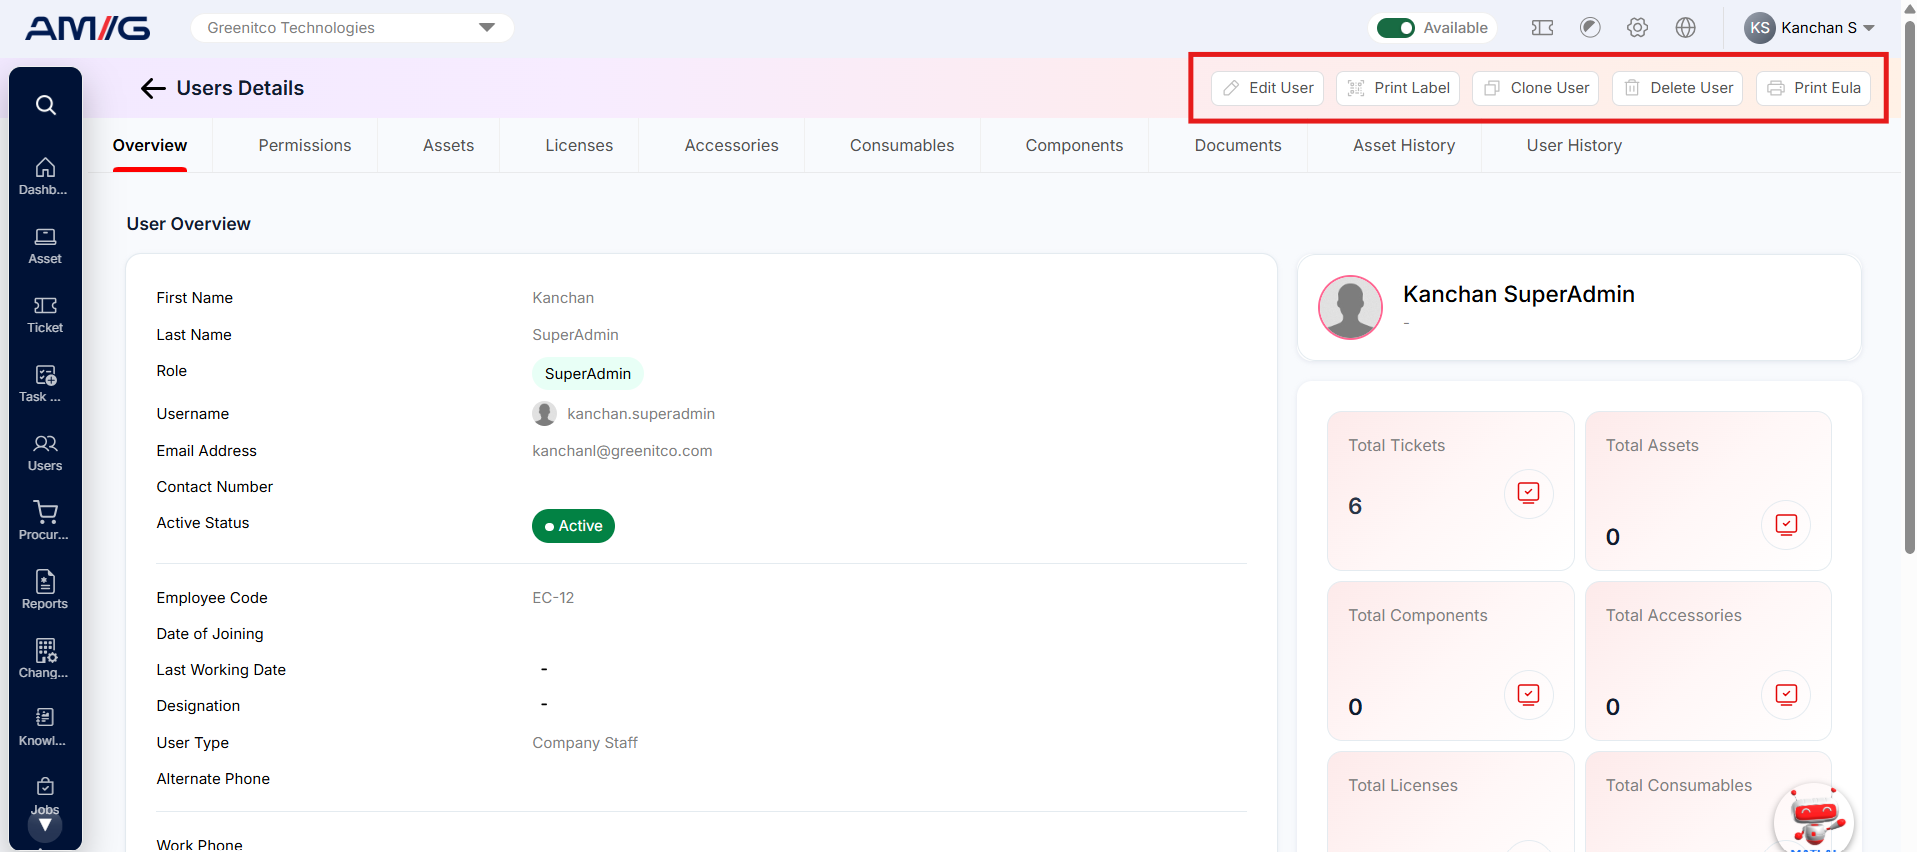
The buttons at the top of the User Details page give quick access to common tasks for the selected user.
Table: Actions on the User Details page
| Action | What it does |
|---|---|
| Edit User | Opens the user form so you can update the user’s details and permissions. |
| Print Label | Opens the label-printing window for the user. |
| Clone User | Creates a new user using this user’s details as a starting point. |
| Delete User | Starts the process of deleting the user. |
| Print EULA | Generates an End User Licence Agreement listing the assets, accessories, consumables and components assigned to the user. Print it or save it as an audit record. |
Important: Check that the correct user is open before you click Delete User. If the user only needs to lose access for a while, set the account to Inactive instead.